Showing posts with label quick. Show all posts

April 7, 2016

Soup Sunday

Pin It
Margaret's Morsels | Easy Crock-Pot Potato Soup

A few Sundays ago, the youth at our church held a soup luncheon to raise funds for a mission trip.  Each youth family was asked to contribute a pot of soup for the event.  Before I even asked my son what he wanted to take, I knew he would say potato soup.

Given his answer, you might think my son had always liked potato soup. However, he never cared for my tried and true crock-pot potato soup recipe, or my mother's stove top version.  What he did like, though, was the potato soup served at one of his favorite restaurants.  I found a copycat recipe online and, although my son thought the soup tasted good, I didn't think it tasted anything like the restaurant version.  I had to plan ahead of time to make the soup since it required a lot of prep work.  Once the prep work was done, I had to keep a close eye on the soup to ensure it didn't stick while cooking.  In my opinion, the finished dish wasn't worth the amount of effort involved.

Last year, while skimming through my box of untried recipes looking for inspiration, I spotted a potato soup recipe a friend had given me.  Although my friend's recipe used several of the same ingredients as the copycat recipe, it also used some time saving shortcuts.  I decided to make a batch hoping my son would like the soup.  Not only did he think it was good, he thought this soup was better than the copycat recipe!

The soup starts with cans of sliced potatoes, a huge time saver since there's no need to peel and dice a bag of potatoes.  If the potato slices are too large, I take a few minutes and cut them into four or six pieces, depending on the size of the potato.


Margaret's Morsels | Easy Crock-Pot Potato Soup


Margaret's Morsels | Easy Crock-Pot Potato Soup


The potatoes and remaining ingredients -- canned potato soup, water and heavy whipping cream -- are mixed in the pot the soup is cooked in which, for this recipe, is a crock-pot.  Using a crock-pot eliminates the need to keep an eye on the soup and stir it periodically.  While my tried and true crock-pot potato soup recipe made with raw potatoes takes eight hours to cook, this version is ready in two hours.  The short cooking time stems from the fact the canned potatoes are already cooked.  The ingredients just need to be cooked long enough to be heated thoroughly.  When the soup's ready, ladle it into bowls and add your favorite toppings. Around here, that would be cheese and bacon.

You may have noticed there's no seasoning added to the soup.  I don't add salt because both canned items -- potatoes and potato soup -- have salt as do the cheese and bacon.  I put salt and pepper shakers on the table and let everyone season their soup to taste.

The luncheon was held on a beautiful, unseasonably warm Sunday afternoon.  All the soups were a hit and I came home with an empty crock-pot.  I made the soup for supper recently on a rainy Friday night.  While just as delicious, this time there were leftovers for Sunday.


Easy Crock-Pot Potato Soup
6 Servings

2 (15 oz.) cans sliced potatoes
2 (10 1/2 oz.) cans cream of potato soup (undiluted)
1 soup can water
2 cups heavy whipping cream
bacon, cheese, chives (optional; for topping)

Cut sliced potatoes into smaller pieces, if necessary.  Combine potatoes, soup, water and whipping cream in a crock-pot.  Cover and cook on low 2 hours.  Ladle into bowls and add desired toppings.

© Margaret's Morsels

March 21, 2016

Hop Into Easter

Pin It
Margaret's Morsels | Marshmallow Peeps Easter Cake

A few years ago, a cousin emailed me pictures of a cake she'd made for Easter.  The cake was so cute, I knew I wanted to make it for Easter, but I didn't know when.  My family was disappointed the year before when I replaced our traditional bunny cake with a carrot cake.  I knew I couldn't replace the bunny cake two years in a row, so I filed the idea away until one Easter when we were having enough company I needed two desserts.

The cake isn't a recipe, but a method.  Start by making a two layer cake, either from scratch or a mix.  Fill and frost the layers with white icing such as buttercream or cream cheese.


Margaret's Morsels | Marshmallow Peeps Easter Cake

I think the cake would also look pretty with pastel pink or yellow icing. Although chocolate icing would be tasty, I don't think the decorations would stand out as well as they do on a lighter color icing.

When the cake is frosted, decorate the sides with marshmallow peep bunnies.  The year I made the cake, the hardest part was finding all the different colored bunnies!  I found pink and blue at Kroger, purple at CVS and green at Rite Aid.  The bunnies aren't quite tall enough to cover both layers.


Margaret's Morsels | Marshmallow Peeps Easter Cake


You can decorate the sides with just the bunnies, or add some pastel color M&M's above or below the bunnies.  I found it easier and faster to put the candy above the bunnies.


Margaret's Morsels | Marshmallow Peeps Easter Cake


The top is decorated with more pastel M&M's.  My cousin piled the candy all over the top, but I used it sparingly.  I also like to turn the candies over so the "m" doesn't show.


Margaret's Morsels | Marshmallow Peeps Easter Cake


This cake is easy to make, quick to assemble and a festive ending to an Easter meal.  Easter is less than a week away, but there's still time to find the bunnies before they hop out of the store.


© Margaret's Morsels

March 7, 2016

Pasta Pleaser

Pin It
Margaret's Morsels | Baked Spaghetti

The transition from winter to spring is never easy for me.  Although days are getting warmer, nights are still chilly.  This makes it challenging for me to know -- not only what to wear each day -- what to cook each night.  The weather's not cold enough for soup, chili or stew, but not warm enough for chicken salad, congealed salad or a chilled soup.  Baked Spaghetti is the perfect compromise for those nights when Mother Nature can't decide if it's winter or spring.  Baked Spaghetti isn't as hearty as my traditional spaghetti, yet it offers warmth on a chilly night via a delectable blend of spices.  Most of my recipes have a story behind them and this one is no exception.

Years ago, we belonged to a church that held a luncheon on the first Sunday of each month.  Members would bring a dish or two to share and the congregation would eat together in the fellowship hall after the church service ended.  The selection varied from month to month, but there were some dishes you could always except to see on the table:  a two layer mandarin orange cake piled high with frosting; a big bowl of banana pudding topped with meringue; a pan of piping hot, perfectly seasoned, baked spaghetti.

After enjoying baked spaghetti on more than one occasion, I found out who made the dish and asked if she would share the recipe.  She graciously did but, like many good cooks, she didn't measure the ingredients.  She gave me a list of what she put in the dish with approximate measurements and the method she used to put it together.  I eagerly bought the ingredients and made the dish a few days later.


Margaret's Morsels | Baked Spaghetti

My first attempt was good, but not as good as what she made.  Over the next few months, I tried unsuccessfully to duplicate the recipe.  My version was either too runny, too dry, too spicy or not spicy enough!  The recipe was too good to throw away, so I filed it complete with notes and revisions in a recipe box with plans to cook it again at a later date.

A couple of years later, a coworker gave me a recipe for a spaghetti casserole.  As I read the recipe, I noticed how similar it was to the recipe for baked spaghetti, except it used additional ingredients and was only seasoned with salt and pepper.  I was able to combine the two recipes, using the measurements from the spaghetti casserole with the assembly instructions from the baked spaghetti.  Figuring out the right proportion of spices was trial and error, but I finally came up with a combination that pleased everyone in my family.  If my version is too mild for your taste, you can add more chili powder and cayenne pepper; too spicy, decrease those two ingredients.

Although the spaghetti is baked, the prep work takes more time than the dish is actually in the oven.  To save time, I chop the vegetables and measure the spices ahead of time.  When I'm ready to cook, I put a pot of water on to boil for the spaghetti while I brown and drain the meat and vegetables.  Once the spaghetti is cooked and drained, I combine the ingredients in the same pot used to cook the spaghetti and let it simmer 10 minutes.  If you want, you can add a drained 8 ounce can of mushrooms to the mixture.


Margaret's Morsels | Baked Spaghetti

The mixture goes in a greased 3-quart pan and into the oven for 20 minutes. To make a cheesy version, add a cup of grated cheese on top before you put the pan in the oven.

Whether you like a little bit or a lot of heat, add the cheese or leave it plain, baked spaghetti is a quick and easy pasta dish sure to please on a cold night.

Baked Spaghetti
6 Servings

1 (7 oz.) pkg. thin spaghetti, cooked and drained
1 lb. ground beef
1/2 cup chopped onion
1/2 cup chopped green pepper
1 (14 1/2 oz.) can diced tomatoes (undrained)
1 (15 oz.) can tomato sauce
1 (8 oz.) can mushroom stems and pieces, drained (optional)
1/2 cup water
1 tsp. salt
1/2 tsp. black pepper
1/8 tsp. garlic powder
1 1/2 tsp. chili powder or to taste
1 tsp. rosemary, crushed
1/8 tsp. cayenne pepper or to taste
3 tsp. sugar
1 c. shredded cheese (optional)


Cook spaghetti according to directions on the package; drain.  While spaghetti is cooking, saute ground beef, onion and bell pepper in a skillet until meat is no longer pink and onion and green pepper are tender; drain. Combine all ingredients, except cheese, in a large pot and simmer 10 minutes.  Pour into a greased 3-quart casserole dish; sprinkle cheese on top.  Bake at 400° for 20 minutes. 

© Margaret's Morsels

February 11, 2016

All in One Valentine

Pin It
Margaret's Morsels | Dum Dums Valentine Flowers


Today I'm doing something I haven't done before.  Instead of sharing a recipe in the traditional sense, I'm sharing a 'recipe' for a cute and easy craft perfect for Valentine's Day.  My son and I used to make these for his classmates when he was young, so this was an opportunity for me to take a sentimental stroll down memory lane.

Let me preface this by saying I am not a crafter.  I don't sew, knit, crochet, embroider, cross stitch, paint, draw, quilt, weave or make jewelry, so you don't need to worry about seeing many -- if any -- posts like this in the future.

Four years ago, I wrote about making heart shaped lollipops out of leftover Christmas candy canes by adding a lollipop stick, melted white chocolate and sprinkles.  This craft uses a lollipop stick too, plus cardstock, adhesive and a hole punch.

Margaret's Morsels | Dum Dums Valentine Flowers


Cardstock is a thicker, more durable paper typically used in scrapbooking. It's available in 8 1/2 x 11-inch and 12 x 12-inch sizes.  You can use either size, but I've found there's a bigger selection of colors and patterns to choose from in the 12 x 12-inch size.  I'm not a fan of red so I tend to pick shades of pink and, although not as heavy as solid color cardstock, patterned papers that have a Valentine's Day look to them.  The total number of sheets depends on what size paper you buy and how large you make the hearts.

You'll need to cut out four hearts for each lollipop.  This can be done in several ways.  My artistic friends can do this freehand, but not me.  I can't even draw a straight line with a ruler!  To solve this dilemma, I bought a heart shaped paper punch that cuts out hearts that are about 2 1/2-inches tall.

Margaret's Morsels | Dum Dums Valentine Flowers


Margaret's Morsels | Dum Dums Valentine Flowers


There are heart shaped templates available on the Internet, but you'd have to print and cut them out which could be time consuming.  Depending on the craft stores in your area, you may be able to find precut hearts, but the sizes and colors might be limited.

Stack four hearts together -- you can use the same color or be creative and mix and match -- and use a small hole punch to make a hole approximately 3/8-inch from the bottom.

Margaret's Morsels | Dum Dums Valentine Flowers

Margaret's Morsels | Dum Dums Valentine Flowers


The first time I ever made these, I used a regular size hole punch.  Not being a crafter, I didn't know hole punches came in different sizes, including 1/8-inch which is what I use now.  If you want to include to/from, conversation heart sentiments, or a message to someone special, now is the time to do that.

Fold the four hearts in half lengthwise to make a crease.  


Margaret's Morsels | Dum Dums Valentine Flowers


Line up the holes and insert a Dum Dums lollipop.  If you're not familiar with Dum Dums, they're lollipops that are available in numerous flavors including classics like grape, orange and cherry, plus fan favorites like blueberry, cotton candy and bubblegum.  Dum Dums are gluten free making them a treat almost everyone can enjoy.  If you can't find Dum Dums, you can substitute other lollipops, but don't use any that are too big or heavy for the size hearts you made.

Fan the hearts into a flower shape.

Margaret's Morsels | Dum Dums Valentine Flowers
This isn't a flower shape, but I had to do it
this way in order to take a picture.

Put a small bit of adhesive -- glue, double sided tape or clear mounting squares -- on the top or bottom of each heart.  I use mounting squares which are a scrapbookers version of double sided tape.  Mounting squares are smooth and thin with a sticky bottom and a removable strip on the top.  


Margaret's Morsels | Dum Dums Valentine Flowers
The removable strip on the top 
of the mounting square.

Margaret's Morsels | Dum Dums Valentine Flowers
It's hard to see, but the upper right heart shows
the adhesive that remains after the strip is peeled off.


Peel the strips off, press the hearts together and you're done.  If you use glue, allow plenty of time for the glue to dry.  

These are fun to give out on Valentine's Day to young kids, the young at heart and everyone in between.  It's a card; it's a flower; it's candy.  On Valentine's Day, what more do you need?

© Margaret's Morsels


January 19, 2016

A Taste of Germany

Pin It
Margaret's Morsels | Schnitzel

At the beginning of the year, I always like to share a healthier alternative for a traditional food.  Over the last few years, I've shared recipes for salmon patties; broccoli; pork chops; Mozzarella cheese sticks.  I want to share a recipe this January too, but we're going to have to take a little detour.

During the 2014-15 school year, my family hosted a foreign exchange student from Germany named Simon.  We enjoyed getting to know this fine young man and learning about his country's customs and culture.  In exchange, he was able to experience life in an American family, attend an American high school and try American food.  He was a good sport about trying and eating new foods, but after a few months he started missing the food from home.  When he arrived, he'd given me a German cookbook as a present.  At the time, I had him mark the recipes he liked with sticky notes and told him at some point during his stay I'd fix a German meal. When that day arrived, the first thing he wanted me to fix was schnitzel.

Schnitzel -- a thin slice of meat dipped in eggs, coated with bread crumbs and fried -- is the German equivalent of American chicken fried steak or country fried steak.  Although I'd never eaten German food before, I had heard of wiener schnitzel which is made with veal, a meat we don't eat. Simon told me schnitzel could be made with other meats, including pork which is what his family used.

Not long after that, Simon helped me interpret the recipe in the cookbook, putting it together with the way he remembered his grandmother fixing schnitzel.  We coated boneless pork chops in flour, dipped them in eggs and then coated them in plain bread crumbs.  Staying true to the recipe, we fried -- not my preferred cooking method -- the pork chops in canola oil. Unfortunately, they didn't taste like the schnitzel he ate in Germany, but like pork chops cooked in an American home.

A few weeks later, I decided to surprise Simon with schnitzel, but I changed a couple of things.  Instead of using pork chops, I sliced a pork tenderloin into pieces and pounded them flat.


Margaret's Morsels | Schnitzel


Margaret's Morsels | Schnitzel

Margaret's Morsels | Schnitzel

I coated the pieces with flour, dipped them in eggs and coated them with bread crumbs, just like I did the first time.  Instead of frying them, though, I baked them in the oven.  Simon said the schnitzel was much better than my first attempt, but it needed more seasoning.  He looked through my spice rack, smelling some of the spices, until he found what he was looking for: garlic powder and Italian seasoning.  When he showed me those spices, I knew exactly how I was going to make the schnitzel.

One cold winter night, Simon burst through the kitchen door, stopped and exclaimed, "It smells good in here!"  What he smelled was my American version of schnitzel.  Since he liked the schnitzel made with pork tenderloin, I used it again, but decided to coat it with the same ingredients I use when I make Chicken Parmesan.  I omitted the flour completely and dipped the pork in eggs and then a mixture of Italian bread crumbs, Parmesan cheese, Italian seasoning and garlic powder before baking it in the oven.  Simon loved it and ate with gusto that night!

I don't know if my version could really be called schnitzel since some of the ingredients and the baking method are different.  Regardless of what you'd call it, two things are certain.  One, it's delicious.  Two, it's a healthy entree since it's baked not fried.

I look forward to trying German cuisine -- including schnitzel -- when we go to Germany later this year.  The thing I look forward to the most, though, is seeing Simon again.  I can't wait to see how much he's grown and give him something he hasn't had since he left last June:  a hug from his American mother!

Update:  After this was posted, Simon texted me and said he didn't mind me using his name in the article.  I've revised the copy, replacing "our student" with "Simon."  I also included his name in the recipe title.  The rest of the entry remains unchanged.


Simon's Schnitzel
6 to 8 Servings

1 (1 1/4 lb.) pork tenderloin, cut into eight pieces and pounded 1/4-inch thick
3 eggs, beaten
1 cup dry Italian bread crumbs
1/3 cup grated Parmesan cheese
2 1/4 tsp. Italian seasoning
1 1/2 tsp. garlic powder

Beat the eggs in a bowl; set aside.  In another bowl, combine the bread crumbs, Parmesan cheese, Italian seasoning and garlic powder.  Dip each piece of meat in the eggs and then coat both sides thoroughly with the bread crumb mixture.  Place meat on a greased cookie sheet.  Bake at 375° for 10 minutes.  Turn meat over; bake 12 minutes more, or until thoroughly cooked. 


© Margaret's Morsels


December 15, 2015

12 Days of Christmas Gifts from the Kitchen: Day 10

Pin It
Bar cookies might not come to mind at Christmastime, but for me they are the equivalent of a bow and go gift.  Bar cookies are a real time saver since they don't have to be rolled and cut out.  Frosting is easy since it's typically done in the pan -- not individually -- and can be as simple as a sprinkling of powdered sugar.  Lemon Bars are quick and easy to make, especially when they start with a tasty shortcut!

Margaret's Morsels | Lemon Bars


© Margaret's Morsels

December 11, 2015

12 Days of Christmas Gifts from the Kitchen: Day 9

Pin It
Coffee Cake Muffins taste just like coffee cake, but with the ease of mixing up a batch of muffins.  Give someone a dozen, or bake them as mini muffins, put them in pretty Christmas tins and give them to several people.

Margaret's Morsels | Coffee Cake Muffins


© Margaret's Morsels

December 9, 2015

12 Days of Christmas Gifts from the Kitchen: Day 8

Pin It
Gifts from the kitchen aren't limited to cookies and candy.  This Cranberry Delight Spread makes a tasty gift.  An easy way to present it is in a small Mason jar or a seasonal bowl.  A nice added touch is to put some vanilla wafers or gingersnaps in a Christmas cellophane bag, tie the bag closed with colored raffia and attach a Christmas spreader for an all inclusive gift.

Margaret's Morsels | Cranberry Delight Spread


© Margaret's Morsels

December 5, 2015

12 Days of Christmas Gifts from the Kitchen: Day 5

Pin It
I thought I'd stick with yesterday's theme and share another candy recipe. I've made this Peanut Butter Fudge for Valentine's Day, but it's also wonderful to give as Christmas gifts.  One batch yields 70 pieces making it easy to cross several names off your list at one time!  You don't even have to turn on your stove to make this fabulous fudge.  It's made in the microwave!

Margaret's Morsels | Peanut Butter Fudge


© Margaret's Morsels

December 1, 2015

12 Days of Christmas Gifts from the Kitchen: Day 1

Pin It
This time of the year, I start getting emails with 12 days of Christmas cookie recipes.  Since I love giving gifts from the kitchen, I thought I'd share 12 recipes -- not all of them cookies -- that would make wonderful Christmas gifts.  I hope to share one or two new recipes, but I can't make any promises. As John Lennon said, "Life is what happens to you while you're busy making other plans."

What better way to start this series than with the recipe I shared five years ago in a post titled, "Gifts from the Kitchen."  I've been making these three (four if you use sprinkles) ingredient cookies at Christmas for years.  I prefer chocolate almond bark, but you can use vanilla if you want a white cookie.  Seasonal sprinkles add a festive touch to the cookies.

Margaret's Morsels | Chocolate Covered Ritz Cracker Cookies

November 25, 2015

Pure Pumpkin

Pin It
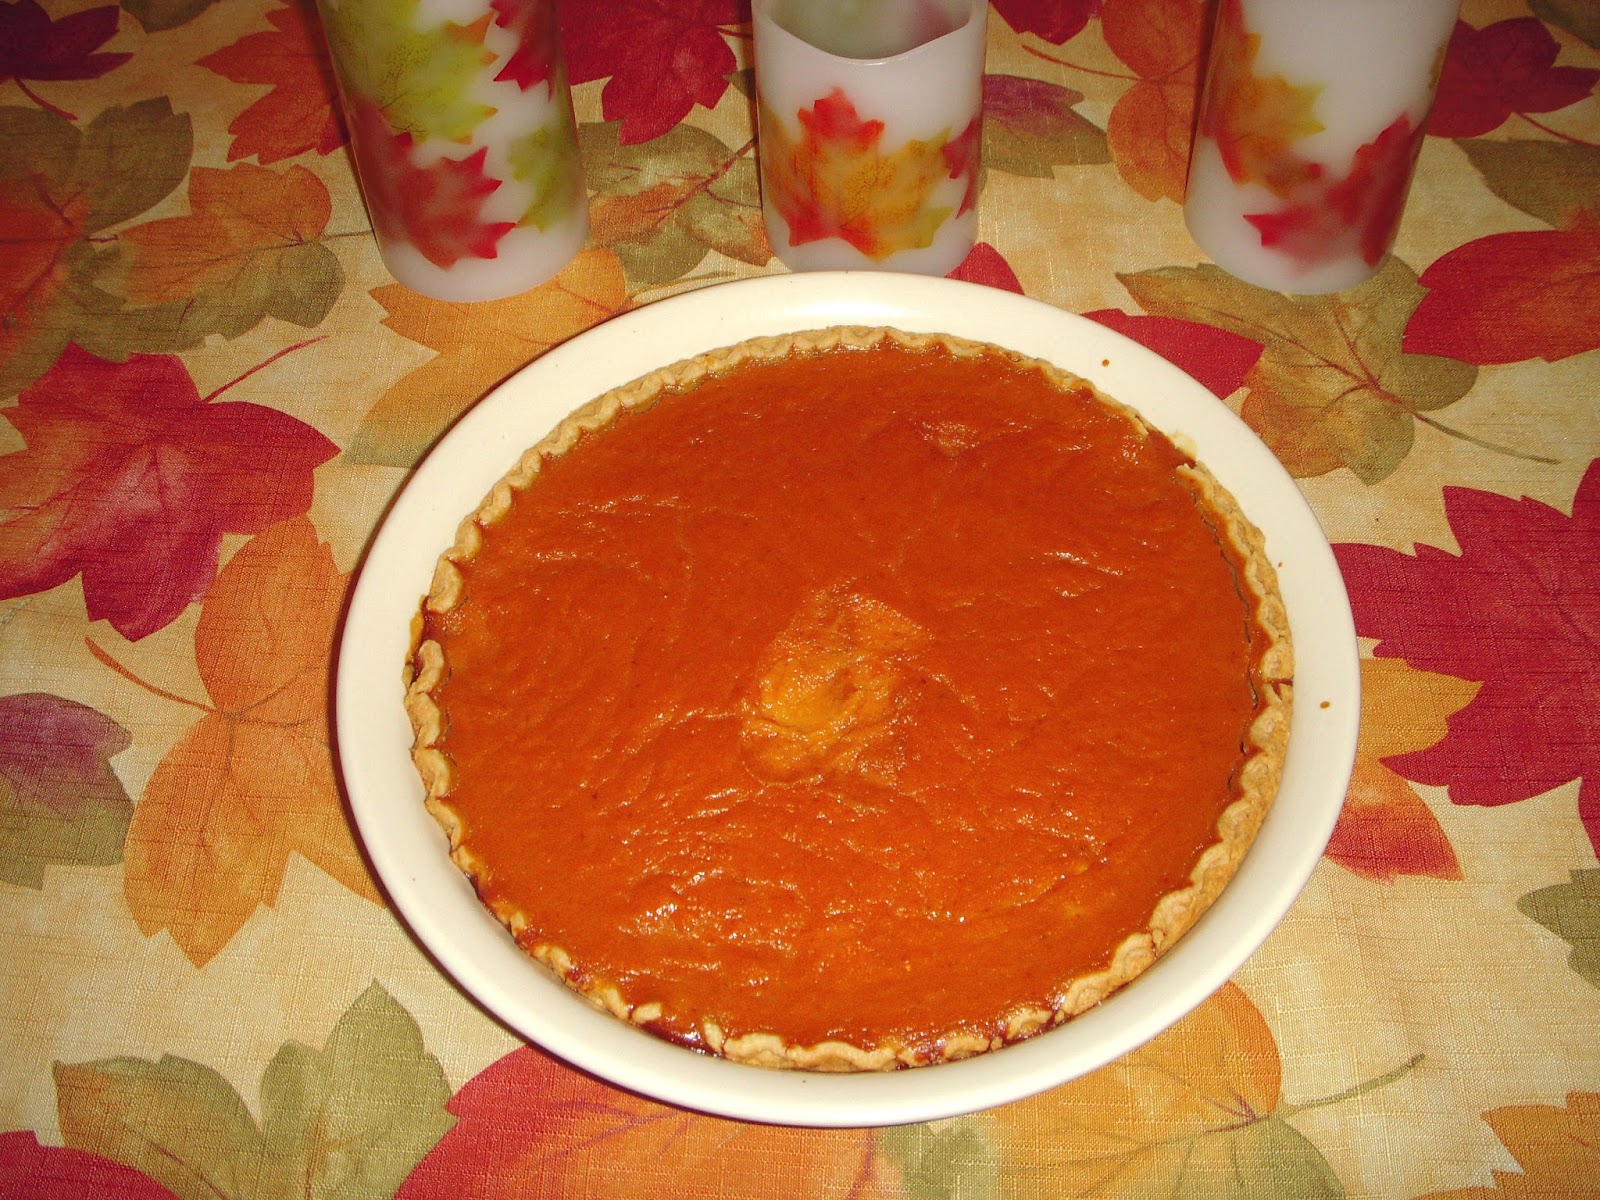
Margaret's Morsels | Pumpkin Pie

This time last year -- the afternoon before Thanksgiving -- I realized I'd failed to buy a can of pumpkin pie mix at the grocery.  I couldn't go to the grocery because I was too busy baking biscuits and cornbread for Cornbread Dressing, making Potato Salad and Sweet Potato Souffle, cooking Aaron's Green Beans, whipping up a Chocolate Dream Pie and prepping ingredients for homemade rolls.  My then 16 year old only had his learner's permit so he couldn't go to the grocery for me.  I texted my husband and asked if he could pick up a can of pumpkin pie mix on his way home from work.  This meant it would be later in the evening before I could make the pie but, with the sugar and spices already added to the mix, it would be a quick task.

When my husband got home, he explained that the grocery was out of pumpkin pie mix and handed me a can of pumpkin puree.  He said he hoped it would be ok since he knew I kept a well stocked pantry.  I wasn't thrilled about making a pie from scratch --  after all I'd been cooking all day -- but I knew he was right.  This is how I'd always made Pumpkin Pie until a sister-in-law introduced me to timesaving pumpkin pie mix 20 something years earlier.


Margaret's Morsels | Pumpkin Pie


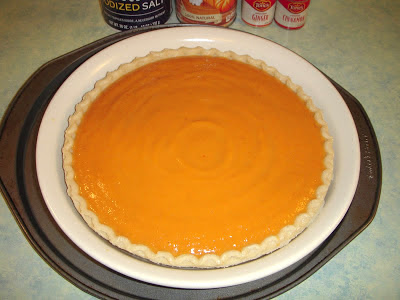
The pumpkin, eggs, sugar, salt, spices and evaporated milk are mixed by hand with a spatula.  If you read my blog, you know I like to substitute healthier ingredients whenever possible.  However, this is one time I use regular evaporated milk instead of the fat-free version.  The fat in the milk helps make the pie firm which means the pieces hold their shape better.

The filling goes into a pie crust, but not just any pie crust.  My mother taught me to always use a deep-dish pie crust, no matter what kind of filling goes in the crust.  Not only does a deep-dish crust hold more of the scrumptious filling, it keeps the filling from spilling over into the oven.

Unlike my mother, I don't make my own pie crust.  I always use frozen store bought pie crusts, unless the recipe specifically calls for a package of refrigerated pie crusts.  However, I have a trick for making a store bought pie crust look homemade.  I transfer the pie crust from the foil pan to a pretty glass pie plate.


Margaret's Morsels | Pumpkin Pie


To do this, let the crust soften at room temperature for a few minutes.  Turn the pan over, letting the crust fall into your hand and transfer it to your pie plate.  If the crust doesn't fall out the first time, let it sit a few more minutes. Don't force the crust out, or you'll risk breaking the crust.

If you're transferring the pie crust, make sure to use a pie plate that's close to the size of the pie crust.  A frozen 9-inch pie crust works perfectly in my 10-inch pie plate.  My experience has been that the crust expands during baking and conforms to the size of my pie plate.

Put the pie plate on a baking sheet and add the filling.


Margaret's Morsels | Pumpkin Pie


Bake the pie an hour and then let it cool on a wire rack before storing it in the refrigerator.

I'm thankful pumpkin pie mix exists, but I'm also thankful for canned pumpkin puree.  Without it, I'd have to seed, cut, roast and puree the pumpkin before making the pie!


Pumpkin Pie
8 Servings

1 (9-inch) deep-dish pie crust
2 eggs
1 (15 oz.) can pumpkin
3/4 cup sugar
1/2 tsp. salt
1 tsp. cinnamon
1/2 tsp. ginger
1/4 tsp. cloves
1 (12 oz.) can evaporated milk (not fat-free)

Preheat oven to 425°.  Lightly beat eggs.  Add remaining ingredients; stir until thoroughly combined.  Put pie plate on a baking sheet; pour filling into pie crust.  Bake 15 minutes.  Reduce oven temperature to 350°.  Bake 45 minutes longer, or until knife inserted in center comes out clean.  Remove from baking sheet and cool 2 hours on a wire rack.  Refrigerate. 

© Margaret's Morsels
September 14, 2015

Just Peachy

Pin It
Margaret's Morsels | Quick Fruit Cobbler

In late June, on her way home from Georgia -- a state known for its peaches -- a friend stopped at a roadside stand and bought several baskets of peaches fresh from the orchard.  My family was the lucky recipient of one of those baskets.  The peaches were juicy and delicious and we enjoyed peeling and eating them out of hand.  A few days later at a 4th of July party, I spotted a peach cobbler on the dessert table and knew exactly what I was going to do with the remaining few peaches.

Almost every church or school cookbook has a recipe for fruit cobbler.  A lot of times, the recipe has the word easy, simple, or like the one I'm sharing today, quick in the title.  All three are appropriate adjectives for this easy to make dessert, but I think versatile would be a better description.

Although the recipe I'm sharing is for peach cobbler, you can substitute other fruit for the peaches.  In fact, you can use fresh, frozen or canned fruit in the recipe.  If you're using canned fruit, be sure to use some of the juice or the cobbler will be dry.  If you're using fresh fruit, taste the fruit to see if you need to add additional sugar.  If so, add a little at a time until the fruit reaches the desired sweetness.    

Start by melting a stick of butter or margarine.  Instead of melting this in the microwave, I put the butter in the baking dish and set it in the oven while it's preheating.

Margaret's Morsels | Quick Fruit Cobbler

The butter melts without me having to do anything and it keeps me from dirtying another dish.  


Margaret's Morsels | Quick Fruit Cobbler

The sugar, self-rising flour, milk and vanilla are stirred together to make the batter.  If you don't have self-rising flour, you can substitute all-purpose flour and add 1/4 teaspoon salt and 1 teaspoon baking powder.  Once the ingredients are combined, pour the batter over the melted butter.  Do not stir the two together!

Margaret's Morsels | Quick Fruit Cobbler

If you're using fresh peaches, here's an easy way to keep the cobbler from being dry.  Put the peeled and sliced peaches in a saucepan and heat them on low heat for about 10 minutes.

Margaret's Morsels | Quick Fruit Cobbler


When heated, the juice seeps from the peaches.  This sounds counterproductive, but it's actually the secret to a very moist cobbler, since the juice is distributed over the entire cobbler.


Margaret's Morsels | Quick Fruit Cobbler
Three peaches yielded almost 1/4 cup juice.

Spoon the peaches on top of the batter.  Pour the juice left in the pan all over the top of the cobbler.  Do not stir!!!  


Margaret's Morsels | Quick Fruit Cobbler


The peaches will sink to the bottom and the batter will rise to the top and make a crust.


Margaret's Morsels | Quick Fruit Cobbler


The cobbler is delicious by itself, or served a la mode with a scoop of vanilla ice cream on top.  Either way you serve it, it's just peachy!


Quick Peach Cobbler
6 to 8 Servings

1 stick butter or margarine, melted
3 fresh peaches, peeled and cut into slices 
1 cup sugar
1 cup self-rising flour*
1/4 tsp. vanilla
1 cup milk

*One cup all-purpose flour, 1/4 teaspoon salt and 1 teaspoon baking powder may be substituted for self-rising flour.

Preheat oven to 400°.  Put butter in a 10-inch baking dish and set in the oven to melt while the oven preheats.  Peel peaches and cut into slices. Put the peaches in a saucepan and heat on low heat about 10 minutes. While the peaches are heating, combine remaining ingredients; mix well. Remove baking dish from oven.  Tilt pan to distribute butter, if necessary. Pour the batter over the butter.  Do not stir!  Spoon peaches over the batter.  Pour the peach juice over the top of the cobbler.  Do not stir.  Bake for 20 to 30 minutes until the crust is brown.

© Margaret's Morsels