Showing posts with label fruit. Show all posts

November 8, 2016

Fall Fruit

Pin It
Margaret's Morsels | Apple Salad

The leaves may not have changed color and the temperature doesn't feel very fall like, but I know fall is here and it's not because of all the pumpkin flavored beverages and baked goods showing up on menus and in the grocery.  I know it's fall because freshly picked, straight from the orchard apples are appearing in the produce department.  These apples are so much prettier and flavorful than the ones I've bought all year that have been in cold storage since they were harvested.

Apples are a staple at our house.  They make a quick and healthy snack and are easy to pack in a lunch box or take on the go.  They're delicious baked, poached  and in a pie.  Apples are wonderful combined with other fruit in a fruit salad and they're the star of the recipe I'm sharing today.

A few years ago on a trip out of town, we ate at a restaurant that had apple salad on the menu.  I'd never eaten it before and was hesitant to order it.  I couldn't fathom how apples could taste good covered with mayonnaise and sour cream.  I ended up ordering the dish and was hooked after one bite. When our very friendly server found out how much I liked the salad, she was more than happy to share the recipe with me.

The dressing -- which I didn't think I would like -- was actually quite tasty. The sour cream contributes to the creaminess, but also adds a subtle tanginess that keeps the salad from being bland.  I use light sour cream, but regular sour cream will add a richer flavor to the dressing.  Depending on the sweetness of the apples you use, you may need to add some sugar, but don't add too much.  You don't want the salad to be too sweet.


Margaret's Morsels | Apple Salad


I make the salad the way the restaurant did using only apples, craisins -- dried cranberries -- and celery.


Margaret's Morsels | Apple Salad

Additions can include nuts, raisins  coconut, grapes, mandarin oranges and even pineapple chunks.  Depending on the size of the addition, you may need to cut the ingredients into smaller pieces.  You're pretty much limited by your imagination, the ingredients you have on hand and what your family likes to eat.

For a fancy presentation, serve the salad on a bed of lettuce leaves.  A nice touch for a party is to combine the dressing and apples and put all the additional ingredients in bowls.  That way, people can create and fall for their own one of a kind salad creation.
  
Apple Salad
4 to 6 Servings

1/2 cup mayonnaise
1/2 cup sour cream
sugar to taste
2 apples, diced (unpeeled)
1/2 cup craisins
1 stalk celery, sliced diagonally

Combine the first three ingredients until the sugar is dissolved.  Stir in remaining ingredients.  Refrigerate overnight to allow flavors to blend.

© Margaret's Morsels

November 25, 2015

Pure Pumpkin

Pin It
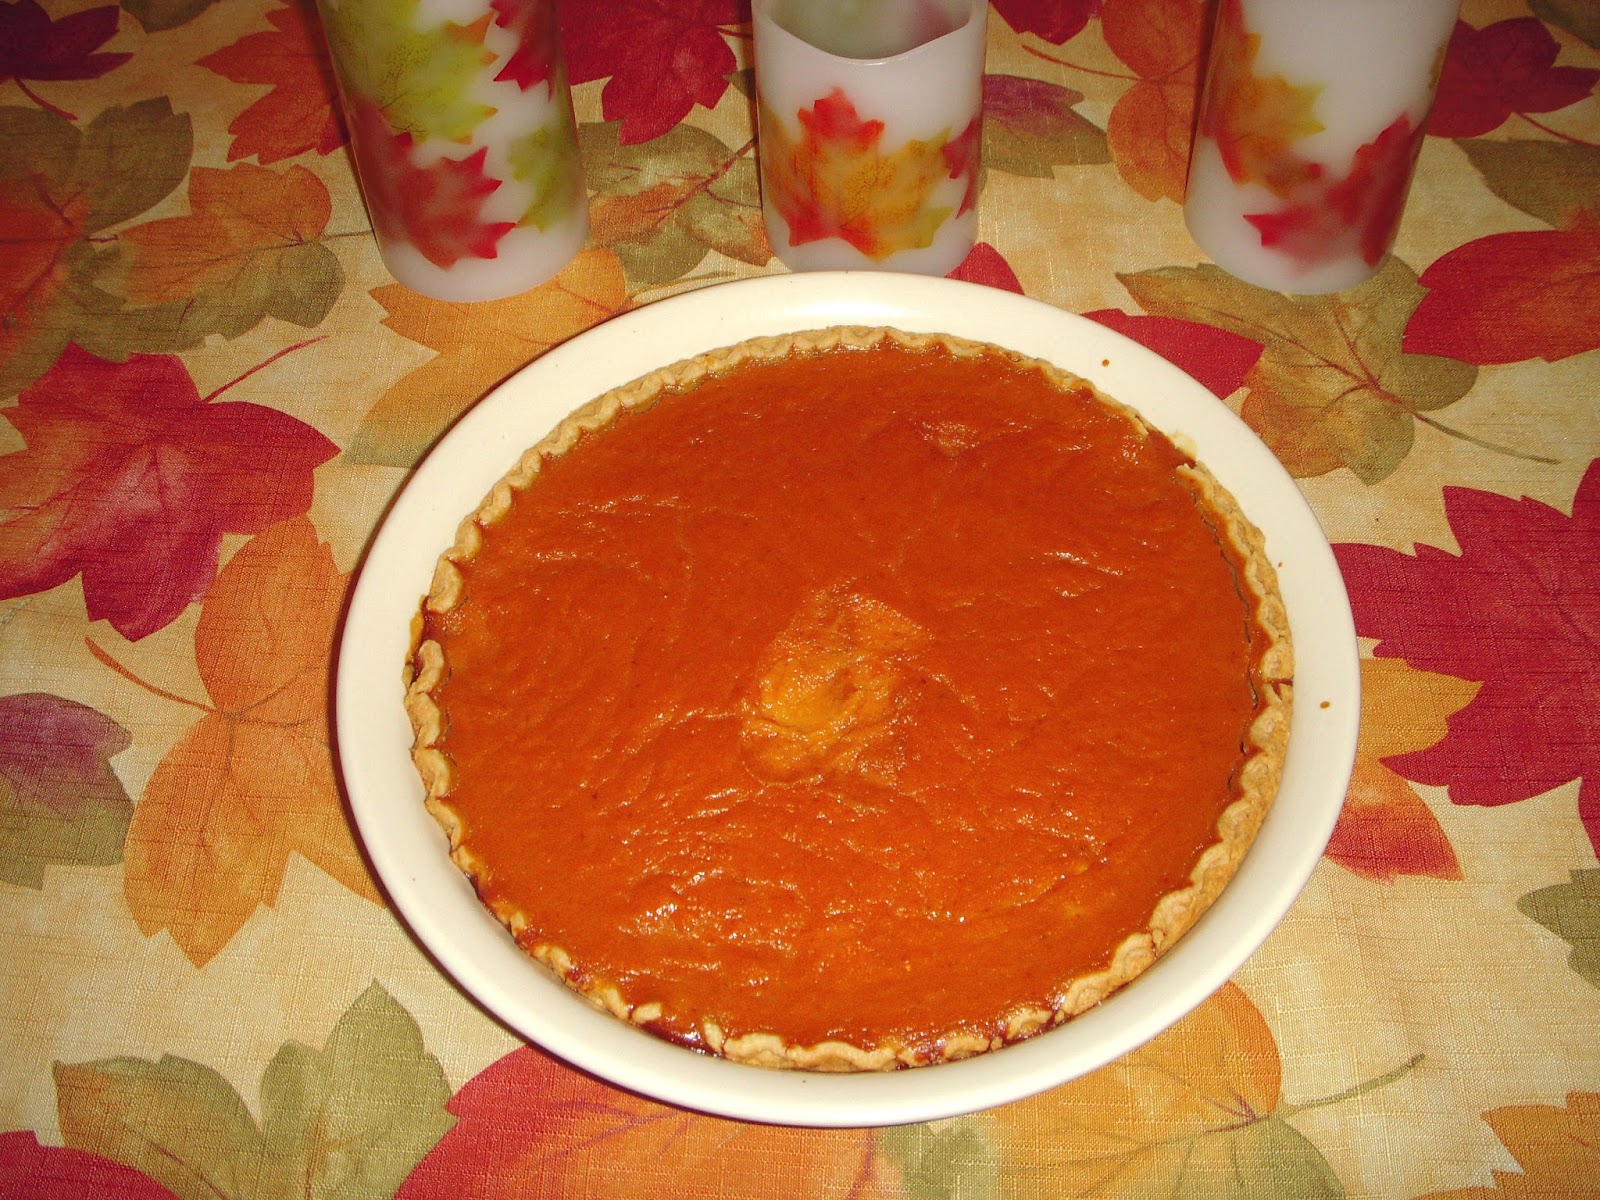
Margaret's Morsels | Pumpkin Pie

This time last year -- the afternoon before Thanksgiving -- I realized I'd failed to buy a can of pumpkin pie mix at the grocery.  I couldn't go to the grocery because I was too busy baking biscuits and cornbread for Cornbread Dressing, making Potato Salad and Sweet Potato Souffle, cooking Aaron's Green Beans, whipping up a Chocolate Dream Pie and prepping ingredients for homemade rolls.  My then 16 year old only had his learner's permit so he couldn't go to the grocery for me.  I texted my husband and asked if he could pick up a can of pumpkin pie mix on his way home from work.  This meant it would be later in the evening before I could make the pie but, with the sugar and spices already added to the mix, it would be a quick task.

When my husband got home, he explained that the grocery was out of pumpkin pie mix and handed me a can of pumpkin puree.  He said he hoped it would be ok since he knew I kept a well stocked pantry.  I wasn't thrilled about making a pie from scratch --  after all I'd been cooking all day -- but I knew he was right.  This is how I'd always made Pumpkin Pie until a sister-in-law introduced me to timesaving pumpkin pie mix 20 something years earlier.


Margaret's Morsels | Pumpkin Pie


The pumpkin, eggs, sugar, salt, spices and evaporated milk are mixed by hand with a spatula.  If you read my blog, you know I like to substitute healthier ingredients whenever possible.  However, this is one time I use regular evaporated milk instead of the fat-free version.  The fat in the milk helps make the pie firm which means the pieces hold their shape better.

The filling goes into a pie crust, but not just any pie crust.  My mother taught me to always use a deep-dish pie crust, no matter what kind of filling goes in the crust.  Not only does a deep-dish crust hold more of the scrumptious filling, it keeps the filling from spilling over into the oven.

Unlike my mother, I don't make my own pie crust.  I always use frozen store bought pie crusts, unless the recipe specifically calls for a package of refrigerated pie crusts.  However, I have a trick for making a store bought pie crust look homemade.  I transfer the pie crust from the foil pan to a pretty glass pie plate.


Margaret's Morsels | Pumpkin Pie


To do this, let the crust soften at room temperature for a few minutes.  Turn the pan over, letting the crust fall into your hand and transfer it to your pie plate.  If the crust doesn't fall out the first time, let it sit a few more minutes. Don't force the crust out, or you'll risk breaking the crust.

If you're transferring the pie crust, make sure to use a pie plate that's close to the size of the pie crust.  A frozen 9-inch pie crust works perfectly in my 10-inch pie plate.  My experience has been that the crust expands during baking and conforms to the size of my pie plate.

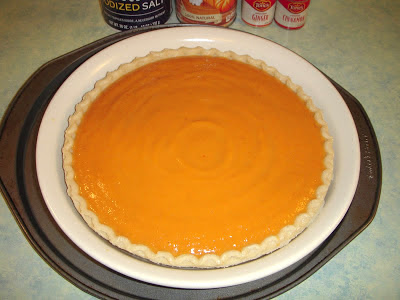
Put the pie plate on a baking sheet and add the filling.


Margaret's Morsels | Pumpkin Pie


Bake the pie an hour and then let it cool on a wire rack before storing it in the refrigerator.

I'm thankful pumpkin pie mix exists, but I'm also thankful for canned pumpkin puree.  Without it, I'd have to seed, cut, roast and puree the pumpkin before making the pie!


Pumpkin Pie
8 Servings

1 (9-inch) deep-dish pie crust
2 eggs
1 (15 oz.) can pumpkin
3/4 cup sugar
1/2 tsp. salt
1 tsp. cinnamon
1/2 tsp. ginger
1/4 tsp. cloves
1 (12 oz.) can evaporated milk (not fat-free)

Preheat oven to 425°.  Lightly beat eggs.  Add remaining ingredients; stir until thoroughly combined.  Put pie plate on a baking sheet; pour filling into pie crust.  Bake 15 minutes.  Reduce oven temperature to 350°.  Bake 45 minutes longer, or until knife inserted in center comes out clean.  Remove from baking sheet and cool 2 hours on a wire rack.  Refrigerate. 

© Margaret's Morsels

November 18, 2015

Thanksgiving Recipe Roundup

Pin It
It's hard to believe Thanksgiving is only eight days away!  If you're planning your menu or looking for something new to serve, here's some Thanksgiving recipes I've shared in the past.  I'm putting the finishing touches on two recipes -- one vegetable, one dessert -- I plan to post before Thanksgiving.  


Margaret's Morsels | Cranberry Delight Spread

Margaret's Morsels | Sweet Potato Souffle

Margaret's Morsels | Potato Salad

Margaret's Morsels | Carrot Souffle

Margaret's Morsels | Pecan Streusel Pumpkin Pie

Margaret's Morsels | No Bake Turkey Cookies


© Margaret's Morsels

September 14, 2015

Just Peachy

Pin It
Margaret's Morsels | Quick Fruit Cobbler

In late June, on her way home from Georgia -- a state known for its peaches -- a friend stopped at a roadside stand and bought several baskets of peaches fresh from the orchard.  My family was the lucky recipient of one of those baskets.  The peaches were juicy and delicious and we enjoyed peeling and eating them out of hand.  A few days later at a 4th of July party, I spotted a peach cobbler on the dessert table and knew exactly what I was going to do with the remaining few peaches.

Almost every church or school cookbook has a recipe for fruit cobbler.  A lot of times, the recipe has the word easy, simple, or like the one I'm sharing today, quick in the title.  All three are appropriate adjectives for this easy to make dessert, but I think versatile would be a better description.

Although the recipe I'm sharing is for peach cobbler, you can substitute other fruit for the peaches.  In fact, you can use fresh, frozen or canned fruit in the recipe.  If you're using canned fruit, be sure to use some of the juice or the cobbler will be dry.  If you're using fresh fruit, taste the fruit to see if you need to add additional sugar.  If so, add a little at a time until the fruit reaches the desired sweetness.    

Start by melting a stick of butter or margarine.  Instead of melting this in the microwave, I put the butter in the baking dish and set it in the oven while it's preheating.

Margaret's Morsels | Quick Fruit Cobbler

The butter melts without me having to do anything and it keeps me from dirtying another dish.  


Margaret's Morsels | Quick Fruit Cobbler


The sugar, self-rising flour, milk and vanilla are stirred together to make the batter.  If you don't have self-rising flour, you can substitute all-purpose flour and add 1/4 teaspoon salt and 1 teaspoon baking powder.  Once the ingredients are combined, pour the batter over the melted butter.  Do not stir the two together!

Margaret's Morsels | Quick Fruit Cobbler

If you're using fresh peaches, here's an easy way to keep the cobbler from being dry.  Put the peeled and sliced peaches in a saucepan and heat them on low heat for about 10 minutes.

Margaret's Morsels | Quick Fruit Cobbler


When heated, the juice seeps from the peaches.  This sounds counterproductive, but it's actually the secret to a very moist cobbler, since the juice is distributed over the entire cobbler.


Margaret's Morsels | Quick Fruit Cobbler
Three peaches yielded almost 1/4 cup juice.

Spoon the peaches on top of the batter.  Pour the juice left in the pan all over the top of the cobbler.  Do not stir!!!  


Margaret's Morsels | Quick Fruit Cobbler


The peaches will sink to the bottom and the batter will rise to the top and make a crust.


Margaret's Morsels | Quick Fruit Cobbler


The cobbler is delicious by itself, or served a la mode with a scoop of vanilla ice cream on top.  Either way you serve it, it's just peachy!


Quick Peach Cobbler
6 to 8 Servings

1 stick butter or margarine, melted
3 fresh peaches, peeled and cut into slices 
1 cup sugar
1 cup self-rising flour*
1/4 tsp. vanilla
1 cup milk

*One cup all-purpose flour, 1/4 teaspoon salt and 1 teaspoon baking powder may be substituted for self-rising flour.

Preheat oven to 400°.  Put butter in a 10-inch baking dish and set in the oven to melt while the oven preheats.  Peel peaches and cut into slices. Put the peaches in a saucepan and heat on low heat about 10 minutes. While the peaches are heating, combine remaining ingredients; mix well. Remove baking dish from oven.  Tilt pan to distribute butter, if necessary. Pour the batter over the butter.  Do not stir!  Spoon peaches over the batter.  Pour the peach juice over the top of the cobbler.  Do not stir.  Bake for 20 to 30 minutes until the crust is brown.

© Margaret's Morsels

July 18, 2013

Spotlight on Summer: Picnic Fare and Quick Cooking

Pin It
Last week, I posted links to previous blogs that contained recipes for cool and creamy foods.  Today, in part two of the series, I'm doing the same thing, but with foods that are good to take on a picnic or can be prepared on busy summer days with very little effort.  Click the words in bold to go to the page with the recipe.


Picnic Fare:

What better way to celebrate summer than with a picnic?  Picnics are fun, but be sure to keep food safety in mind:  keep hot foods hot and cold foods cold!

Margaret's Morsels | Chicken Salad

Chicken Salad:  This has been my favorite chicken salad recipe for over 20 years!  When I take it on picnics, I serve it just like I do at home:  on a plate with croissants on the side.  If you want to use it for sandwiches, keep the chicken salad in the cooler and assemble the sandwiches when you're ready to eat.  This will keep the sandwiches from getting soggy.


Margaret's Morsels | Deviled Eggs

Deviled Eggs:  I like to take chicken salad on a picnic, but my mother liked to take fried chicken.  To accompany the chicken, she always took a batch of deviled eggs.  They're better made the day before so you can pack and go the day of the picnic.  Make sure to leave them in the cooler until you're ready to eat.


Margaret's Morsels | Lillie's Fruit Salad


Fruit Salad:  My grandmother made this simple salad -- apples, bananas, crushed pineapple and orange juice -- for my mom and her siblings; my mom made it for her kids and now I make it for my family.  It's ideal for a picnic because it doesn't contain mayonnaise, sour cream or Cool Whip. Serve it straight from the cooler as a refreshing fruit salad or as dessert.


Margaret's Morsels | Award Winning Peanut Butter Cookies


Peanut Butter Cookies:  No one will ever guess these cookies only use three ingredients.  They bake in just minutes so you can whip up a batch at the spur of the moment.  They're also easy to pack and mess free since they're not frosted.


Margaret's Morsels | Mini Mason Jar Cakes

Mini Mason Jar Cakes:  Mason jars aren't just for canning anymore.  You can use the four ounce jars to make cute desserts -- cakes, cobblers, pies and crisps -- that are wonderful for a picnic or casual get together.  Don't forget to pack spoons!


Margaret's Morsels | Fruit Tea


Fruit Tea:  Soft drinks and Kool-Aid might be easy to pack for a picnic, but they're not as refreshing as an ice cold glass of fruit tea.  This dressed up sweet tea uses lemon juice, pineapple juice and, the secret ingredient, ginger ale!


Quick Cooking:

Life tends to move a little slower in the summer.  The weather is warmer, days are longer and there's more to do outside.  Who wants to be stuck inside cooking?  These recipes let you put dinner on the table without having to do a lot of work or get the kitchen too hot.

Margaret's Morsels | Sauteed Pork Chops


Sauteed Pork Chops:  You won't heat up the kitchen when you cook these pork chops.  They cook in just 11 minutes!  The only thing you need other than the ingredients is a skillet with a lid.


Margaret's Morsels | Easy Pork Chops and Apples

Easy Pork Chops and Apples:  This dish is as easy as they come.  You don't even have to brown the pork chops or cut and peel the apples.  Cook a vegetable separately and you've got a meal that's very easy to prepare.  


Margaret's Morsels | Hamburger Macaroni Casserole


Hamburger Macaroni Casserole:  A reader once described this dish as homemade Hamburger Helper, but better.  The macaroni doesn't even have to be cooked separately.  Everything is cooked in the same pan and, from start to finish, takes less than 45 minutes to cook.


Margaret's Morsels | Marinated Baked Chicken


Marinated Baked Chicken:  This dish takes very little work, but you do need to plan ahead since the chicken has to be marinated overnight.  The marinade is super easy to mix up:  you use equal parts of Italian salad dressing and soy sauce.  The recipe can easily be doubled or, if necessary, halved.


Margaret's Morsels | Broccoli with Lemon


Broccoli with Lemon:  This recipe starts with fresh steamed broccoli.  If you don't have time to steam the broccoli, microwave a package of fresh broccoli florets that's sold in a microwave-safe bag.  You can mix up the rest of the ingredients while the broccoli is in the microwave.


Margaret's Morsels | Potato Salad


Potato Salad:  You might not think of this dish as quick, but it can be when you don't have to peel, cut and boil potatoes.  Ore-Ida Steam 'n Mash cut Russet potatoes -- which cook in only 10 minutes in the microwave -- can be substituted for fresh potatoes.  No one will ever taste the difference.

Check back next week for this series finale:  foods that won't heat up the kitchen.


© Margaret's Morsels

March 28, 2012

Countdown to Easter: Part 1

Pin It
Easter is 11 days away, but I'm already planning my menu.  It's actually easy because my family expects the same thing -- ham, macaroni and cheese, deviled eggs, homemade rolls and fruit tea -- every year.  The menu might get boring, except I change things up by preparing different side dishes.

A few years ago, I discovered I loved cranberries paired with oranges.  I think the cranberry/orange combination is especially delicious served with ham.

Last Easter, I served a cranberry/orange side dish in the form of Cranberry Orange RelishThis sweet-tart relish is a combination of fresh cranberries, apple, orange, pineapple and sugar.   If you don't have fresh cranberries on hand, you can still enjoy a cranberry/orange side dish.


Margaret's Morsels | Cranberry Orange Relish


Cranberry Orange Casserole uses canned whole berry cranberry sauce and mandarin oranges mixed with lemon juice and sugar.  Unlike the relish, the casserole is heated in the oven and served hot.  The recipe only makes four servings, but it can easily be doubled or tripled.

Margaret's Morsels | Cranberry Orange Casserole

If you want to serve a cold side dish, try Southern Cranberry Salad.  It also uses whole berry cranberry sauce and mandarin oranges, but is combined with cherry gelatin, water and pineapple for a congealed salad.


Margaret's Morsels | Southern Cranberry Salad

If you prefer a seasonal side dish, check back soon for a recipe that uses the quintessential spring vegetable. 

Cranberry Orange Casserole
4 Servings

1 (14 oz.) can whole berry cranberry sauce
1 (11 oz.) can mandarin oranges, drained
1/2 tsp. lemon juice
2 tsp. sugar

Preheat the oven to 350°.  Combine the ingredients and pour into a greased casserole dish.  Bake 25 minutes until hot and bubbly.


© Margaret's Morsels


February 27, 2012

Poached not Baked

Pin It
Margaret's Morsels | Poached Cinnamon Apples

I've previously shared recipes for foods that are baked rather than fried. Today, I want to share an apple recipe that's poached rather than baked.  If you made the No Bake Turkey Cookies I posted last year, this is a chance to use the rest of the cinnamon candies.

My mom never fixed baked apples.  She always poached them on top of the stove in a sugar syrup made with red cinnamon candies and water.

Poaching is a cooking method where food is submerged -- either partially or completely -- in a liquid and simmered until done.  Poached eggs are probably the best known poached food, but fish, chicken and fruit can also be poached.

There's two things to remember when you poach food.  One, don't let the liquid boil.  If you boil the liquid, you're boiling rather than poaching the food.  Two, use the right size pan.  The pan should be big enough to hold the food and liquid, but no bigger.  If you use a pan that's too big, you'll need to add more liquid.  Since the food absorbs the flavor of the liquid it's cooked in, adding more liquid dilutes the flavor.

When you cook with apples, use an all-purpose or cooking apple.  They retain their shape and don't get mushy when cooked.  Granny Smith, Rome, Empire, Golden Delicious and McIntosh are all good choices.  I've recently discovered Honeycrisp, an all-purpose apple that is both sweet and tart, and used it the last time I fixed these apples.  They were delicious poached!

My mom used a 9 ounce package of red cinnamon candies, but I only use about 1 1/4 to 1 1/2 cups.  Put the candies and water in a saucepan and bring to a boil over medium-high heat.  Once the candies are dissolved, turn the heat down to low and add the apples which have been sliced into eighths.


Margaret's Morsels | Poached Cinnamon Apples
This pan can hold 11 apple slices.


Depending on the number of apples you cook, you may need to poach them in batches.  Simmer the apples, turning them occasionally, until they are tender when pierced with a sharp knife, about 8 to 12 minutes.  When you're finished with a batch, use a slotted spoon to remove the apples from the liquid and put them in a serving bowl.


Margaret's Morsels | Poached Cinnamon Apples

Once all the apples are poached, check the viscosity of the remaining sugar syrup.  If it's thick enough, pour it over the apples.  If it's thin, reduce it by bringing it to a boil until it thickens.  Reducing not only thickens the syrup, it also intensifies the flavor.


Margaret's Morsels | Poached Cinnamon Apples

I like the combination of apples and pork so I serve these with sauteed pork chops.

Margaret's Morsels | Poached Cinnamon Apples

The apples can also be served as a dessert.  No matter which way you serve them, the apples add a burst of color to any meal.

Poached Cinnamon Apples
4 Servings

1 1/4 to 1 1/2 cups red cinnamon candies
2 cups water
5 all-purpose or cooking apples, peeled, cored and cut into eighths

Dissolve the cinnamon candies in water over medium-high heat.  Reduce heat to low.  Working in batches, simmer the apples uncovered, turning occasionally, until they are tender when pierced with a sharp knife, 8 to 12 minutes.  Use a slotted spoon to remove the apples to a serving bowl. When all the apples are cooked, reduce the syrup, if necessary, by boiling it until it's thick.  Pour the syrup over the apples and serve.


© Margaret's Morsels

November 4, 2011

Awesome Apples

Pin It

Margaret's Morsels | Baked Apples

I love this time of year.  Days are cool and nights are crisp, leaves turn to vivid shades of yellow, orange and red and newly harvested apples are arriving at the grocery store.

Although available year round, apples have a season just like other fruits and vegetables.  Fall is apple season.  Apples that aren't sold right away go into storage and are sold throughout the year.  Compare apples sold in the summer to ones sold in the fall.  You'll be able to see and taste the difference.

Baked apples are wonderful year round, but they're especially delicious made with apples fresh from the orchard.  Start by selecting all-purpose or baking apples -- they retain their shape and don't turn mushy when baked -- that are firm and free of bruises and blemishes.  Although I use a combination of apples when I bake a pie, I stick with one variety -- Rome -- for baked apples.  You'll also get good results with Empire, Golden Delicious, Granny Smith or McIntosh apples.

Unlike apples that are baked whole, this recipe uses sliced apples.  This reduces the cooking time and puts the finished dish on the table in less than 30 minutes.  I use an apple wedger to core and slice each apple into eight equal pieces.


Margaret's Morsels | Baked Apples

If you don't have one of these handy gadgets, slice the apples as close to the same size as possible to ensure even coooking.  Toss the apples with lemon juice to prevent them from turning brown and place them -- this is important -- cut side down in a baking dish.


Margaret's Morsels | Baked Apples

The remaining ingredients are heated and poured over the sliced apples. The apples are baked for 10 minutes and then turned over, cut side up. This is easy to do since all the apples are turned the same way at the beginning of the cooking process.


Margaret's Morsels | Baked Apples
Turned over after cooking 10 minutes.

Continue baking until the apples are tender, about 8 to 10 more minutes.  I test the apples with the tip of a knife.  If the apples aren't tender, I bake them a few more minutes.

Margaret's Morsels | Baked Apples

I like to serve baked apples as a side dish with sauteed pork chops.  They can also be served warm as a dessert with a scoop of ice cream, if desired.   


Margaret's Morsels | Baked Apples


Whether you fix baked apples, apple pie or eat apples straight from the refrigerator, they're most flavorful and juicy when they're in season.

Baked Apples
4 Servings

3 large Rome apples, peeled, cored and sliced into eighths
2 Tbsp. lemon juice
2/3 cup apple juice
2/3 cup light brown sugar
2 Tbsp. butter or margarine
1/4 tsp. ground cinnamon

In a large glass dish, toss apples with lemon juice.  Rearrange apples cut side down; set aside.  In a small saucepan, combine the remaining ingredients.  Cook over medium-high heat until the sugar dissolves and butter melts.  Pour the mixture over the apples.  Bake at 400° for 10 minutes; turn apples over.  Bake until tender, about 8 to 10 more minutes. Serve warm.


© Margaret's Morsels