Showing posts with label side. Show all posts

October 20, 2016

Oktoberfest

Pin It

Oktoberfest may conjure up images of free flowing beer, but there's plenty of German cuisine available at this yearly 2 1/2 week Munich folk festival. One of the dishes, spaetzle, is a specialty of the region.

I wasn't familiar with spaetzle until Simon, the wonderful young man I wrote about in January, asked me to fix it with schnitzel.  I looked in the German cookbook he'd given me and learned that spaetzle is a pasta made from flour, eggs, water and salt.  The resulting dough is too soft to roll out and cut so it's pressed through a spaetzle maker.  The recipe intimidated me for two reasons.  One, I'd never made pasta and two, I didn't have a spaetzle maker.  I was relieved when Simon told me dried spaetzle was sold at the grocery in Germany.  Since we live near several international markets, we decided to go on a spaetzle search.

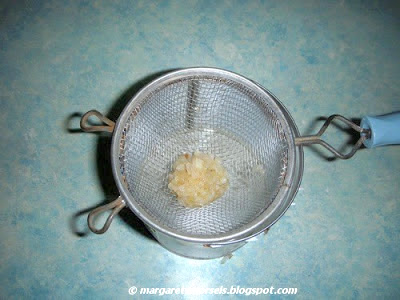
The market we went to was huge and had products arranged by country. We found several brands of spaetzle and bought the one Simon recognized from Germany.  This solved the problem of making spaetzle. However, what was I supposed to do with the dried spaetzle?


Margaret's Morsels | Spaetzle

Simon's grandmother, Oma, told me to cook the spaetzle in a large pot of boiling salted water, drain it and add butter to keep the noodles from sticking together.  Spaetzle can be served with just butter, but it's tastier with a couple of easy additions.

It's common in Germany to stir Emmental cheese into the hot spaetzle until the cheese melts.  That sounded easy enough, but it ended up being the hardest part of the whole recipe!  I bought two different brands of Emmental, but neither one of them tasted anything like the cheese Simon ate in Germany.  My son suggested we try Mozzarella, but it made a sticky mess!  On my fifth attempt, I added some Swiss cheese.  When Simon said the spaetzle tasted almost as good as what he ate in Germany, I knew I'd found the right cheese.


Margaret's Morsels | Spaetzle
Spaetzle with cheese

While the butter and cheese are stirred into the spaetzle, the final addition, also common in Germany, goes on top.  Diced onions are cooked in olive oil until brown and sprinkled on the spaetzle.  I've eaten spaetzle with and without onions and I highly recommend adding them.


Margaret's Morsels | Spaetzle
Spaetzle with onions served at a Munich
biergarten I visited this summer

A few months after my first attempt at cooking spaetzle, Simon's grandmother showed me how to make homemade spaetzle and gave me a spaetzle maker.  Until I get the courage to make spaetzle from scratch, I'll continue to used dried spaetzle.  And when I do, I'll think about the young man who introduced us to this wonderful dish and look forward to the next time he's sitting around the table with us.


Simon's Spaetzle
4 to 6 Servings

1 (17.6 oz.) pkg. dried spaetzle
2 Tbsp. butter or margarine
2 cups finely shredded Swiss cheese
1 large onion, diced
olive oil (enough to coat saute pan)

Cook spaetzle according to package directions.  While spaetzle is cooking, cook the onion in olive oil on medium to medium-low heat until brown. Drain spaetzle and put it in a bowl; add butter or margarine and stir until melted. Add cheese; stir until melted.  Top spaetzle with onion and serve.    


© Margaret's Morsels

November 23, 2015

A Do Ahead Side

Pin It
Margaret's Morsels | Adobo Green Beans

A couple of years ago at a church potluck, I saw a bowl filled with green beans and onions.  Normally, I would have ignored the dish -- I don't like beans with onions -- but the beans smelled delicious so I put a small serving on my plate.  After one bite, two things were apparent.  One, the beans were flavored with something besides onion.  Two, I wanted the recipe!

As the potluck wound down, I watched as people collected their bowls and pans from the food table.  When I saw Aaron, owner of the now empty bowl, pick it up off the table, I walked over and asked how he made the beans.  He graciously shared the recipe and I made the beans for the first time a few weeks later for Thanksgiving.

The recipe starts with a can of cut green beans.  The liquid is drained into a saucepan with some water, chopped onion and -- the ingredient that makes the beans so good -- adobo all purpose seasoning.

Margaret's Morsels | Adobo Green Beans

I wasn't familiar with adobo so I looked it up on the Internet.  My search yielded a lot of recipes for making the seasoning using salt, paprika, black pepper, onion powder, oregano, cumin, garlic powder and chili powder, or some combination of these ingredients.  I didn't mess with perfection and bought a bottle of Goya adobo all-purpose seasoning with pepper which is what was called for in Aaron's recipe.

Margaret's Morsels | Adobo Green Beans


I assumed the seasoning would be with all the other spices, but I found it in the aisle with Hispanic food.  The Goya brand is available in many different varieties!

Margaret's Morsels | Adobo Green Beans

The liquid, onion and adobo are brought to a rolling boil for 30 minutes. During this long boiling time, the liquid is reduced, thereby intensifying the flavor of the remaining liquid.  

Margaret's Morsels | Adobo Green Beans
After boiling for 30 minutes.

The beans are added to the pot and simmered over low heat for 15 minutes.  You can add water, if necessary, but don't add too much or it will dilute the wonderful flavor of the beans.

Margaret's Morsels | Adobo Green Beans

The beans can be served the same day they're cooked, but I think they're better reheated the next day after the flavors have had time to blend.  You can reheat the beans on the stove, or in a crock-pot.  Using a crock-pot is a big help at the holidays, especially if there's not a spare burner available on the stove.  You also don't have to keep a constant eye on the beans since the crock-pot does all the work for you.

Green beans have always been on our Thanksgiving table, but now I fix them ahead of time.   When I'm cooking holiday meals, any dish that can be made ahead is something I'm thankful for!

Aaron's Green Beans
6 to 8 Servings

1 (28 oz.) can cut green beans
1/2 cup chopped onion
1 1/2 tsp. adobo all-purpose seasoning
1 cup water

Drain liquid from beans into a saucepan; add onion, adobo and water. Bring ingredients to a boil and let boil for 30 minutes.  If the liquid is reducing too quickly, turn the heat down.  Add the green beans and, if necessary, a little additional water.  Turn heat to low and simmer 15 minutes.  Let the beans cool and then store them in a covered container in the refrigerator overnight to allow the flavors to blend.  The next day, reheat beans in a crock-pot on low for 2 hours, or until heated through.

© Margaret's Morsels

November 18, 2015

Thanksgiving Recipe Roundup

Pin It
It's hard to believe Thanksgiving is only eight days away!  If you're planning your menu or looking for something new to serve, here's some Thanksgiving recipes I've shared in the past.  I'm putting the finishing touches on two recipes -- one vegetable, one dessert -- I plan to post before Thanksgiving.  


Margaret's Morsels | Cranberry Delight Spread

Margaret's Morsels | Sweet Potato Souffle

Margaret's Morsels | Potato Salad

Margaret's Morsels | Carrot Souffle

Margaret's Morsels | Pecan Streusel Pumpkin Pie

Margaret's Morsels | No Bake Turkey Cookies


© Margaret's Morsels

January 10, 2014

Vanishing Velveeta

Pin It
Margaret's Morsels | Broccoli Rice Casserole

According to news reports, Velveeta -- the processed cheese known for its creaminess when melted -- is in short supply.  I only use Velveeta in queso dip so I'm not too worried yet.  Other people, though, use Velveeta regularly in a variety of dishes from appetizers to entrees, sides and, believe it or not, even dessert.  If you rely on Velveeta for broccoli rice casserole, here's a recipe that will make you forget all about the shortage.  

I don't remember when or where I first discovered broccoli rice casserole. My mother never made it so I probably tried it at a church potluck or a friend's house.  My mother-in-law used to make it and gave me a copy of her recipe.  I tried making it like she did with Cheez Whiz, but my husband thought it was too cheesy.  The next time I used her recipe, I substituted grated Cheddar cheese, but it still wasn't as good as the casserole I fondly remembered from my youth.  I tried several other recipes unsuccessfully and resigned myself to the fact that I'd probably only enjoy this casserole when I could find it on the menu at a restaurant.  

A couple of years ago, an acquaintance shared her broccoli rice casserole recipe with me.  It was similar in some ways to the recipes I'd tried in the past, but at the same time different enough that it piqued my interest.

The recipe starts like most broccoli rice casseroles by sauteing chopped onion in margarine.  However, the broccoli, instead of being cooked separately in a pot of water, is sauteed with the onion.  I think the texture and flavor of the broccoli is better when it's sauteed rather than boiled.

Margaret's Morsels | Broccoli Rice Casserole


Evaporated milk and soup are stirred into the sauteed mixture.  Instead of the traditional cream of mushroom or cream of chicken soup, this recipe uses a can of broccoli cheese soup.  This adds additional broccoli -- even if it is tiny -- and, more importantly, cheese.  However, it's not the only source of cheese in the recipe.  The casserole gets it cheesiness not from Velveeta, Cheez Whiz or grated cheese, but from a can of Cheddar cheese soup! 

Margaret's Morsels | Broccoli Rice Casserole

Cooked long grain rice -- no Minute rice in this recipe -- is mixed in before the dish goes into the oven.

Margaret's Morsels | Broccoli Rice Casserole

I've written more than once that I'm a creature of habit, especially when it comes to ordering food in a restaurant.  When I find something I like at a restaurant, I tend to order it every single time I eat there.  One of my favorite restaurants has broccoli rice casserole on the menu.  I always order it with cooked cabbage, lima beans, sweet potato casserole and a corn muffin. This is how I serve the casserole at home for a meatless meal, except I omit the cabbage since I'm the only one that likes it. 

Margaret's Morsels | Broccoli Rice Casserole

Hopefully, the vanishing Velveeta will be back on store shelves soon.  I certainly hope it will be plentiful when Cinco de Mayo rolls around so I can make queso dip.  To be on the safe side, though, I'm going to pick up a box the next time I'm at the grocery.  After all, I can't make queso dip without Velveeta!


Broccoli Rice Casserole
6 to 8 Servings

1/2 cup chopped onion
1 (10 oz.) pkg. frozen chopped broccoli
1 Tbsp. butter or margarine
1 (5 oz.) can evaporated milk
1 (10 3/4 oz.) can broccoli cheese soup (undiluted)
1 (10 3/4 oz.) can Cheddar cheese soup (undiluted)
1 cup long grain rice, cooked according to pkg. directions

In a large skillet over medium heat, saute onion and broccoli in butter or margarine 3 to 5 minutes.  Remove skillet from the heat and stir in milk and soups until smooth.  Stir in rice.  Pour into a greased 2-quart baking dish. Bake uncovered at 350° for 45 minutes, or until heated through and bubbly.

© Margaret's Morsels 


June 29, 2013

Smokin' Hot

Pin It
Margaret's Morsels | Barbecue Baked Beans

Since the 4th of July is next week, I thought I'd share a recipe I first made a couple of years ago for my family's Independence Day celebration.  It's an easy way to add heat to the meal without the fire.

When I think of barbecue, I think of a pulled pork sandwich piled high on a bun and topped with coleslaw.  Or, barbecue spaghetti sauce ladled on a plate of hot cooked spaghetti.  Or, something I make at home, barbecue chicken breasts that have been cooked in the crock-pot.  Barbecue isn't just for entrees though.  It makes a great addition to baked beans.

Barbecue Baked Beans are similar to the Easy Stove Top Beans recipe I posted a couple of years ago.  They use a lot of the same ingredients, but have different cooking methods.

The most notable difference is stove top beans use pork and beans, while barbecue baked beans use baked beans.  Sometimes the terms are used interchangeably, but there is a difference between the two.  Canned pork and beans are lighter in color and are made with white beans, tomato sauce and, surprisingly, very little pork.  Canned baked beans are made with additional ingredients which not only gives them a darker color, but makes them sweeter and thicker too.

Both recipes start by cooking bacon and using the grease to saute chopped onion.  Once the onion is sauteed 


Margaret's Morsels | Barbecue Baked Beans


and drained,


Margaret's Morsels | Barbecue Baked Beans


the baked beans 


Margaret's Morsels | Barbecue Baked Beans


are combined with barbecue sauce (this takes the place of the vinegar and catsup used in the easy stove top beans)


Margaret's Morsels | Barbecue Baked Beans


brown sugar,


Margaret's Morsels | Barbecue Baked Beans


the sauteed onion 


Margaret's Morsels | Barbecue Baked Beans


and crumbled bacon.


Margaret's Morsels | Barbecue Baked Beans


Put the mixture in a greased baking dish and bake until heated through, 20 to 30 minutes.

The recipe can be doubled or even tripled, but you might not want to double or triple the barbecue sauce.  It depends on how spicy you want the finished dish.

The barbecue sauce will make the beans smokin' hot.  If that's too much heat for you, check back in a couple of days for a tasty way to cool off your taste buds.


Barbecue Baked Beans
4 Servings

3 bacon strips, cooked and crumbled
2 Tbsp. chopped onion
1 (16 oz.) can baked beans
3/4 cup barbecue sauce
2 Tbsp. packed brown sugar


Saute onion in bacon grease; drain.  Thoroughly combine all ingredients. Put mixture in a greased casserole dish.  Bake at 350° until heated through, 20 to 30 minutes.

© Margaret's Morsels

June 19, 2013

A Bowl Full of Cherries

Pin It
Margaret's Morsels | Cherry Pie Filling Salad

I've posted a lot of recipes that came from my mother.  Today, I thought I'd share one that was given to me by my mother-in-law.  Ironically, I'd seen the recipe in a cookbook years earlier, but dismissed it thinking it wouldn't be any good.  Boy, was I wrong!

Cherry pie filling salad only uses five ingredients.  One of them -- sweetened condensed milk -- is prominently featured in the recipe and the reason I dismissed the recipe in the first place.  It's not that I don't like sweetened condensed milk -- I use it in other recipes -- but I couldn't imagine a salad made with milk.  After all, sweetened condensed milk is, as the name says, milk that has been thickened by removing the water and then sweetened with sugar.

The sweetened condensed milk 

Margaret's Morsels | Cherry Pie Filling Salad


is combined with lemon juice,

Margaret's Morsels | Cherry Pie Filling Salad


crushed pineapple

Margaret's Morsels | Cherry Pie Filling Salad


and cherry pie filling.

Margaret's Morsels | Cherry Pie Filling Salad


My mother-in-law used regular cherry pie filling, but I use lite which has fewer calories and less sodium, carbs and sugar than regular pie filling. When it's mixed with the other ingredients, you won't even be able to taste the difference.  Once these ingredients are thoroughly combined,

Margaret's Morsels | Cherry Pie Filling Salad


a carton of Cool Whip is folded into the mixture.

Margaret's Morsels | Cherry Pie Filling Salad


To make this salad a little healthier, I use Cool Whip Lite which has less fat than regular Cool Whip.  Refrigerate the salad several hours or overnight until it's thoroughly cold.

Although it's called salad and could be served as such, my mother-in-law served it as a dessert.  I serve it that way too, but with a twist.  I like to freeze it in individual paper baking cups.  If you want to freeze it, make sure to use regular or low-fat Cool Whip.  The fat in the Cool Whip helps make the salad firm when frozen.  You don't need to refrigerate the salad first if you're going to put it in the freezer.

Line a muffin tin with paper baking cups.  You'll need 30 if you want to freeze the entire salad.  Spoon the mixture into the cups, filling almost all the way to the top.

Margaret's Morsels | Cherry Pie Filling Salad


Use a spoon to smooth the top and put the pan in the freezer overnight.

Margaret's Morsels | Cherry Pie Filling Salad

The next day, remove the baking cups from the pan and store them in a covered container in the freezer.

One advantage of using low-fat Cool Whip is that, when frozen, it's not rock hard.  You can take it out of the freezer and serve it immediately without having to wait for it to soften.  If you use regular Cool Whip, remove the desired number from the freezer and let them soften a few minutes at room temperature before serving.

You can skip freezing the salad and serve it straight from the refrigerator.  I serve part of it this way and freeze the rest.  When the temperature goes from hot to scorching in the summer, these individual frozen treats are much more refreshing than a popsicle or scoop of ice cream.

Margaret's Morsels | Cherry Pie Filling Salad


Cherry Pie Filling Salad
4 to 6 Servings or 30 Servings if Frozen

1 (14 oz.) can sweetened condensed milk
1/4 cup lemon juice
1 (20 oz.) can crushed pineapple, drained
1 (21 oz.) can cherry pie filling
1 (8 oz.) carton Cool Whip, thawed*

Mix the first four ingredients.  Fold in Cool Whip.  Mix well and refrigerate. Store leftovers in the refrigerator.

To freeze, put paper baking cups in a muffin pan.  Spoon the mixture into the  cups, filling almost all the way to the top.  Use a spoon to smooth the top and put the pan in the freezer overnight.  The next day, remove the baking cups from the pan and store them in a covered container in the freezer.

*If freezing the salad, use regular or low-fat Cool Whip, not fat-free.


© Margaret's Morsels

June 6, 2013

Say Cheese: Vegetable Edition

Pin It
Margaret's Morsels | Broccoli Au Gratin

A couple of years ago, I shared a recipe for fresh steamed broccoli with lemon -- not cheese -- sauce.  When I don't have fresh broccoli on hand or I want to serve something a little fancier, I pull out a recipe my mom used to make called Broccoli Au Gratin.  The name may sound intimidating, but the recipe is really easy to make.  Au gratin is just a French word that means to sprinkle food with bread crumbs, grated cheese, or both and then brown it in the oven.

Instead of fresh broccoli, this casserole uses a 16 ounce package of frozen chopped broccoli that's cooked according to package directions.  While the broccoli is cooking, crumble enough Ritz crackers to equal 1/2 cup crumbs -- about 13 crackers.  The easiest and neatest way to do this is to put the crackers in a plastic bag

Margaret's Morsels | Broccoli Au Gratin

and crush them with your hands.

Margaret's Morsels | Broccoli Au Gratin

When the broccoli is almost done, bring a can of undiluted cream of chicken soup to a boil over low heat.

Margaret's Morsels | Broccoli Au Gratin

Remove the soup from the heat and stir in the grated cheese until it's melted.


Margaret's Morsels | Broccoli Au Gratin

I use 98% fat-free soup which has less sodium than regular soup.  For that reason, I stir in 1/2 teaspoon of salt when I add the cheese.

Thoroughly drain the broccoli, stir it in the soup mixture and spread it in a greased casserole dish.

Margaret's Morsels | Broccoli Au Gratin

Most recipes call for cracker crumbs to be combined with melted butter or dotted with butter, but not this one.  It doesn't use any butter.  I actually prefer it this way because the crumbs won't be soggy when you reheat the leftovers.  Sprinkle the cracker crumbs on top 

Margaret's Morsels | Broccoli Au Gratin

and bake the casserole at 350° for 30 minutes.

My mom served Broccoli Au Gratin with a variety of entrees, but I especially like to serve it with Microwave Tuna and Noodle Parmesan.

Margaret's Morsels | Broccoli Au Gratin

No matter what you choose to serve it with, the recipe is a nice alternative to steamed broccoli.  It's also an easy, tasty and inexpensive way to dress up an ordinary package of frozen chopped broccoli.

Broccoli Au Gratin
6 Servings

1 (16 oz.) pkg. frozen chopped broccoli, cooked and drained
1 (10 3/4 oz.) can cream of chicken soup (undiluted)*
1/2 cup shredded Cheddar cheese
1/2 cup crushed Ritz cracker crumbs (approximately 13 crackers)

Cook broccoli according to package directions; drain.  Bring undiluted soup to a boil over low heat; remove from heat and stir in cheese until it's melted.  Stir in broccoli.  Place mixture in a greased casserole dish; sprinkle with cracker crumbs.  Bake at 350° for 30 minutes.

*If using 98% fat-free soup, add 1/2 teaspoon salt when you add the cheese.

© Margaret's Morsels