Showing posts with label do ahead. Show all posts

November 23, 2015

A Do Ahead Side

Pin It
Margaret's Morsels | Adobo Green Beans

A couple of years ago at a church potluck, I saw a bowl filled with green beans and onions.  Normally, I would have ignored the dish -- I don't like beans with onions -- but the beans smelled delicious so I put a small serving on my plate.  After one bite, two things were apparent.  One, the beans were flavored with something besides onion.  Two, I wanted the recipe!

As the potluck wound down, I watched as people collected their bowls and pans from the food table.  When I saw Aaron, owner of the now empty bowl, pick it up off the table, I walked over and asked how he made the beans.  He graciously shared the recipe and I made the beans for the first time a few weeks later for Thanksgiving.

The recipe starts with a can of cut green beans.  The liquid is drained into a saucepan with some water, chopped onion and -- the ingredient that makes the beans so good -- adobo all purpose seasoning.

Margaret's Morsels | Adobo Green Beans

I wasn't familiar with adobo so I looked it up on the Internet.  My search yielded a lot of recipes for making the seasoning using salt, paprika, black pepper, onion powder, oregano, cumin, garlic powder and chili powder, or some combination of these ingredients.  I didn't mess with perfection and bought a bottle of Goya adobo all-purpose seasoning with pepper which is what was called for in Aaron's recipe.

Margaret's Morsels | Adobo Green Beans


I assumed the seasoning would be with all the other spices, but I found it in the aisle with Hispanic food.  The Goya brand is available in many different varieties!

Margaret's Morsels | Adobo Green Beans

The liquid, onion and adobo are brought to a rolling boil for 30 minutes. During this long boiling time, the liquid is reduced, thereby intensifying the flavor of the remaining liquid.  

Margaret's Morsels | Adobo Green Beans
After boiling for 30 minutes.

The beans are added to the pot and simmered over low heat for 15 minutes.  You can add water, if necessary, but don't add too much or it will dilute the wonderful flavor of the beans.

Margaret's Morsels | Adobo Green Beans

The beans can be served the same day they're cooked, but I think they're better reheated the next day after the flavors have had time to blend.  You can reheat the beans on the stove, or in a crock-pot.  Using a crock-pot is a big help at the holidays, especially if there's not a spare burner available on the stove.  You also don't have to keep a constant eye on the beans since the crock-pot does all the work for you.

Green beans have always been on our Thanksgiving table, but now I fix them ahead of time.   When I'm cooking holiday meals, any dish that can be made ahead is something I'm thankful for!

Aaron's Green Beans
6 to 8 Servings

1 (28 oz.) can cut green beans
1/2 cup chopped onion
1 1/2 tsp. adobo all-purpose seasoning
1 cup water

Drain liquid from beans into a saucepan; add onion, adobo and water. Bring ingredients to a boil and let boil for 30 minutes.  If the liquid is reducing too quickly, turn the heat down.  Add the green beans and, if necessary, a little additional water.  Turn heat to low and simmer 15 minutes.  Let the beans cool and then store them in a covered container in the refrigerator overnight to allow the flavors to blend.  The next day, reheat beans in a crock-pot on low for 2 hours, or until heated through.

© Margaret's Morsels

December 24, 2013

A Yearly Tradition

Pin It
Margaret's Morsels | Bacon Quiche

A couple of years ago, I wrote about the cheese ball, German Christmas cookies and Kool-Aid punch my mother made every year at Christmas. Today, I thought I'd share a Christmas tradition that started quite by accident.

One year when my son was young, I invited some in-laws over to watch him open presents and eat breakfast with us on Christmas morning.  I wasn't sure what I was going to cook, but I knew I didn't want to spend all morning working in the kitchen.  As I was going through my recipes, I came across a quiche recipe a cousin had given me two months earlier.  I decided it would be the perfect dish for a Christmas morning breakfast. Not only would I be able to join everyone in the festivities, I could do the majority of the work the night before!

Bacon Quiche is very similar to Quiche Lorraine -- a bacon and cheese quiche -- with a few differences.

  • Bacon Quiche doesn't use a quiche pan or pie plate.  It's made in a 13 x 9 x 2-inch glass baking dish.
  • You don't have to make the pie crust for Bacon Quiche.  It uses a package of refrigerated pie crusts, a real time saver on Christmas morning!

Margaret's Morsels | Bacon Quiche
  • Bacon Quiche uses an entire package of bacon, whereas most Quiche Lorraine recipes use less.
  • Instead of cream -- half and half, whipping or heavy -- Bacon Quiche uses milk.
  • Bacon Quiche uses Cheddar cheese not the traditional Swiss or Gruyere found in Quiche Lorraine.
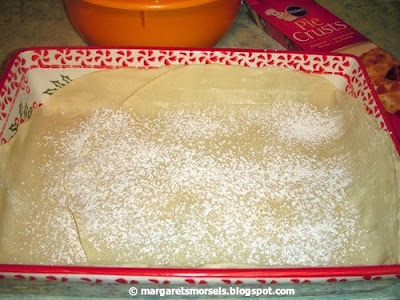
The filling ingredients can be assembled the night before and stored in the refrigerator.  The next morning, put both pie crusts in a glass -- not metal -- baking dish.  I made the quiche in a metal pan once and, although the filling was good, the crust never did get brown.  Sprinkling the pie crusts with flour helps keep the crust from getting soggy.

Margaret's Morsels | Bacon Quiche

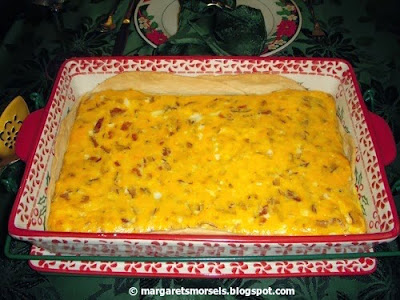
Add the filling and bake for 40 to 45 minutes. 

Margaret's Morsels | Bacon Quiche

Add a side of fresh fruit or a fruit salad and breakfast is ready!

Since the quiche was easy to make and so well received, I decided to make it again the next Christmas.  I didn't realize it at the time, but I created a Christmas tradition that we'll be observing for the 14th time tomorrow morning.  To keep it special, I only make the quiche on Christmas.  This gives my family something to look forward to, just like the day we're celebrating.

Bacon Quiche
6 to 8 Servings

1 (14.1 oz.) pkg. refrigerated pie crusts
1 (12 oz.) pkg. bacon, cooked, drained and crumbled
6 eggs, beaten
2 cups milk
2 cups shredded Cheddar cheese
salt and pepper to taste

Put both pie crusts in an ungreased 13 x 9 x 2-inch glass baking dish. Flour the bottoms and sides of the pie crusts.  Combine remaining ingredients and pour on top of crusts.  Bake at 375° for 40 to 45 minutes.

Filling ingredients can be assembled the night before and stored in the refrigerator. 

© Margaret's Morsels

November 10, 2011

Assemble Today, Bake Tomorrow

Pin It
Margaret's Morsels | French Toast Souffle

It's nice to have a wide variety of recipes to choose from:  family favorites handed down through the generations; crock-pot recipes that cook all day; recipes that can be prepared in 30 minutes or less; recipes for comfort food that nourish the body and soothe the soul; recipes that can be assembled the night before and baked the next day.  The last category is a real timesaver, especially when you want to serve a nice breakfast.

Although not a souffle in the traditional sense, French Toast Souffle is a light airy dish that elevates French toast from ordinary to extraordinary. Although the word "souffle" may sound intimidating, this recipe is really easy to prepare.  You don't even need a souffle dish.  It's baked in a 13 x 9 x 2-inch baking dish.

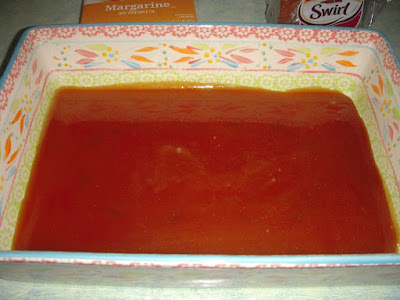
Start by cooking a combination of brown sugar, butter and corn syrup in a saucepan.  If you've never worked with cooked sugar before, take it from me, it's hot.  I have the scar to prove it!  Don't touch the mixture with your hands and try to avoid splatters.  Pour the mixture in the baking dish, spreading it to cover the bottom completely.  It hardens fast so work quickly.


Margaret's Morsels | French Toast Souffle


The original recipe used a loaf of cinnamon bread cut into 1-inch thick slices.  I've never been able to find unsliced cinnamon bread so I substitute a loaf of sliced cinnamon bread.  Since the slices are thin, I use two slices for each serving.  Stack the bread on top of the brown sugar mixture, inserting a toothpick in each serving to hold the two slices together.

The remaining ingredients -- eggs, half and half, vanilla and salt -- are combined and poured over the bread.  For additional flavor, a dash of cinnamon can be added to the mixture, if desired.  Cover the pan and put it in the refrigerator overnight.

The next morning, remove the pan from the refrigerator and let it stand at room temperature while the oven preheats.


Margaret's Morsels | French Toast Souffle
This is what it looks like after being
refrigerated overnight.

It takes 40 to 45 minutes for the souffle to cook, but it's worth the wait! When cooked, the brown sugar mixture melts and becomes a delicious sauce that can be spooned over the French toast in place of syrup.


Margaret's Morsels | French Toast Souffle

Add some bacon and fresh fruit and you've got a meal that everyone will think you spent hours preparing!


French Toast Souffle
6 Servings

1 cup packed brown sugar
1/2 cup butter
2 Tbsp. light corn syrup
12 pieces sliced cinnamon bread 
8 eggs, beaten
3 cups half and half or light cream
2 tsp. vanilla
1/2 tsp. salt
dash of cinnamon (optional)

In a medium saucepan, combine the brown sugar, butter and corn syrup; cook and stir until the mixture comes to a boil.  Boil uncovered 1 minute. Pour into a 13 x 9 x 2-inch baking dish, spreading to cover the bottom evenly.  Arrange bread, two slices per serving, on top of the brown sugar mixture, inserting a toothpick to hold the slices together.  In a bowl, combine the remaining ingredients; pour over bread slices.  Cover and refrigerate overnight.

Preheat the oven to 350°.  Let the baking dish stand at room temperature while the oven preheats.  Bake uncovered for 40 to 45 minutes, or until the top is browned and puffed and a knife inserted near the center comes out clean.  Remove toothpicks before serving.  Refrigerate leftovers.


© Margaret's Morsels


December 9, 2010

Party Food

Pin It

Margaret's Morsels | Little Corn Dogs

I always loved planning birthday parties for my son.  When he was younger, he'd choose a theme -- building, cars, Legos -- and we'd plan food and games to go with the theme.  Although the theme changed every year, one thing remained the same.  He always wanted Little Corn Dogs, also known as pigs in a blanket, on the menu.


You can buy pigs in a blanket in the freezer section at the grocery, but if you have the time they're easy to make.  All you need is canned dough and cocktail wieners.  Most recipes use a can of crescent rolls.  The recipe I liked and made for years used a can of cornbread twists instead. Unfortunately, cornbread twists are no longer on the market.  All is not lost, though, because you can recreate the taste and texture with only one additional ingredient.


I don't care for pigs in a blanket made with crescent rolls so I substitute a can of breadsticks.  After I take the breadsticks out of the can, I coat both sides with the secret ingredient:  cornmeal.  The cornmeal is what gives the finished product a wonderful texture.


Margaret's Morsels | Little Corn Dogs
I coat the dough before cutting it into thirds.

There are 12 breadsticks in a can so I cut the breadsticks into thirds.  This gives me 36 pieces which is enough for one 14 ounce package of cocktail wieners.  The easiest way to assemble them is to put the cocktail wiener on one end of the dough and roll the wiener and dough to the other end. Once the wiener is covered with dough, roll the seam back and forth on the work surface to smooth the seam and seal it completely.


Margaret's Morsels | Little Corn Dogs
Start rolling from one end to the other.

Most directions say to bake the pigs in a blanket at the temperature listed on the can of dough.  I think they brown better if they're baked at a higher temperature.  I bake them at 450° until the dough is brown, about 10 to 15 minutes.

Today is my son's birthday, but he doesn't want a party or pigs in a blanket this year.  He requested Marinated Baked Chicken for supper instead.  At least he still wants Peanut Butter Pie instead of cake for dessert.  I guess some things never change!

Little Corn Dogs

1 (11 oz.) can refrigerated breadsticks
1 (14 oz.) pkg. cocktail wieners
cornmeal (optional)

Coat breadsticks with cornmeal, if desired.  Separate breadsticks into strips.  Cut strips into thirds.  Wrap each strip around one cocktail wiener. Place seam side down on greased cookie sheet.  Bake at 450° for 10 to 15 minutes, until golden brown.


© Margaret's Morsels


November 5, 2010

Confessions of a Tea Drinker

Pin It
Margaret's Morsels | Fruit Tea


My Southern roots run deep.  When my ancestors immigrated to America, they settled in the South.  My parents were born and bred in the South. Except for the 10 years I lived overseas when my dad was in the service and the year I lived in New York City as an adult, the rest of my life has been spent South of the Mason Dixon line.  Given my Southern heritage, it's surprising I didn't like the most quintessential Southern beverage, iced tea, until a few years ago.

Like most Southerners, my mom served ice tea at lunch and supper.  Even with this early exposure to tea, I never could acquire a taste for the beverage.  As I got older and attended more functions where tea was being served, I had opportunities to try the beverage in various forms:  sun tea, sweetened tea, unsweetened tea, tea with lemon juice, tea without lemon juice, hot tea and even instant tea.  No matter how it was prepared, I just didn't like it.

Ten years ago, I was at a function and Fruit Tea was being served.  It was a typical sultry Southern day and the tea looked inviting so I tried a glass. Much to my surprise, I absolutely loved it.  The hostess graciously shared the recipe with me and I've been making it ever since.

Why am I talking about tea now that the weather's cooler?  Two reasons. First, Southerners drink tea year round.  Second, the holidays are rapidly approaching and no family function would be complete if I didn't make Fruit Tea.

The recipe for Fruit Tea is nothing more than sweet tea with a couple of extra ingredients.  It's the addition of pineapple juice, lemon juice and ginger ale that turned me into a tea drinker!  When someone drinks the tea for the first time, I'm always asked what makes it so effervescent.  There's been a lot of guesses, but no one has ever guessed ginger ale.


Margaret's Morsels | Fruit Tea

One batch of Fruit Tea makes eight servings.  If I'm making tea for a crowd, I make several batches, but I make them one at a time.  The tea is best made the day it's being served because the pineapple pulp settles at the bottom after a day or two.  If there's any leftover tea, I strain it to remove the pulp before I drink it.  

Although I love Fruit Tea, I don't fix it on a regular basis.  I fix it several times during the year, especially in the summer, and I always make it for holiday functions.   Although I still don't drink sweet tea, I am experimenting and recently enjoyed a glass of peach tea.  Maybe I'll be adding that recipe to my collection too.


Fruit Tea
8 Servings

2 1/2 cups water
2 family size tea bags
1 cup sugar
2 (6 oz.) cans pineapple juice
1/4 cup lemon juice
3 (12 oz.) cans ginger ale

Bring water to a boil.  Pour over tea bags; cover and steep 5 minutes. Pour tea over sugar, stirring until sugar is dissolved.  Add remaining ingredients; stir well. Refrigerate.


© Margaret's Morsels