Showing posts with label Pie. Show all posts

November 25, 2015

Pure Pumpkin

Pin It
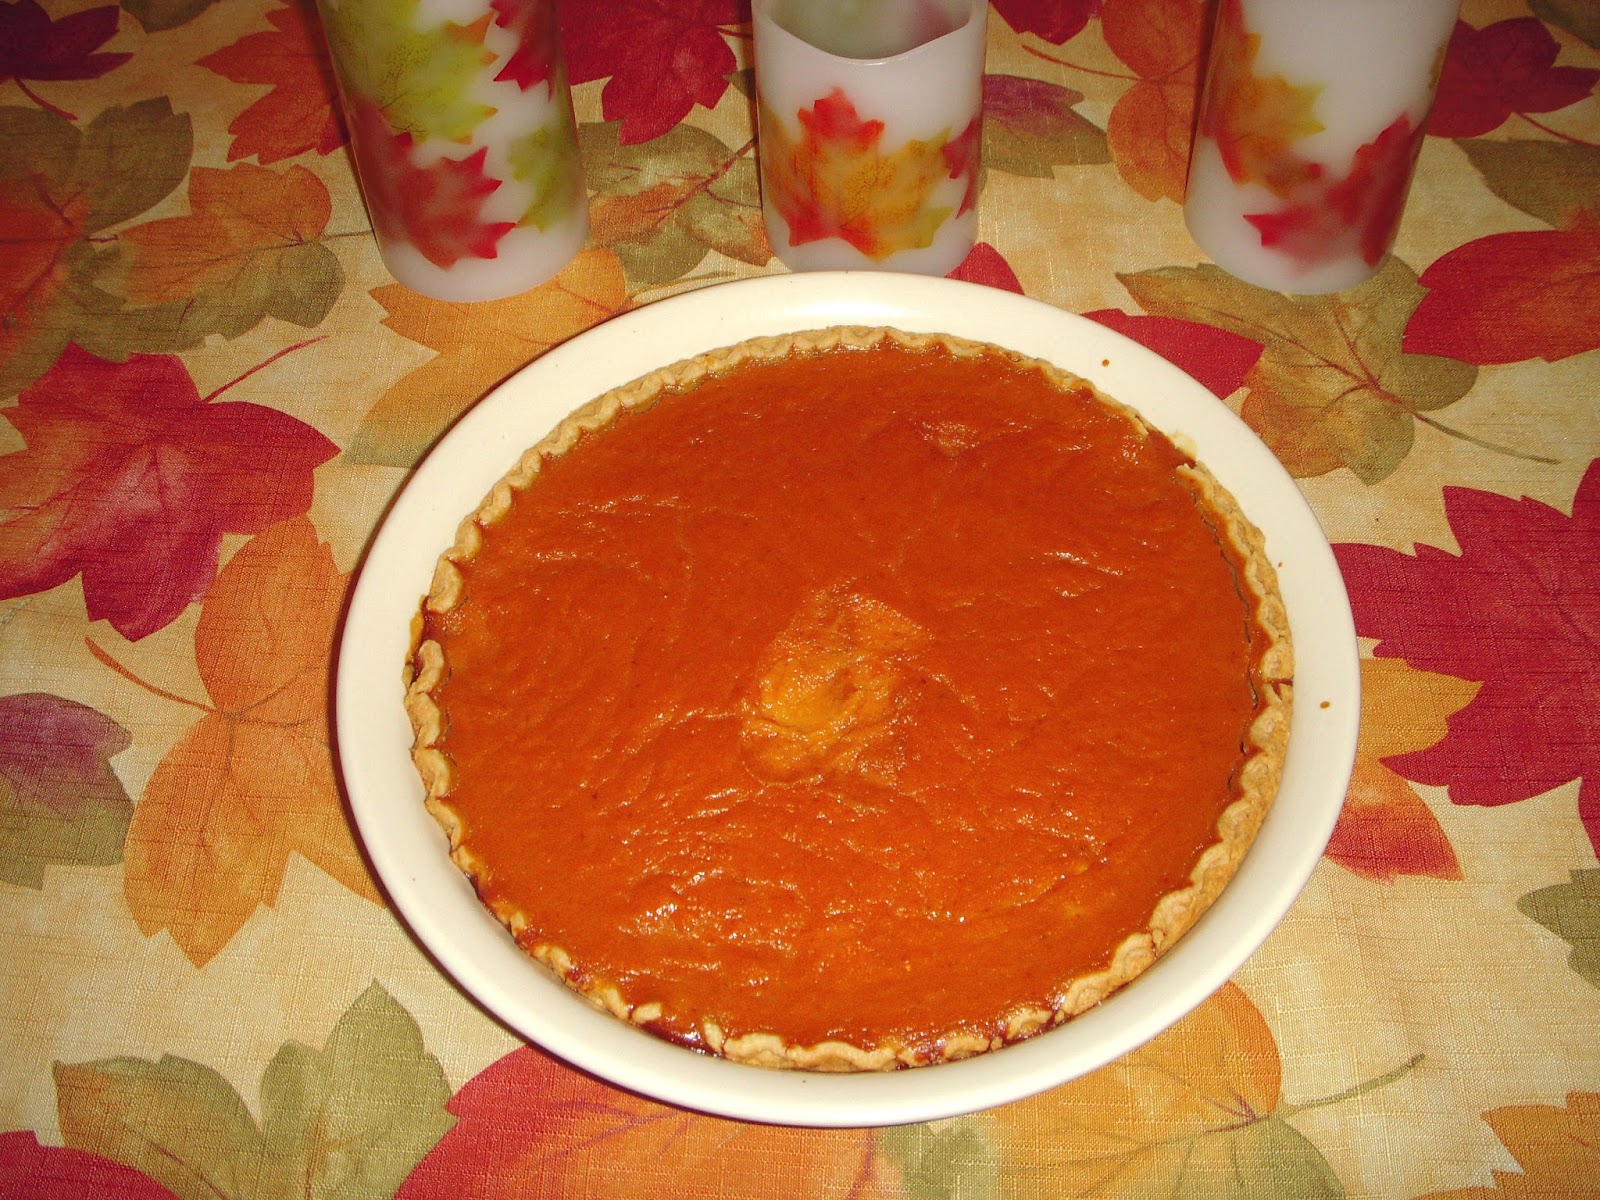
Margaret's Morsels | Pumpkin Pie

This time last year -- the afternoon before Thanksgiving -- I realized I'd failed to buy a can of pumpkin pie mix at the grocery.  I couldn't go to the grocery because I was too busy baking biscuits and cornbread for Cornbread Dressing, making Potato Salad and Sweet Potato Souffle, cooking Aaron's Green Beans, whipping up a Chocolate Dream Pie and prepping ingredients for homemade rolls.  My then 16 year old only had his learner's permit so he couldn't go to the grocery for me.  I texted my husband and asked if he could pick up a can of pumpkin pie mix on his way home from work.  This meant it would be later in the evening before I could make the pie but, with the sugar and spices already added to the mix, it would be a quick task.

When my husband got home, he explained that the grocery was out of pumpkin pie mix and handed me a can of pumpkin puree.  He said he hoped it would be ok since he knew I kept a well stocked pantry.  I wasn't thrilled about making a pie from scratch --  after all I'd been cooking all day -- but I knew he was right.  This is how I'd always made Pumpkin Pie until a sister-in-law introduced me to timesaving pumpkin pie mix 20 something years earlier.


Margaret's Morsels | Pumpkin Pie


The pumpkin, eggs, sugar, salt, spices and evaporated milk are mixed by hand with a spatula.  If you read my blog, you know I like to substitute healthier ingredients whenever possible.  However, this is one time I use regular evaporated milk instead of the fat-free version.  The fat in the milk helps make the pie firm which means the pieces hold their shape better.

The filling goes into a pie crust, but not just any pie crust.  My mother taught me to always use a deep-dish pie crust, no matter what kind of filling goes in the crust.  Not only does a deep-dish crust hold more of the scrumptious filling, it keeps the filling from spilling over into the oven.

Unlike my mother, I don't make my own pie crust.  I always use frozen store bought pie crusts, unless the recipe specifically calls for a package of refrigerated pie crusts.  However, I have a trick for making a store bought pie crust look homemade.  I transfer the pie crust from the foil pan to a pretty glass pie plate.


Margaret's Morsels | Pumpkin Pie


To do this, let the crust soften at room temperature for a few minutes.  Turn the pan over, letting the crust fall into your hand and transfer it to your pie plate.  If the crust doesn't fall out the first time, let it sit a few more minutes. Don't force the crust out, or you'll risk breaking the crust.

If you're transferring the pie crust, make sure to use a pie plate that's close to the size of the pie crust.  A frozen 9-inch pie crust works perfectly in my 10-inch pie plate.  My experience has been that the crust expands during baking and conforms to the size of my pie plate.

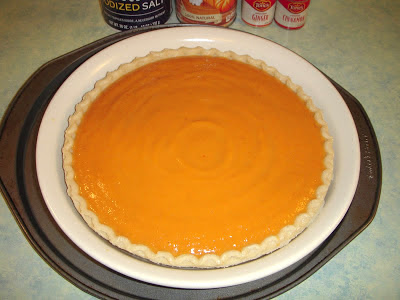
Put the pie plate on a baking sheet and add the filling.

Margaret's Morsels | Pumpkin Pie


Bake the pie an hour and then let it cool on a wire rack before storing it in the refrigerator.

I'm thankful pumpkin pie mix exists, but I'm also thankful for canned pumpkin puree.  Without it, I'd have to seed, cut, roast and puree the pumpkin before making the pie!


Pumpkin Pie
8 Servings

1 (9-inch) deep-dish pie crust
2 eggs
1 (15 oz.) can pumpkin
3/4 cup sugar
1/2 tsp. salt
1 tsp. cinnamon
1/2 tsp. ginger
1/4 tsp. cloves
1 (12 oz.) can evaporated milk (not fat-free)

Preheat oven to 425°.  Lightly beat eggs.  Add remaining ingredients; stir until thoroughly combined.  Put pie plate on a baking sheet; pour filling into pie crust.  Bake 15 minutes.  Reduce oven temperature to 350°.  Bake 45 minutes longer, or until knife inserted in center comes out clean.  Remove from baking sheet and cool 2 hours on a wire rack.  Refrigerate. 

© Margaret's Morsels

November 18, 2015

Thanksgiving Recipe Roundup

Pin It
It's hard to believe Thanksgiving is only eight days away!  If you're planning your menu or looking for something new to serve, here's some Thanksgiving recipes I've shared in the past.  I'm putting the finishing touches on two recipes -- one vegetable, one dessert -- I plan to post before Thanksgiving.  


Margaret's Morsels | Cranberry Delight Spread

Margaret's Morsels | Sweet Potato Souffle

Margaret's Morsels | Potato Salad

Margaret's Morsels | Carrot Souffle

Margaret's Morsels | Pecan Streusel Pumpkin Pie

Margaret's Morsels | No Bake Turkey Cookies


© Margaret's Morsels

September 14, 2015

Just Peachy

Pin It
Margaret's Morsels | Quick Fruit Cobbler

In late June, on her way home from Georgia -- a state known for its peaches -- a friend stopped at a roadside stand and bought several baskets of peaches fresh from the orchard.  My family was the lucky recipient of one of those baskets.  The peaches were juicy and delicious and we enjoyed peeling and eating them out of hand.  A few days later at a 4th of July party, I spotted a peach cobbler on the dessert table and knew exactly what I was going to do with the remaining few peaches.

Almost every church or school cookbook has a recipe for fruit cobbler.  A lot of times, the recipe has the word easy, simple, or like the one I'm sharing today, quick in the title.  All three are appropriate adjectives for this easy to make dessert, but I think versatile would be a better description.

Although the recipe I'm sharing is for peach cobbler, you can substitute other fruit for the peaches.  In fact, you can use fresh, frozen or canned fruit in the recipe.  If you're using canned fruit, be sure to use some of the juice or the cobbler will be dry.  If you're using fresh fruit, taste the fruit to see if you need to add additional sugar.  If so, add a little at a time until the fruit reaches the desired sweetness.    

Start by melting a stick of butter or margarine.  Instead of melting this in the microwave, I put the butter in the baking dish and set it in the oven while it's preheating.

Margaret's Morsels | Quick Fruit Cobbler

The butter melts without me having to do anything and it keeps me from dirtying another dish.  


Margaret's Morsels | Quick Fruit Cobbler


The sugar, self-rising flour, milk and vanilla are stirred together to make the batter.  If you don't have self-rising flour, you can substitute all-purpose flour and add 1/4 teaspoon salt and 1 teaspoon baking powder.  Once the ingredients are combined, pour the batter over the melted butter.  Do not stir the two together!

Margaret's Morsels | Quick Fruit Cobbler

If you're using fresh peaches, here's an easy way to keep the cobbler from being dry.  Put the peeled and sliced peaches in a saucepan and heat them on low heat for about 10 minutes.

Margaret's Morsels | Quick Fruit Cobbler


When heated, the juice seeps from the peaches.  This sounds counterproductive, but it's actually the secret to a very moist cobbler, since the juice is distributed over the entire cobbler.


Margaret's Morsels | Quick Fruit Cobbler
Three peaches yielded almost 1/4 cup juice.

Spoon the peaches on top of the batter.  Pour the juice left in the pan all over the top of the cobbler.  Do not stir!!!  


Margaret's Morsels | Quick Fruit Cobbler


The peaches will sink to the bottom and the batter will rise to the top and make a crust.


Margaret's Morsels | Quick Fruit Cobbler


The cobbler is delicious by itself, or served a la mode with a scoop of vanilla ice cream on top.  Either way you serve it, it's just peachy!


Quick Peach Cobbler
6 to 8 Servings

1 stick butter or margarine, melted
3 fresh peaches, peeled and cut into slices 
1 cup sugar
1 cup self-rising flour*
1/4 tsp. vanilla
1 cup milk

*One cup all-purpose flour, 1/4 teaspoon salt and 1 teaspoon baking powder may be substituted for self-rising flour.

Preheat oven to 400°.  Put butter in a 10-inch baking dish and set in the oven to melt while the oven preheats.  Peel peaches and cut into slices. Put the peaches in a saucepan and heat on low heat about 10 minutes. While the peaches are heating, combine remaining ingredients; mix well. Remove baking dish from oven.  Tilt pan to distribute butter, if necessary. Pour the batter over the butter.  Do not stir!  Spoon peaches over the batter.  Pour the peach juice over the top of the cobbler.  Do not stir.  Bake for 20 to 30 minutes until the crust is brown.

© Margaret's Morsels

March 14, 2014

National Pi Day

Pin It
That's not a typo in the title.  National Pi Day isn't referring to the sweet and savory pies we eat, but the Greek letter (Ï€) used in mathematics to represent the numerical value of the ratio of the circumference of a circle to its diameter, approximately 3.14159....  Math is an important part of cooking -- just think of all the fractions!  Since today is March 14 (3/14), I thought it would be fun to use this play on words with pie recipes I've posted in the past.


Margaret's Morsels | Pecan Streusel Pumpkin Pie


Pecan Streusel Pumpkin Pie:  The addition of a streusel topping takes a plain pumpkin pie from ho hum to wow!


Margaret's Morsels | Banana Cream Supreme

Banana Cream Supreme:  This cool and creamy, no bake pie is a cross between banana pie and banana pudding.  


Margaret's Morsels | Lemonade Pie

Lemonade Pie:  What's more refreshing on a hot summer day than a glass of lemonade?  A piece of lemonade pie!  This beat the heat dessert gets its wonderful lemon flavor from a can of lemonade concentrate.  


Margaret's Morsels | Easy Peanut Butter Chip Pie

Easy Peanut Butter Chip Pie:  The pie is made with peanut butter chips and not peanut butter.  If you love chocolate and peanut butter, top the pie with a bottle of chocolate Magic Shell topping!


Margaret's Morsels | Chocolate Dream Pie

Chocolate Dream Pie:  This no bake pie only uses four ingredients and half of them are chocolate!  


Margaret's Morsels | Chocolate Cobbler


Chocolate Cobbler:  This eggless cobbler makes its own chocolate sauce! It's best served hot from the oven with a scoop of ice cream on top!  


Margaret's Morsels | Cookie Apple Cobbler


Cookie Apple Cobbler:  This apple pie is super easy to make.  The crust is made with a package of refrigerated sugar cookie dough!


Margaret's Morsels | Chicken Pot Pie

Chicken Pot Pie:  The picture doesn't do this pie justice!  Refrigerated pie crusts encase a filling made with canned chicken, vegetables, soup, milk and seasonings.


Margaret's Morsels | Broccoli Quiche

Broccoli Quiche:  You don't have to make the pie crust, cook the broccoli or, if you don't mind spending a little extra, even grate the cheese!


Margaret's Morsels | Bacon Quiche

Bacon Quiche:  This quiche uses a package of refrigerated pie crusts and is baked in a 13 x 9-inch pan.  The filling ingredients can be assembled and refrigerated ahead of time.


© Margaret's Morsels


February 13, 2014

Chocolate Lovers Delight

Pin It
Margaret's Morsels | Chocolate Cobbler

Ever since we got married, my husband and I celebrate Valentine's Day at home.  We'd rather go out another night when restaurants aren't as crowded and in a hurry to seat the next party and prices aren't inflated because of the holiday.  To celebrate at home, I always fix something special for supper.  This year, my husband and son both asked if I would fix Grilled Peppered Steaks.  My husband would love Chocolate Covered Cherries for dessert, while our son would prefer a Peanut Butter Pie with a Magic Shell chocolate topping.  Unfortunately, my son doesn't like cherries and my husband doesn't like chocolate and peanut butter combined.  I don't have time to make both so I decided to keep it simple and just make something chocolate.

My mother found the recipe for Chocolate Cobbler in the newspaper in the early 1990's.  The name is misleading because it doesn't use fruit like most cobbler recipes, but like a cobbler it only has one crust.  I've seen the recipe called by other names including, "Pudding Cake," "Fudge Cake" and "Brownie Pudding."

Usually when I serve dessert, it's something that can be made ahead of time and served cold or at room temperature.  Chocolate Cobbler, though, is best served hot from the oven.  To make it less stressful at the end of the day when I'm cooking supper, I measure the cobbler ingredients ahead of time.  By the time supper's on the table, I've got the cobbler mixed up and ready to go in the oven.  By the time supper's over, the cobbler is ready to eat.

The cobbler starts by combining sugar, cocoa, milk, oil and self-rising flour.

Margaret's Morsels | Chocolate Cobbler


Self-rising flour is a time saver because it already has the leavener and salt added.  If you don't have self-rising flour, you can make your own.  For 1 cup self-rising flour, add 1 1/2 teaspoons baking powder and 1/2 teaspoon salt to 1 cup all-purpose flour.

Once the cobbler ingredients are combined, spread them in a greased 8 or 9-inch square pan.

Margaret's Morsels | Chocolate Cobbler


Combine cocoa and brown sugar in a bowl and sprinkle the mixture over the cobbler ingredients.

Margaret's Morsels | Chocolate Cobbler


Unlike white sugar, brown sugar needs to be firmly packed into the measuring cup.  If you need to know how to do this, or want to know why, you can read about it here.

The final ingredient is hot -- not boiling -- water.  Turn the hot water on and let it run until the faucet feels hot to the touch.  Measure the water in a liquid measuring cup and pour it slowly over the brown sugar mixture.  Do not stir the water with the other ingredients!  

Margaret's Morsels | Chocolate Cobbler


Put the pan in the oven and bake the cobbler for 45 minutes.  When you remove the cobbler from the oven, you'll see that the batter has risen to the top and made a crust.  The cocoa and brown sugar mixture melts and turns the hot water into a delicious chocolate sauce underneath the crust!

Margaret's Morsels | Chocolate Cobbler


Scoop the cobbler into a serving dish, making sure to spoon some of the sauce over the top.  The cobbler is good plain, but it's even better topped with whipped cream or a scoop of vanilla ice cream.  For a truly decadent dessert, substitute chocolate ice cream for the vanilla!

Margaret's Morsels | Chocolate Cobbler


Chocolate Cobbler is a tasty way to celebrate Valentine's Day, but it's also a great dessert to serve year round.  It's delicious, easy to mix up and, since it doesn't use eggs, chances are you've got the ingredients on hand. To be on the safe side, though, you might want to keep some ice cream in the freezer!


Chocolate Cobbler
6 Servings

1 cup self-rising flour
1/2 cup sugar
2 Tbsp. cocoa
1/2 cup milk
3 Tbsp. vegetable oil
1 cup brown sugar, firmly packed
1/4 cup cocoa
1 3/4 cups hot water (not boiling)

Combine the first 5 ingredients in a mixing bowl.  Pour into a greased 8 or 9-inch square pan.  Stir together the brown sugar and 1/4 cup cocoa; sprinkle over the batter.  Pour hot water evenly over the brown sugar mixture.  Do not stir!  Bake at 350° for 45 minutes.  While hot, scoop into serving bowls and spoon sauce over each serving.  If desired, top with whipped cream or ice cream.

© Margaret's Morsels

December 31, 2013

Best of 2013

Pin It
This is the time of year when TV news shows and newspapers have stories that highlight the year in review.  With that in mind, I thought I'd count down the top 10 most viewed recipes I posted during 2013. Some of the top 10 came as a surprise, but none more than the recipe that took the number one spot.  I almost didn't post the recipe because I was afraid it wouldn't appeal to many people.  I'm glad this old family favorite was a hit with my readers!  

10.  Strawberry Delight Cake:  A cake recipe that doesn't require any baking!  It doesn't get much easier than that!

Margaret's Morsels | Strawberry Delight Cake


9.  Peanut Butter Fudge:  If you think you can't make candy, think again! There's no cooking involved, unless softening ingredients in a microwave counts as cooking!

Margaret's Morsels | Peanut Butter Fudge


8.  Carrot Cake:  This cake takes some time to make, but it's worth the effort!  Unlike most carrot cake recipes, this one doesn't use pineapple.

Margaret's Morsels | Carrot Cake


7.  Chocolate Dream Pie:  A chocoholics dream.  A pie that only uses four ingredients and half of them are chocolate!  

Margaret's Morsels | Chocolate Dream Pie


6.  Chicken Parmesan:  This version is baked not fried.  It's also kid friendly, delicious and ready in under an hour!

Margaret's Morsels | Chicken Parmesan


5.  Salisbury Steak:  A tasty one dish recipe that turns ground beef from ho hum to wow!

Margaret's Morsels | Salisbury Steak


4.  Cherry Pie Filling Salad:  This versatile dish can be served as a salad or dessert.  It can also be frozen in paper baking cups for a cold treat on a hot summer day!

Margaret's Morsels | Cherry Pie Filling Salad


3. Unfried Refried Beans:  These beans look and taste like refried beans, but there's a twist.  They're not fried at all!

Margaret's Morsels | Unfried Refried Beans


2.  Eggs Benedict Casserole:  You don't have to poach a single egg to make this version of Eggs Benedict.  With this recipe, it's easy to make brunch for a bunch!

Margaret's Morsels | Eggs Benedict Casserole

1.  Loaf Cake:  This unfrosted, made from scratch, plain pound cake made with my grandmother's recipe was the most popular recipe I posted this year.  It's an oldie, but goodie!

Margaret's Morsels | Loaf Cake


As 2013 draws to a close, I want to thank everyone for reading Margaret's Morsels.  I especially appreciate the comments, emails and feedback. This interaction is what makes sharing the recipes worthwhile!  This year was challenging on several levels and I wasn't able to post as frequently as I wanted.  Hopefully, I'll be sharing a lot more recipes in 2014.  My husband gave me a 35mm camera with lenses and some other blogging necessities for Christmas, so I have some things in mind for Margaret's Morsels in 2014.  In the meantime, 
HAPPY NEW YEAR FROM MY KITCHEN TO YOURS!!!!!

© Margaret's Morsels