© Margaret's Morsels
Welcome to Margaret's Morsels!!! I hope you'll enjoy these cooking tips, techniques and recipes. If you like the site, please share it with a friend! I love to interact with readers so feel free to leave comments, questions or feedback or email me directly at margaretsmorsels@yahoo.com. Thanks for stopping by! Check back soon for the latest morsel. Bon Appetit!
Showing posts with label dressing. Show all posts
Showing posts with label dressing. Show all posts
November 18, 2015
Thanksgiving Recipe Roundup
November 7, 2012
Thanksgiving Traditions
and Baked Ziti with salad and garlic bread.
This habit comes in handy at Thanksgiving, especially when the fourth Thursday in November falls early like it does this year. My Thanksgiving menu will be reminiscent of years past which, in reality, is almost identical to what my mother served every year at Thanksgiving.
There will be slices of roast turkey on a colorful turkey serving platter and a big bowl of Cornbread Dressing. To save time, I bake the frozen biscuits and packaged cornbread mix the day before. The recipe makes a lot -- 8 to 12 servings -- so if there's any left, you can freeze it and use it later.
A lot of people serve mashed potatoes on Thanksgiving, but my mother always served Potato Salad and so do I. In fact, it's the only Thanksgiving recipe I use that came from my mother. This tasty side dish can be made one or two days ahead of time. You can substitute a 24 ounce package of Ore-Ida Steam 'n Mash cut Russet potatoes and avoid peeling, dicing and cooking the potatoes.
If you prefer sweet potatoes, I've got two recipes to share. Sweet Potato Souffle, a fancy name for sweet potato casserole, can be made with three pounds of sweet potatoes or a package of Ore-Ida Steam 'n Mash cut sweet potatoes. It can be made a day or two ahead of time and reheated in the oven or microwave. If you leave it in the dish you baked it in, no one will even know it was made ahead of time.
Quick and Easy Candied Sweet Potatoes are a nice alternative to the traditional casserole. You don't have to peel potatoes because this recipe uses canned sweet potatoes. Unlike the sweet potato souffle that can be made ahead of time, this is best made right before serving. It only takes a few minutes and is cooked on the stove top, which is helpful when the oven is already being used.
If you're a cranberry lover like me, I've got three tasty recipes that share some of the same ingredients, but with completely different textures. The first one, Cranberry Orange Relish, is a sweet-tart combination made with fresh cranberries, apple, orange, pineapple and sugar. It can be made up to two weeks ahead of time and stored in the freezer.
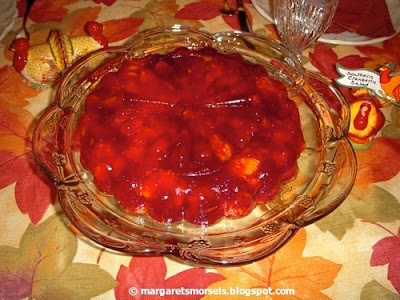
Southern Cranberry Salad is a congealed salad that combines whole berry cranberry sauce, mandarin oranges and pineapple with cherry gelatin. It can be made a couple of days ahead of time.
Cranberry Orange Casserole also uses whole berry cranberry sauce and mandarin oranges, but not pineapple. The sauce and oranges are combined with lemon juice and sugar and baked in the oven. Unlike the other two cranberry recipes that can be made ahead of time and served cold, this one is best served hot from the oven. The recipe can easily be doubled or tripled.
My mother made homemade rolls from scratch, but I use a bread machine to make One Hour Buttermilk Rolls, which means they take longer than an hour to make. If you don't have a bread machine, the recipe includes directions for making the rolls by hand. The rolls can be made a month ahead of time, stored in the freezer and reheated in the oven or microwave.
To quench everyone's thirst, I serve Fruit Tea. This sweet tea is combined with pineapple juice, lemon juice and, the secret ingredient, ginger ale. It's best made the day it's served.
I'll be posting some new Thanksgiving recipes next week, including a dessert that combines two traditional Thanksgiving flavors.
© Margaret's Morsels
August 10, 2012
Better than Store Bought
Earlier this week, I shared my version of the restaurant entree, Chicken Tender Salad. When I serve this to a group, I put a variety of salad dressings on the table. When I serve it to my family, I only put one dressing on the table. Not just any dressing, but a made from scratch honey mustard dressing.
Honey mustard dressing, as the name implies, is made from honey and mustard plus additional ingredients. Some recipes use Dijon mustard which contains white wine while others use prepared mustard. Some recipes use sour cream to make the dressing creamy while others use mayonnaise.
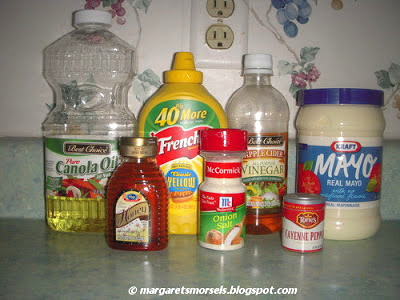
In addition to honey and mustard, the recipe I'm sharing also uses vegetable oil, mayonnaise, cider vinegar, onion salt and cayenne pepper.
The last two ingredients -- onion salt and cayenne pepper -- call for a dash and pinch respectively. When a recipe calls for a dash and the spice jar has a lid with holes, I gently tap the jar two times for a dash. I only tap the jar one time for a pinch. If you're afraid too much will come out, tap the jar over a bowl or a piece of wax paper and add the desired amount to the mixture.
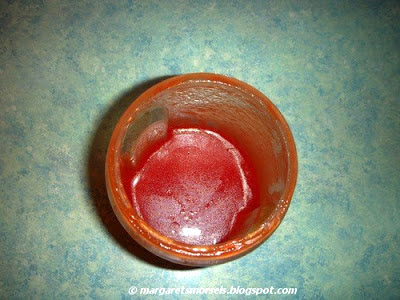
A pinch of cayenne pepper
If your jar doesn't have holes in the lid, a good rule of thumb is a pinch is approximately 1/16 teaspoon; a dash, 1/8 teaspoon.
Thoroughly combine the ingredients and store in a covered container in the refrigerator. The dressing is best made one day ahead so the flavors have time to blend.
The dressing is delicious on salads, but it's also good with chicken nuggets, fries and club sandwiches. My son likes to spread it on a turkey sandwich and my husband uses it as a dip for carrots. No matter how you choose to use it, it's better than store bought.
Honey Mustard Dressing
2 1/2 Cups
6 Tbsp. honey
6 Tbsp. prepared mustard
6 Tbsp. vegetable oil (I use canola)
1 1/3 cups mayonnaise
1 tsp. cider vinegar
dash of onion salt
pinch of cayenne pepper
Mix ingredients thoroughly. Cover and store in the refrigerator.
© Margaret's Morsels
November 15, 2011
Stuffing or Dressing?
For many people, the centerpiece of the Thanksgiving table is a succulent roast turkey. For others, the most highly anticipated dish is the dressing. There are two schools of thought when it comes to this versatile side dish: stuffing or dressing. Some people say they're the same, but they're not.
The most obvious difference is stuffing is, well, stuffed in the turkey and baked. Dressing, on the other hand, is baked separately in a pan. Stuffing tends to be more common north of the Mason-Dixon line and dressing more common in the South. People in some parts of the country use white or wheat bread as the base whereas Southerners use cornbread.
A typical recipe for Southern dressing includes cornbread, white bread -- usually biscuits -- celery, onion, chicken broth, poultry seasoning, sage, salt, pepper, eggs and, if you cook the vegetables, butter. Additional ingredients vary depending on which region of the country you reside. Common additions include oysters, rice, sausage, turkey giblets, dried cherries, cranberries, pecans and almonds.
For years, I made cornbread dressing using my mother's recipe. Although the dressing was good, it was never as good as what my mother always prepared. A couple of years ago, one of my nieces made the best cornbread dressing I'd ever tasted. She shared the recipe with me and it has since become a staple on my holiday table. The recipe makes a lot so be sure to use a big mixing bowl. I don't have a mixing bowl big enough so I mix everything in my biggest stockpot.
The recipe uses the ingredients listed above for Southern dressing, but with two notable differences. First, the recipe uses cornbread and Mexican cornbread. The Mexican cornbread adds additional flavor without any additional work. Second, in addition to chicken stock, the recipe also uses milk.
To save time, I bake the cornbread and biscuits the day before and store them in a covered container. When I'm ready to assemble the dressing, I use a food processor to chop the cornbread and biscuits into very fine crumbs. If you don't have a food processor, grate the bread into crumbs using a hand or box grater. No matter which method you use, you want the crumbs to look like this:
Crumbs made with the cornbread.
If you've got a food processor, use it to chop the onions and celery too. They also need to be chopped very fine which, of course, you can also do with a knife.
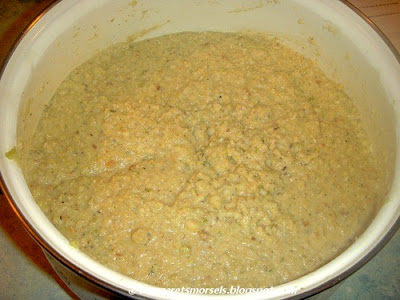
Once everything is chopped, cooked and combined, add milk to the dressing until it's the consistency of a thick cake batter. Don't add too much milk; you don't want the dressing to be soupy.
The dressing after the milk has been added.
When all the ingredients are combined, there's enough dressing to fill a 13 x 9 x 2-inch pan and a 9-inch pan. Bake the dressing 45 minutes covered with foil; remove the foil and bake an additional 15 minutes to brown the top.
The house smells so good while the dressing bakes. To dressing aficionados, the dressing makes the house smell like Thanksgiving more so than the turkey!
Cornbread Dressing
8 to 12 Servings
1 (6.5 oz.) pkg. yellow cornbread mix
1 (6 oz.) pkg. Mexican cornbread mix
15 biscuits (canned, frozen or homemade)
1 stick butter
3 onions, finely chopped
6 celery stalks, finely chopped
6 eggs, beaten
2 tsp. salt
pepper to taste
2 tsp. poultry seasoning
4 tsp. sage
1 (32 oz.) box chicken broth
1 (14 oz.) can chicken broth
milk
Cook cornbread and biscuits; cool. Chop into very fine crumbs using a food processor. Mix to evenly distribute. Chop onions and celery in a food processor. Melt butter and cook onions and celery for about 15 minutes until wilted.
Add eggs to the bread crumbs. Stir in salt, pepper, poultry seasoning and sage. Stir well; mixture will be very thick. Stir in cooked vegetables. Add chicken broth, adding additional broth, if necessary. Add milk so the mixture is the consistency of thick cake batter.
Pour mixture into a greased 13 x 9 x 2-inch pan and a greased 9-inch square pan. Cover each pan with foil and bake at 350° for 45 minutes. Remove foil and bake for 15 minutes to brown the top.
© Margaret's Morsels
June 20, 2011
Dressing it Up
To solve the problem of leftover French dressing, I decided to make my own. This was harder than I thought since there are a lot of recipes for French dressing. It took a few tries, but I finally found a recipe I like and my husband likes too. It only makes a few servings so there's not a lot left over.
Unlike some recipes for French dressing, this one only uses six ingredients. There's no chopping -- only measuring -- so it only takes a few minutes to prepare. You can eat it the day it's made, but it's better made a day ahead of time so the flavors have time to blend.
Like many dressing recipes, this contains oil and vinegar. The recipe specified vegetable oil which is an edible oil made from vegetables, nuts or seeds. Canola, corn, olive, peanut, safflower and sesame are some of the vegetable oils available. I always use canola for two reasons. One, it's healthier than some oils. Two, it doesn't have a strong flavor.
The recipe didn't specify a type of vinegar so I use apple cider vinegar. Unlike distilled white vinegar that is extremely sour, apple cider vinegar has a fruit flavor. Strongly flavored oil and vinegar can overpower the tangy sweet flavor of the dressing, so choose your ingredients accordingly.
Other than the ingredients, the only thing you need is a container with a tight fitting lid; I use a jar. Put the ingredients in the container, seal and shake until the ingredients are thoroughly combined. Store the dressing in the refrigerator, shaking well before use.
The dressing is easy to make and tastes so fresh, you won't want to use bottled French dressing again!
French Dressing
6 Servings
1/4 cup plus 2 Tbsp. vegetable oil
1/4 cup sugar
2 Tbsp. vinegar
2 Tbsp. catsup
1/8 tsp. salt
dash of garlic powder
Combine ingredients in a container with a tight fitting lid; shake well. Refrigerate any leftovers.
This is better made a day ahead of time.
© Margaret's Morsels
July 25, 2010
Christmas in July
It's July 25 and retailers, such as the home shopping channel QVC, are telling me it's Christmas in July. I'm not ready to buy Christmas presents or decorations, but all this talk about Christmas makes me think about turkey and dressing. What's a girl to do when she wants turkey and dressing in the middle of summer? When the craving hits, I pull out a recipe I found years ago called Stuffed Breast of Turkey. It satisfies the craving without heating up the kitchen roasting a turkey.
The only other ingredient you need is hot water.
Instead of a turkey or turkey breast, this recipe calls for turkey breast cutlets. If the cutlets come four to a package, you can halve the recipe or buy two packages and cook the whole recipe. The cutlets are stuffed with packaged cornbread stuffing and covered with jars of turkey gravy so there's no additional cooking required. The cutlets cook in one hour, unlike a turkey which can take all afternoon.
I've been making this dish for a long time so I want to share some tips I've learned through trial and error over the years.
- You really do need to pound the cutlets. If you omit this step, the cutlets won't be nearly as tender.
- If you can't find an 8 ounce package of stuffing, use half of a 16 ounce package The larger package comes in handy if you need more stuffing for the top.
- If you spoon the stuffing down the center of the cutlets, it helps the stuffing stay in place when you roll the cutlets.
If you serve this dish to company, be prepared for a lot of accolades. The dish is not only impressive looking, but looks as though you spent hours in the kitchen. When you tell your guests it really wasn't that much trouble, they'll think you're being modest!
Stuffed Breast of Turkey
8 Servings
1 (8 oz.) pkg. cornbread stuffing, divided
2/3 cup hot water
2 Tbsp. butter or margarine
8 turkey breast cutlets, slightly pounded
2 (12 oz.) jars turkey gravy
In a large bowl, combine 2 cups stuffing, hot water and butter; mix well. Put an equal amount of the stuffing mixture in the center of each cutlet; roll each cutlet tightly. Place cutlets seam side down in a greased 13 x 9 x 2-inch baking dish. Pour gravy over the cutlets and sprinkle the remaining stuffing over the top. Cover tightly with aluminum foil and bake at 350° for 45 minutes. Remove foil and bake 15 more minutes until heated through and no pink remains in the turkey.
© Margaret's Morsels
Subscribe to:
Posts (Atom)


