I shared Halloween tricks on Wednesday. Today, I want to share the treats. I gave a hint about one of the treats -- bones -- in my last blog. Bones might look like a trick, but when they're made with pretzels, marshmallows and white chocolate, they're a treat!
To make these edible bones, start by breaking thin pretzel sticks into various sizes, but don't make them too short. Insert the flat side of a miniature marshmallow into each end of the pretzel.
Melt one 12 ounce package of white chocolate chips in a microwave, double boiler or, my preferred method, a 1 1/2-quart crock-pot. Using a fork, dip the bones in the chocolate -- they don't have to look perfect, but make sure to cover all the ingredients -- letting the excess chocolate drip off. Place the bones on waxed paper to dry and then store in an airtight container.
I made a congealed salad in a large brain shape mold for one of the tricks. For the treats, I use smaller molds made specifically for candy. Candy molds are inexpensive and come in a variety of shapes and sizes for almost any occasion. The mold I used for a Halloween treat served two purposes. One, it was candy that looked like a bat. Two, the bat was on top of a party pick that could be used to garnish another dessert.
Candy melts -- what you use to fill the molds -- come in a rainbow of colors so you can use more than one color in a mold. I've used multiple colors a few times but, to be honest, I don't have the time or patience so I stick with one color.
No matter which method you choose to melt the candy melts -- microwave, double boiler or crock-pot -- do not cover the container. If you do, condensation falls into the container which hinders the melting process. The candy coating retains its shape so you need to stir it periodically to help the melting process.
Using a spoon -- I use an iced teaspoon -- fill the cavities to the top with the melted candy melts. Once all the cavities are filled, tap the tray on the counter a couple of times to distribute the chocolate and remove any air bubbles. Using the dull edge of a table knife, scrape any excess chocolate off the tray. Removing the excess chocolate gives the finished candy a nicer look. Put the tray in the freezer for 10 minutes until the candy is firm.
Ready to go in the freezer.
To remove the candy from the molds, turn the tray upside down over waxed paper. Sometimes the candy will fall out on its own. If not, tap the bottom of the mold to help loosen the stubborn pieces. If some of the candy breaks, put the pieces back in the crock-pot and melt them again. Store the finished candy in a food storage bag or airtight container.
Cupcakes baked in festive paper liners are always fun to serve at a party. They aren't as messy as cake and you can bake exactly as many as you need. If you want something similar to cupcakes, but a little fancier, make mini Mason jar cakes instead.
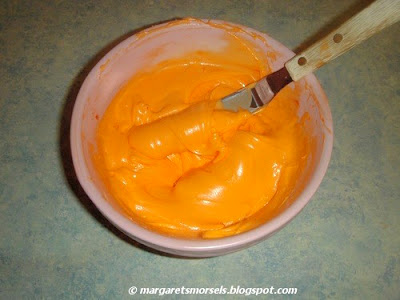
It's fun to decorate cupcakes or Mason jar cakes with colored frosting. I've found that store bought cream cheese frosting is just as good and a lot easier than making frosting from scratch. I use a gel icing color to tint the frosting. Gel icing color is much thicker than liquid food coloring and doesn't dilute the frosting. Gel icing color also produces a deeper, richer color than liquid food coloring. To use the gel, insert a clean toothpick into the gel.
Wipe the toothpick with the gel into the frosting, stirring with a spatula to incorporate the color.
Repeat the process using a clean toothpick until the frosting reaches the desired color.
The cupcakes and Mason jar cakes can be left plain or decorated with sprinkles or colored sugar. I used the bat party picks in the cupcakes and garnished the Mason jar cakes with a variety of Halloween sprinkles.
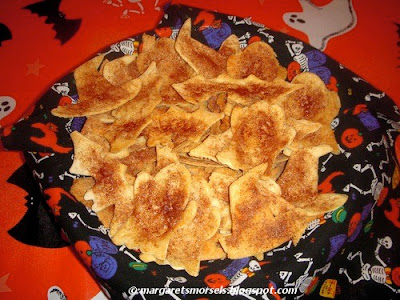
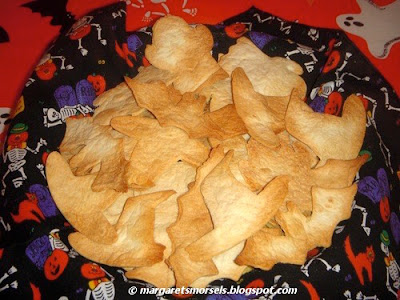
I have one more treat to share. Instead of sprinkling Halloween shaped tortilla chips with salt, brush them with melted butter and sprinkle cinnamon sugar on top. Bake just like you would the salted tortilla chips.
May your Halloween be frightfully fun and your treats delightfully delicious!!!
© Margaret's Morsels


