December 31, 2014

Lucky Legumes

Pin It

Margaret's Morsels | Hoppin' John


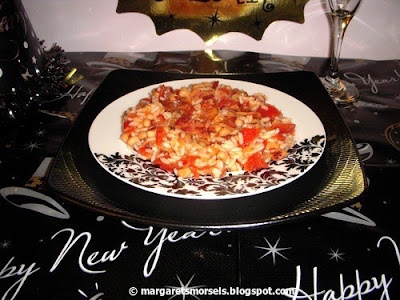
My husband isn't a superstitious person, except when it comes to New Year's Day.  For the 20 plus years we've been married, he's always requested black-eyed peas on January 1.  We live in the South and legend has it that eating black-eyed peas on New Year's Day is supposed to bring a person good luck all year long.  Black-eyed peas are my least favorite legume, but I find them palatable when served as Hoppin' John, a Southern dish made with pork, rice and, of course, black-eyed peas.  After cooking feasts on Thanksgiving and Christmas, I don't want to spend New Year's Day cooking so I take a few shortcuts.

Instead of cooking a pot of dried black-eyed peas, I substitute a can of black-eyed peas.


Margaret's Morsels | Hoppin' John


Canned black-eyed peas are already cooked so you don't have to soak or cook them.  The peas need to be drained and, since canned black-eyed peas contain a lot of salt, rinsed.

Quite a few Hoppin' John recipes use ham hock, an approximately 3-inch piece of a hog's hind leg consisting of meat, fat, bone and connective tissue which adds a lot of flavor to beans.  This recipe skips the ham hock and uses bacon instead.  I cook the bacon in my indispensable Bacon Wave microwave bacon tray which gives, as advertised on the box, "The frying pan taste without the frying pan."


Margaret's Morsels | Hoppin' John


The bacon grease collects in the bottom of the tray and can easily be poured into a saucepan and used to saute the onion.

No matter what I cook, I like to do as much prep work ahead of time as possible.  There's not much I can do ahead of time with this recipe, other than cook the rice and put it in the refrigerator.  The rice is reheated when it's added to the saucepan with the other ingredients.


Margaret's Morsels | Hoppin' John


Not all Hoppin' John recipes use tomatoes.  I like to add them because they add a pop of color to the finished dish.  Some recipes call for garnishing Hoppin' John with diced fresh tomatoes.  Other recipes call for stirring a can of diced tomatoes into the mixture.  Instead of fresh or canned diced tomatoes, the recipe I'm sharing today calls for a can of stewed tomatoes. Canned diced tomatoes and stewed tomatoes are not the same thing.


Margaret's Morsels | Hoppin' John

Unlike diced tomatoes, stewed tomatoes are cooked before being canned. Stewed tomatoes are also flavored with herbs and spices.  Regular or classic stewed tomatoes contain bell pepper, onion and celery.  Mexican stewed tomatoes contain jalapeno, garlic and onion; Italian stewed tomatoes contain basil, garlic and oregano.  I don't recommend using Mexican or Italian stewed tomatoes in this recipe because it will give the finished dish an entirely different taste.  Another difference is diced tomatoes are -- like the name implies -- diced.  Stewed tomatoes are usually halved.


Margaret's Morsels | Hoppin' John

The easiest way to cut stewed tomatoes into smaller pieces is with a pair of kitchen shears.

This Hoppin' John is seasoned with Tabasco, garlic powder and pepper. You can skip the Tabasco, but I recommend adding it because it keeps the dish from being bland.  This is the only recipe I have that uses Tabasco and the only reason I have a bottle in my cupboard!  You don't need to add salt; the bacon and rice add enough.

Black-eyed peas are often served on New Year's Day with greens such as collard, turnip or mustard which, because of their green color, symbolize money.  We're not fans of greens so I don't fix them.  I keep the meal simple and serve Hoppin' John with corn muffins made from a packaged mix.

I'll never like black-eyed peas as much as my husband does.  However, after the year I've had, I'll gladly eat a plate of them New Year's Day, especially if it means better luck is in store for 2015!


Margaret's Morsels | Hoppin' John


Hoppin' John
6 Servings

3 slices bacon, cooked and crumbled (reserve drippings)
1/2 cup chopped onion
1 (15 1/2 oz.) can black-eyed peas, drained and rinsed
1 (14 1/2 oz.) can stewed tomatoes (undrained), chopped
1 1/2 cups cooked rice
1/4 tsp. Tabasco
1/8 tsp. garlic powder
1/8 tsp. pepper

Saute onion in bacon drippings until tender; drain onion and discard drippings.  Return onion to saucepan.  Add remaining ingredients, except the bacon.  Cover and cook on low heat 8 to 10 minutes.  Spoon into a serving dish; sprinkle crumbled bacon over top.

© Margaret's Morsels


November 19, 2014

A Message from Margaret

Pin It
For months, Facebook posted a daily reminder on my personal timeline the exact number of days it had been since I last posted on Margaret's Morsels Facebook page.  It's no surprise the date corresponds to the last time I posted anything on my blog.

If you're a regular reader of my blog, you know I don't reveal much about my personal life when I share recipes.  I'd like to think what I write is more important than the one doing the writing.  However, over the last few months, I've received emails from readers wanting to know why I stopped posting.  After thinking about it, I decided I should explain my absence, especially since some of you have followed my blog since day one.

The last seven months have been some of the most difficult of my life.  I've reached an age where I look back on my life and question the decisions I made -- and the ones I didn't make -- and wonder if I made the right choices.  This intense soul searching has been accompanied by a plethora of tears, stress, confusion and sleepless nights.  Unfortunately, my blog is a casualty of this rumination because, I discovered, I cannot write when I experience inner turmoil.  Believe me, I tried, but I couldn't get past the first paragraph.

If I can't write when I experience turmoil, why am I writing today?  Good question.  I actually started writing this message over a month ago, but couldn't find the words I needed to say.  Since I'm able to write something, I guess it's a sign things are getting better, although I still haven't found the answers I was so desperately searching for.  I'm still plagued on a daily basis with all the coulda, woulda, shoulda thoughts that have been an unwelcome constant companion since April.

I thoroughly enjoy blogging and deciding which recipes to share and when. I thought, perhaps, I could ease back into blogging by posting once a week, just like a newspaper food section.  However, I'm not sure I want to be that rigid.  I really like the flexibility of being able to post when it's a particular food day -- such as National Peanut Butter Cookie Day -- or food is in the news like it was earlier this year when there was a shortage of Velveeta cheese.

Not too long ago, Facebook gave up and stopped telling me how many days it had been since I last posted on Margaret's Morsels.  Thanks to all of you for not giving up on me!  A special welcome to the new followers who have joined since April.  Thank you for your patience and understanding as I get back into a routine of posting new content.  I have a lot of tasty recipes I want to share and who better to share them with than people who like to cook.  I hope to see you soon.

                                              © Margaret's Morsels

April 17, 2014

Hamming it Up

Pin It
Margaret's Morsels | Canned Ham

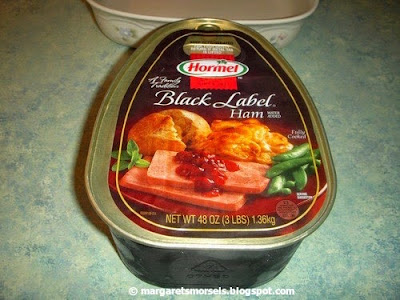
I always serve ham at Easter and this year is no exception.  However, I'm not preparing a shank portion like I normally do.  I'm only cooking for five people so I don't need that much ham.  Due to a time constraint of one of the guests, I need to have supper on the table at 5:30.  This is going to be challenging since I won't start cooking the ham until we get home from church.  I could cook the ham the day before and reheat it when we're ready to eat, but I don't like that idea.  Buying an already cooked spiral ham isn't an option because my family doesn't like them.  Fortunately, there's another choice.  This year, I'll be serving a canned ham for Easter.

Canned ham is exactly what it sounds like:  ham that is sold in a can.

Margaret's Morsels | Canned Ham

The ham is either from a boneless piece of meat, or pieces that have been combined and are held together with a gelatin mixture.  The brand I buy comes in three and five pound sizes, but the larger size is sometimes hard for me to find.  Canned hams are fully cooked and, as such, don't require additional cooking.  However, the flavor is greatly improved by heating. 

There are two varieties of canned hams:  shelf stable and refrigerated. Shelf stable canned hams have been processed at high temperatures which allow them to be stored at room temperature.  This processing, which gives the ham a long shelf life, also makes the product less flavorful than its counterpart.  I avoid shelf stable canned hams and only purchase those that are refrigerated.  The taste and texture of a refrigerated canned ham are a little different from traditional ham, but that's a small price to pay for the convenience.  Unlike a shank or butt portion that can take hours to cook, a canned ham is ready in an hour.  It can also be cooked in a crock-pot which frees up the oven for side dishes and rolls.

Just because it's a canned ham doesn't mean it has to be served plain.  I serve it that way because that's how my family likes ham.  Canned hams -- like regular hams -- can be dressed up with the addition of fruit, liquid smoke or glazes.  A search on the Internet will yield lots of recipes and ideas for using canned hams.

Although I may take a shortcut with the ham this year, the rest of our Easter dinner will be the same as every year:  macaroni and cheese, green bean bundles, deviled eggscranberry orange relish, homemade rolls, an Easter bunny cake and, to wash it all down, a refreshing pitcher of fruit tea.

Canned ham might not be the first thing you think of serving for Easter, but it is an easy and tasty alternative when time is short, you don't need to feed a large crowd and you still want to ham it up!

Margaret's Morsels | Canned Ham

Baked Canned Ham
6 to 8 Servings

1 (3 lb.) canned ham
1/2 cup water

To Bake in the Oven:  Remove ham from can and place in baking pan. Add 1/2 cup water to pan.  Cover pan with foil and bake at 325° for 1 hour, or until meat thermometer inserted in center reads 135°.

To Cook in a Crock-Pot:  Pour 1/2 cup water in bottom of crock-pot.  Wrap ham in foil; place in crock-pot.  Cover and cook on high 1 hour.  Reduce heat to low and cook 6 to 7 hours, or until ham is heated through.

© Margaret's Morsels
March 18, 2014

From Ho Hum to Wow!

Pin It
Margaret's Morsels | Marinated Green Beans

My husband and I like a lot of vegetables.  Unfortunately, we don't like a lot of the same vegetables!  I love lima beans, but my husband loathes the legume.  He thinks black-eyed peas are the best, while I think they're best left at the grocery store!  I'm crazy about cabbage in any form except sauerkraut, but the only cabbage he'll eat is in the form of coleslaw.

One vegetable we agree on is green beans.  It's a side dish on our table more often than any other vegetable.  Most of the time, I just open a can of green beans and heat them in the microwave.  Since I fix green beans so often, though, I'm always looking for recipes that put an interesting twist on this old stand by.

When I first saw the recipe for Marinated Green Beans, I knew my husband would love it and I was right!  The recipe uses a lot of the same ingredients as the Green Bean Bundles I make every year at Christmas and Easter. Unlike bean bundles, the recipe is easier to prepare and less time consuming.  The beans need to marinate overnight, so you do need to plan ahead when you want to make these beans.

The original recipe called for canned green beans, but didn't specify what kind.  I use whole green beans because I like the size.


Margaret's Morsels | Marinated Green Beans


The recipe doesn't use Worcestershire sauce, salt and pepper, but the rest of the ingredients are identical to bean bundles, except for the amounts and method of preparation.


Margaret's Morsels | Marinated Green Beans

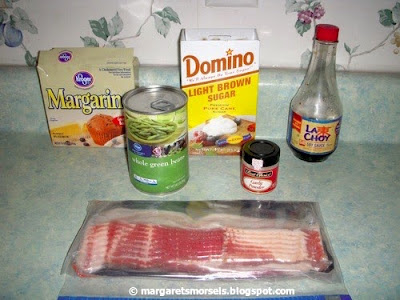
Instead of wrapping the beans in bacon and layering the ingredients on top, the butter, brown sugar, soy sauce and garlic powder are combined and stirred into the green beans.  The seasonings can be adjusted to suit your taste.  If you want sweeter beans, add more brown sugar; for spicier beans, add more garlic powder. 


Margaret's Morsels | Marinated Green Beans

The bacon is diced -- the easiest way to do this is with a pair of kitchen shears -- and stirred into the beans.  If you don't want to add meat, omit the bacon; the beans will still be delicious.  Once everything is mixed together, refrigerate the beans overnight.  To evenly distribute the marinade, stir the beans a couple of times while they're marinating.

The beans take more effort than simply heating a can of green beans, but it's worth the work!  The marinade melds together and transforms canned green beans into a sweet and salty dish with a hint of bacon flavor.  The finished product is so good, you'll forget you're eating a vegetable!


Marinated Green Beans
4 Servings

2 (14.5 oz.) cans whole green beans, drained
1 stick butter or margarine, melted
1/2 cup brown sugar, packed
1 Tbsp. soy sauce
1/4 tsp. garlic powder
3 slices bacon, diced (uncooked)

Put beans in a mixing bowl.  Mix margarine, brown sugar, soy sauce and garlic powder together; pour over green beans.  Add diced bacon and stir until ingredients are combined.  Cover and refrigerate overnight, stirring two or three times while marinating.  When ready to cook, remove beans from the refrigerator and let sit at room temperature for 30 minutes.  Stir the beans and put them in a greased baking dish.  Bake uncovered at 350° for 45 minutes, or until bacon is thoroughly cooked.

© Margaret's Morsels   
March 14, 2014

National Pi Day

Pin It
That's not a typo in the title.  National Pi Day isn't referring to the sweet and savory pies we eat, but the Greek letter (Ï€) used in mathematics to represent the numerical value of the ratio of the circumference of a circle to its diameter, approximately 3.14159....  Math is an important part of cooking -- just think of all the fractions!  Since today is March 14 (3/14), I thought it would be fun to use this play on words with pie recipes I've posted in the past.


Margaret's Morsels | Pecan Streusel Pumpkin Pie


Pecan Streusel Pumpkin Pie:  The addition of a streusel topping takes a plain pumpkin pie from ho hum to wow!


Margaret's Morsels | Banana Cream Supreme

Banana Cream Supreme:  This cool and creamy, no bake pie is a cross between banana pie and banana pudding.  


Margaret's Morsels | Lemonade Pie

Lemonade Pie:  What's more refreshing on a hot summer day than a glass of lemonade?  A piece of lemonade pie!  This beat the heat dessert gets its wonderful lemon flavor from a can of lemonade concentrate.  


Margaret's Morsels | Easy Peanut Butter Chip Pie

Easy Peanut Butter Chip Pie:  The pie is made with peanut butter chips and not peanut butter.  If you love chocolate and peanut butter, top the pie with a bottle of chocolate Magic Shell topping!


Margaret's Morsels | Chocolate Dream Pie

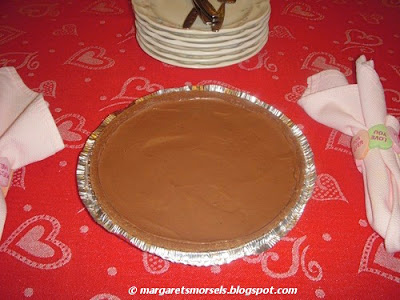
Chocolate Dream Pie:  This no bake pie only uses four ingredients and half of them are chocolate!  


Margaret's Morsels | Chocolate Cobbler


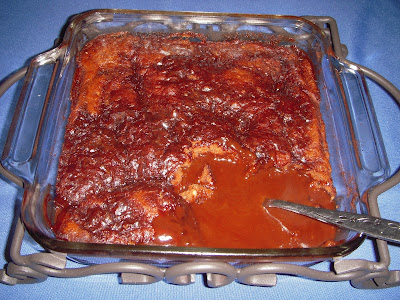
Chocolate Cobbler:  This eggless cobbler makes its own chocolate sauce! It's best served hot from the oven with a scoop of ice cream on top!  


Margaret's Morsels | Cookie Apple Cobbler


Cookie Apple Cobbler:  This apple pie is super easy to make.  The crust is made with a package of refrigerated sugar cookie dough!


Margaret's Morsels | Chicken Pot Pie
Chicken Pot Pie:  The picture doesn't do this pie justice!  Refrigerated pie crusts encase a filling made with canned chicken, vegetables, soup, milk and seasonings.


Margaret's Morsels | Broccoli Quiche

Broccoli Quiche:  You don't have to make the pie crust, cook the broccoli or, if you don't mind spending a little extra, even grate the cheese!


Margaret's Morsels | Bacon Quiche

Bacon Quiche:  This quiche uses a package of refrigerated pie crusts and is baked in a 13 x 9-inch pan.  The filling ingredients can be assembled and refrigerated ahead of time.


© Margaret's Morsels


March 7, 2014

Top 50 Food Blogs

Pin It
I found out that "Margaret's Morsels" has been nominated as one of the top 50 food blogs on Voicebok.  Voting is currently talking place for the top 10. If you have a minute, could you please vote for my blog?  Copy and paste the link below, scroll through the list -- it's in alphabetical  order -- and vote for me (please).  Thanks!!!
http://voiceboks.com/50-food-blog-nominees-for-2014/

February 27, 2014

Almost Homemade

Pin It
Margaret's Morsels | Better than Garlic Bread Pull Apart Rolls


I'm always surprised when people assume I cook feasts for my family year round.  I love to cook, but the only feasts I prepare are at Easter, Thanksgiving and Christmas!  Not only would that be too much food for a family of three on a regular basis, I don't have time to cook like that every day.  As I've written before, suppertime is the most stressful time of day for me.  This is why I'm always looking for shortcuts that will allow me to spend less time in the kitchen, while still making foods my family will eat and get supper on the table at a decent hour!

In the blogs I posted for Chicken Parmesan, Chicken Alfredo and Baked Ziti, I either mention adding garlic bread to round out the meal, or have a picture of the plated dish with garlic bread on the side.  Garlic bread is a packaged food I find convenient to keep in the freezer for nights when I need a quick bread to go with a meal.  Sometimes, though, I want to serve something that tastes homemade, but doesn't require the time and effort of making something from scratch.  What my family affectionately calls "Better than Garlic Bread Pull Apart Rolls" meet all of these requirements.

The bread starts with a package of frozen rolls.  You've probably seen these in the freezer case at the grocery and wondered what to do with them.

Margaret's Morsels | Better than Garlic Bread Pull Apart Rolls

These rolls are a real time saver and can be used for monkey bread, cinnamon rolls and a myriad of other dishes.  They can even be baked as rolls!  Although I don't have to make the bread, I still need to plan ahead of time since the rolls have to be thawed overnight in the refrigerator.

A couple of hours before we're going to eat, I remove the rolls from the refrigerator.  While the margarine is melting in the microwave, I take the rolls out of the package and place them on a piece of waxed paper.

Margaret's Morsels | Better than Garlic Bread Pull Apart Rolls

You don't have to do this, but I find it faster than removing the rolls from the bag one at a time, especially if the rolls are stuck together.  Once the margarine is melted, stir in garlic powder and garlic salt.  These are the same seasonings used in equal proportions in Garlic Cheese Biscuits, but this roll recipe uses 50% more garlic powder.

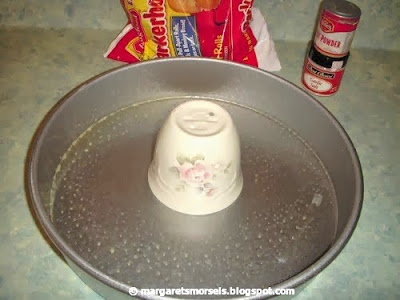
The friend that gave me the recipe bakes the rolls in a Bundt pan.  I tried that once and thought the rolls were dry.  If you're like me and love the round shape, but don't have a ring shaped pan, you can improvise and make your own.  Grease a small, ovensafe cup or bowl -- this keep the rolls from sticking to it -- and place it in the center of a 10-inch round cake pan. You now have a ring shaped pan!  If you don't want to go to that much trouble, use the 10-inch pan without the cup or bowl, or use a 9 x 5-inch loaf pan instead.

Margaret's Morsels | Better than Garlic Bread Pull Apart Rolls


Dip each roll in the melted butter mixture and place it in the greased pan, stacking the rolls in two layers.  If there's any butter mixture left, pour it over the top layer of rolls.


Margaret's Morsels | Better than Garlic Bread Pull Apart Rolls
First layer


Margaret's Morsels | Better than Garlic Bread Pull Apart Rolls
Second layer

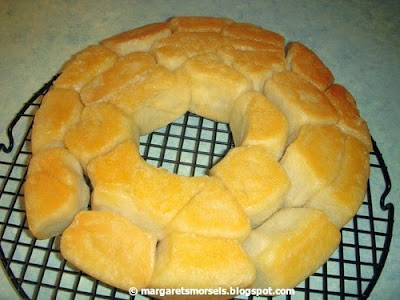
Put the pan in a warm place free from drafts, cover it with a towel and let the rolls rise an hour.  After the rolls have risen, bake them for 30 to 45 minutes, or until brown.  When the rolls are done, put the pan on a cooling rack for 10 minutes.  If the rolls come apart when you take them out of the pan, you can separate them and serve them in a bread basket.


Margaret's Morsels | Better than Garlic Bread Pull Apart Rolls


The frozen rolls make the finished product taste as though it was made from scratch.  People love these rolls and, unless they ask for the recipe, assume they're homemade.  I don't mind letting them think that since they're "almost" homemade!


Better than Garlic Bread Pull Apart Rolls
6 to 8 Servings

1 (1 lb. 9 oz.) pkg. frozen Parkerhouse style roll dough, thawed
1/4 cup butter, melted
1 tsp. garlic powder
1/2 tsp. garlic salt

Thaw dough according to package directions.  Melt butter; stir in the garlic powder and garlic salt.  Dip each roll in the butter mixture and place in a greased 10-inch round cake pan, or 9 x 5-inch loaf pan.  Put the pan in a warm place free from drafts, cover with a towel and let rise an hour.  Bake the rolls at 350° for 30 to 45 minutes, or until brown.  Put the pan on a cooling rack and let cool 10 minutes before removing bread.


© Margaret's Morsels

February 13, 2014

Chocolate Lovers Delight

Pin It
Margaret's Morsels | Chocolate Cobbler

Ever since we got married, my husband and I celebrate Valentine's Day at home.  We'd rather go out another night when restaurants aren't as crowded and in a hurry to seat the next party and prices aren't inflated because of the holiday.  To celebrate at home, I always fix something special for supper.  This year, my husband and son both asked if I would fix Grilled Peppered Steaks.  My husband would love Chocolate Covered Cherries for dessert, while our son would prefer a Peanut Butter Pie with a Magic Shell chocolate topping.  Unfortunately, my son doesn't like cherries and my husband doesn't like chocolate and peanut butter combined.  I don't have time to make both so I decided to keep it simple and just make something chocolate.

My mother found the recipe for Chocolate Cobbler in the newspaper in the early 1990's.  The name is misleading because it doesn't use fruit like most cobbler recipes, but like a cobbler it only has one crust.  I've seen the recipe called by other names including, "Pudding Cake," "Fudge Cake" and "Brownie Pudding."

Usually when I serve dessert, it's something that can be made ahead of time and served cold or at room temperature.  Chocolate Cobbler, though, is best served hot from the oven.  To make it less stressful at the end of the day when I'm cooking supper, I measure the cobbler ingredients ahead of time.  By the time supper's on the table, I've got the cobbler mixed up and ready to go in the oven.  By the time supper's over, the cobbler is ready to eat.

The cobbler starts by combining sugar, cocoa, milk, oil and self-rising flour.

Margaret's Morsels | Chocolate Cobbler


Self-rising flour is a time saver because it already has the leavener and salt added.  If you don't have self-rising flour, you can make your own.  For 1 cup self-rising flour, add 1 1/2 teaspoons baking powder and 1/2 teaspoon salt to 1 cup all-purpose flour.

Once the cobbler ingredients are combined, spread them in a greased 8 or 9-inch square pan.

Margaret's Morsels | Chocolate Cobbler


Combine cocoa and brown sugar in a bowl and sprinkle the mixture over the cobbler ingredients.

Margaret's Morsels | Chocolate Cobbler


Unlike white sugar, brown sugar needs to be firmly packed into the measuring cup.  If you need to know how to do this, or want to know why, you can read about it here.

The final ingredient is hot -- not boiling -- water.  Turn the hot water on and let it run until the faucet feels hot to the touch.  Measure the water in a liquid measuring cup and pour it slowly over the brown sugar mixture.  Do not stir the water with the other ingredients!  

Margaret's Morsels | Chocolate Cobbler


Put the pan in the oven and bake the cobbler for 45 minutes.  When you remove the cobbler from the oven, you'll see that the batter has risen to the top and made a crust.  The cocoa and brown sugar mixture melts and turns the hot water into a delicious chocolate sauce underneath the crust!

Margaret's Morsels | Chocolate Cobbler


Scoop the cobbler into a serving dish, making sure to spoon some of the sauce over the top.  The cobbler is good plain, but it's even better topped with whipped cream or a scoop of vanilla ice cream.  For a truly decadent dessert, substitute chocolate ice cream for the vanilla!

Margaret's Morsels | Chocolate Cobbler


Chocolate Cobbler is a tasty way to celebrate Valentine's Day, but it's also a great dessert to serve year round.  It's delicious, easy to mix up and, since it doesn't use eggs, chances are you've got the ingredients on hand. To be on the safe side, though, you might want to keep some ice cream in the freezer!


Chocolate Cobbler
6 Servings

1 cup self-rising flour
1/2 cup sugar
2 Tbsp. cocoa
1/2 cup milk
3 Tbsp. vegetable oil
1 cup brown sugar, firmly packed
1/4 cup cocoa
1 3/4 cups hot water (not boiling)

Combine the first 5 ingredients in a mixing bowl.  Pour into a greased 8 or 9-inch square pan.  Stir together the brown sugar and 1/4 cup cocoa; sprinkle over the batter.  Pour hot water evenly over the brown sugar mixture.  Do not stir!  Bake at 350° for 45 minutes.  While hot, scoop into serving bowls and spoon sauce over each serving.  If desired, top with whipped cream or ice cream.

© Margaret's Morsels

January 31, 2014

Slow Simmered

Pin It
Margaret's Morsels | Crock-Pot Spaghetti Sauce

Every January, I make it a point to share a crock-pot recipe in honor of National Slow Cooking Month.  With my husband's surgery earlier this month, January almost got away from me this year.

I like to vary the recipes I share and not post similar recipes close together. However, I'm going to break that unofficial rule today and share another recipe that uses ground beef.  It's quite different from the Sweet and Sour Meat Loaf recipe I posted earlier this week.

Homemade spaghetti sauce is one of my favorite cold weather recipes.  It only requires a little prep work, is quick to assemble and can easily be doubled.  It's also the best spaghetti sauce I've ever eaten!  Over the last 20 years, I've adapted the recipe to suit our tastes.  The easiest adaptation I made was to move the sauce from the stove top to the crock-pot.  If you're making one batch of sauce, you'll need a 3 1/2 to 4-quart crock-pot. If you double it like I do, you'll need a 6-quart crock-pot.

Although I don't brown roast beef or chicken before I cook them in a crock-pot, I always brown ground beef before using it in a crock-pot. Spaghetti sauce doesn't take as long to cook as roast beef or chicken, so I want to make certain the meat is fully cooked.  Browning the meat beforehand gives me that peace of mind.  It also gives me the opportunity to drain off the grease so it won't be in the finished sauce.  The easiest way to drain the grease is to set a colander inside a large bowl and pour the meat mixture into the colander.  I let the meat drain while I prep the other ingredients.

Margaret's Morsels | Crock-Pot Spaghetti Sauce


Margaret's Morsels | Crock-Pot Spaghetti Sauce
Grease from two pounds of extra lean ground chuck.

Once the grease is drained, the meat and onion are combined with the remaining ingredients.  Unlike many spaghetti sauce recipes, this one doesn't use crushed or diced tomatoes.  It uses tomato sauce and tomato paste instead.  It can be difficult to get all the tomato paste out of the can, so I want to share a trick my mother taught me when I first started cooking. Open one end of the can of tomato paste.  Leaving the lid in place, turn the can upside down and open the other end.  Remove this lid, turn the can upside down over your mixing bowl or pan and use the lid on the other end to push the tomato paste out of the can.

Margaret's Morsels | Crock-Pot Spaghetti Sauce

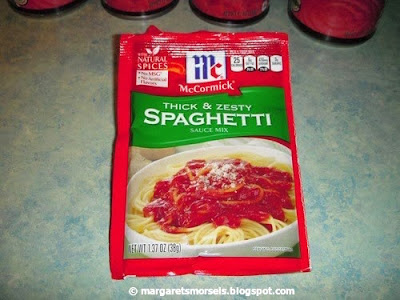
The sauce is seasoned with oregano, garlic powder and a package of Italian style spaghetti sauce mix.  Sometimes I can't find Italian style spaghetti sauce mix so I use a package of thick and zesty spaghetti sauce mix instead.

Margaret's Morsels | Crock-Pot Spaghetti Sauce

A little bit of sugar is added to the sauce to help cut down on the acidity of the tomato sauce and tomato paste.

The only other ingredients are the liquid and canned mushrooms.  To give the finished sauce more flavor, I drain and reserve the mushroom liquid, adding enough water to it to equal the amount called for in the recipe.

Margaret's Morsels | Crock-Pot Spaghetti Sauce
 Liquid from two (8 ounce) cans of mushrooms.

Margaret's Morsels | Crock-Pot Spaghetti Sauce
Mushroom liquid and water for a double 
batch of spaghetti sauce.

If you don't like mushrooms, you can leave them out and just add water to the sauce.

Once everything is thoroughly combined, cook the sauce three to four hours on high, or six hours on low until the sauce is heated through.  The last 30 minutes of cooking, I fix the pasta and garlic bread and assemble the salad.

I always double this sauce so I can freeze some to use later in the year. To do this, I refrigerate the sauce overnight so it's completely cold.  The next day, I ladle the sauce into a freezer safe, resealable plastic bag, making sure I date and label the contents.  The sauce expands as it freezes so don't fill the bag completely full; leave about an inch of headspace.  To save space in the freezer, I freeze the bag flat.  I have a chest freezer so it's not always easy to find a spot to lay the bag flat.  To solve this problem, I put the bag on a cookie sheet and put the cookie sheet in the freezer overnight.

Margaret's Morsels | Crock-Pot Spaghetti Sauce

The next day, the bag looks like this:

Margaret's Morsels | Crock-Pot Spaghetti Sauce


To use the frozen spaghetti sauce, thaw it in the refrigerator overnight.  It can be reheated on the stove top or, what I do, in the crock-pot.  Either way, you'll need to add some additional water to the sauce when it's reheated.

I've often wondered why January is National Slow Cooking Month.  I finally decided it must be because a lot of people only use their crock-pots in the summer when they don't want to heat up the kitchen.  National Slow Cooking Month is a great way to remind people to use their crock-pots in cold months too.   Even better, use this time saving appliance all year round!


Spaghetti Sauce
4 Servings

1 lb. ground beef
1/2 medium onion, finely chopped
1 (15 oz.) can tomato sauce
1 (12 oz.) can tomato paste
1 (1.5 oz.) envelope Italian style spaghetti sauce mix
1 1/2 tsp. sugar
1/2 tsp. crushed oregano
1/8 tsp. garlic powder
1 (8 oz.) can mushroom stems and pieces, liquid drained and reserved
reserved mushroom liquid and enough water to make 1 1/2 cups

Cook and stir the ground beef and onion in a large pan until the meat is brown and the onion is tender; drain.  Combine the meat and onion with the remaining ingredients.  Cook in a crock-pot for 3 to 4 hours on high, or 6 hours on low until the sauce is heated through.  Serve over hot spaghetti. Recipe can be doubled.  Leftover sauce can be frozen.

© Margaret's Morsels