December 31, 2013

Best of 2013

Pin It
This is the time of year when TV news shows and newspapers have stories that highlight the year in review.  With that in mind, I thought I'd count down the top 10 most viewed recipes I posted during 2013. Some of the top 10 came as a surprise, but none more than the recipe that took the number one spot.  I almost didn't post the recipe because I was afraid it wouldn't appeal to many people.  I'm glad this old family favorite was a hit with my readers!  

10.  Strawberry Delight Cake:  A cake recipe that doesn't require any baking!  It doesn't get much easier than that!

Margaret's Morsels | Strawberry Delight Cake


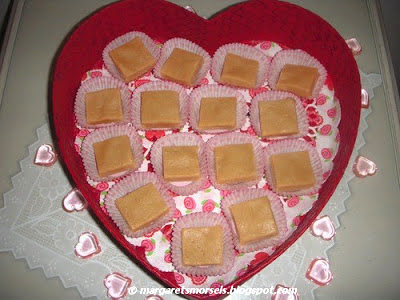
9.  Peanut Butter Fudge:  If you think you can't make candy, think again! There's no cooking involved, unless softening ingredients in a microwave counts as cooking!

Margaret's Morsels | Peanut Butter Fudge


8.  Carrot Cake:  This cake takes some time to make, but it's worth the effort!  Unlike most carrot cake recipes, this one doesn't use pineapple.

Margaret's Morsels | Carrot Cake


7.  Chocolate Dream Pie:  A chocoholics dream.  A pie that only uses four ingredients and half of them are chocolate!  

Margaret's Morsels | Chocolate Dream Pie


6.  Chicken Parmesan:  This version is baked not fried.  It's also kid friendly, delicious and ready in under an hour!

Margaret's Morsels | Chicken Parmesan


5.  Salisbury Steak:  A tasty one dish recipe that turns ground beef from ho hum to wow!

Margaret's Morsels | Salisbury Steak


4.  Cherry Pie Filling Salad:  This versatile dish can be served as a salad or dessert.  It can also be frozen in paper baking cups for a cold treat on a hot summer day!

Margaret's Morsels | Cherry Pie Filling Salad


3. Unfried Refried Beans:  These beans look and taste like refried beans, but there's a twist.  They're not fried at all!

Margaret's Morsels | Unfried Refried Beans


2.  Eggs Benedict Casserole:  You don't have to poach a single egg to make this version of Eggs Benedict.  With this recipe, it's easy to make brunch for a bunch!

Margaret's Morsels | Eggs Benedict Casserole


1.  Loaf Cake:  This unfrosted, made from scratch, plain pound cake made with my grandmother's recipe was the most popular recipe I posted this year.  It's an oldie, but goodie!

Margaret's Morsels | Loaf Cake


As 2013 draws to a close, I want to thank everyone for reading Margaret's Morsels.  I especially appreciate the comments, emails and feedback. This interaction is what makes sharing the recipes worthwhile!  This year was challenging on several levels and I wasn't able to post as frequently as I wanted.  Hopefully, I'll be sharing a lot more recipes in 2014.  My husband gave me a 35mm camera with lenses and some other blogging necessities for Christmas, so I have some things in mind for Margaret's Morsels in 2014.  In the meantime, 
HAPPY NEW YEAR FROM MY KITCHEN TO YOURS!!!!!

© Margaret's Morsels  

December 24, 2013

A Yearly Tradition

Pin It
Margaret's Morsels | Bacon Quiche

A couple of years ago, I wrote about the cheese ball, German Christmas cookies and Kool-Aid punch my mother made every year at Christmas. Today, I thought I'd share a Christmas tradition that started quite by accident.

One year when my son was young, I invited some in-laws over to watch him open presents and eat breakfast with us on Christmas morning.  I wasn't sure what I was going to cook, but I knew I didn't want to spend all morning working in the kitchen.  As I was going through my recipes, I came across a quiche recipe a cousin had given me two months earlier.  I decided it would be the perfect dish for a Christmas morning breakfast. Not only would I be able to join everyone in the festivities, I could do the majority of the work the night before!

Bacon Quiche is very similar to Quiche Lorraine -- a bacon and cheese quiche -- with a few differences.

  • Bacon Quiche doesn't use a quiche pan or pie plate.  It's made in a 13 x 9 x 2-inch glass baking dish.
  • You don't have to make the pie crust for Bacon Quiche.  It uses a package of refrigerated pie crusts, a real time saver on Christmas morning!

Margaret's Morsels | Bacon Quiche
  • Bacon Quiche uses an entire package of bacon, whereas most Quiche Lorraine recipes use less.
  • Instead of cream -- half and half, whipping or heavy -- Bacon Quiche uses milk.
  • Bacon Quiche uses Cheddar cheese not the traditional Swiss or Gruyere found in Quiche Lorraine.
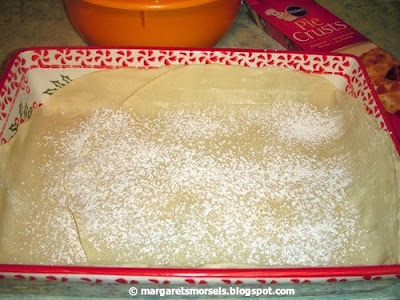
The filling ingredients can be assembled the night before and stored in the refrigerator.  The next morning, put both pie crusts in a glass -- not metal -- baking dish.  I made the quiche in a metal pan once and, although the filling was good, the crust never did get brown.  Sprinkling the pie crusts with flour helps keep the crust from getting soggy.

Margaret's Morsels | Bacon Quiche

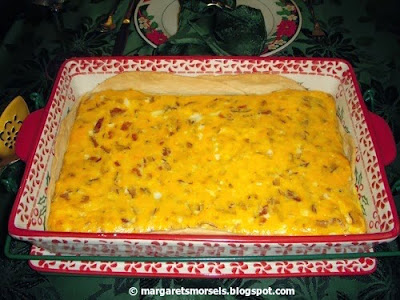
Add the filling and bake for 40 to 45 minutes. 

Margaret's Morsels | Bacon Quiche

Add a side of fresh fruit or a fruit salad and breakfast is ready!

Since the quiche was easy to make and so well received, I decided to make it again the next Christmas.  I didn't realize it at the time, but I created a Christmas tradition that we'll be observing for the 14th time tomorrow morning.  To keep it special, I only make the quiche on Christmas.  This gives my family something to look forward to, just like the day we're celebrating.

Bacon Quiche
6 to 8 Servings

1 (14.1 oz.) pkg. refrigerated pie crusts
1 (12 oz.) pkg. bacon, cooked, drained and crumbled
6 eggs, beaten
2 cups milk
2 cups shredded Cheddar cheese
salt and pepper to taste

Put both pie crusts in an ungreased 13 x 9 x 2-inch glass baking dish. Flour the bottoms and sides of the pie crusts.  Combine remaining ingredients and pour on top of crusts.  Bake at 375° for 40 to 45 minutes.

Filling ingredients can be assembled the night before and stored in the refrigerator. 

© Margaret's Morsels

November 26, 2013

Crazy about Carrots

Pin It
Margaret's Morsels | Carrot Souffle

My Thanksgiving table will look different this year.  Thirteen family members will be absent and two, who normally don't come for Thanksgiving, will be here this year.  There will still be slices of turkey on a colorful platter; a big bowl of cornbread dressing; potato salad made with my mom's recipe; Aaron's green beans; a basket of homemade rolls hot from the oven; gravy in a turkey shaped gravy bowl; a congealed cranberry salad; a pitcher of refreshing fruit tea and, for dessert, pecan pie and pumpkin pie. Different faces around the table won't be the only difference, though. Sweet potatoes -- either in the form of sweet potato souffle or quick and easy candied sweet potatoes -- will be noticeably absent.  This year, sweet potatoes are being replaced by Carrot Souffle.

Carrot souffle isn't a souffle in the true sense of the word.  Traditionally, a souffle is comprised of two parts:  a thick egg based sauce or puree which gives the souffle flavor and beaten egg whites which gives the souffle lift. Carrot souffle doesn't use beaten egg whites which makes it more of a puree:  a thick, soft dish made by processing cooked food through a sieve or mixing it with a mixer, blender or food processor.  Carrot souffle definitely sounds more appealing than carrot puree!

I have three versions of this recipe, but the one I'm sharing is my favorite because it uses less sugar than the others.  Carrots are naturally sweet and, in my opinion, don't need as much sugar as the amounts called for in the other recipes.  I use baby cut carrots for two reasons.  One, I always have them on hand.  Two, I don't have to peel and cut the carrots, a real time saver when you're cooking a holiday meal.  Another way to save time is to assemble the remaining ingredients while the carrots are cooking in boiling water.

Margaret's Morsels | Carrot Souffle
 The cooked carrots

When the carrots are tender, drain them thoroughly and combine them with the remaining ingredients.  One ingredient, baking powder, acts as a leavening agent.  However, don't expect the souffle to rise to the top of the baking dish like a souffle made with beaten egg whites.  It actually rises very little, if any.

Margaret's Morsels | Carrot Souffle
Ready to be baked

A nice touch is to bake the souffle in a souffle dish -- a round bowl with straight edges -- but it can be baked in any 2-quart baking dish.  Grease the dish and coat it with granulated sugar.  Sprinkle the sugar in the bottom of the dish and rotate it like you would if you were coating a cake pan with flour, making sure to coat the bottom and sides.  The sugar adds a slight crust around the edges and additional sweetness to the cooked shuffle. Add the carrot mixture and bake until the souffle is set in the center when pressed lightly with your fingertip.

Margaret's Morsels | Carrot Souffle


The souffle can be served hot, but I think it tastes better lukewarm.  This is helpful at the holidays since the souffle can be cooling while the rest of the food cooks in the oven.  I let the souffle cool 30 minutes on a wire rack before garnishing the top with powdered sugar. The easiest way to add the powdered sugar is to put it in a small mesh strainer and sprinkle it on the souffle.


Margaret's Morsels | Carrot Souffle


If you want to cut out the additional sugar, serve it plain.

Margaret's Morsels | Carrot Souffle


Carrot souffle is a nice change of pace from traditional sweet potatoes. Like sweet potatoes,  it's orange and sweet, but unlike sweet potatoes, most kids eat carrots!


Carrot Souffle
8 to 10 Servings

2 lb. peeled carrots
1 1/2 Tbsp. sugar
2 Tbsp. flour
1 1/2 tsp. baking powder
1 1/2 tsp. vanilla extract
3/4 cup sugar
3 large eggs (room temperature)
1/4 cup butter, softened
powdered sugar (for garnish; optional)

Put carrots in a large saucepan and cover with water; bring to a boil. Reduce heat to medium and cook carrots 30 to 45 minutes, until very tender.  Drain.  Heat oven to 350°.  Lightly grease a 2-quart souffle dish. Coat the bottom and sides with 1 1/2 tablespoons sugar.  Set aside.  Put carrots in a mixing bowl and add the flour, baking powder, vanilla and 3/4 cup sugar.  Mix with an electric mixer until smooth.  Add eggs, one at a time, beating well after each addition.  Add butter and mix well.  Put carrot mixture in prepared souffle dish.  Bake 45 minutes, until souffle is set in center when lightly pressed with fingertip.  Let cool 30 minutes on a wire rack.  Sprinkle powdered sugar on top, if desired, and serve.

© Margaret's Morsels 

November 5, 2013

A Piece of Cake

Pin It
Margaret's Morsels | Loaf Cake


Not too long ago, I made a batch of coleslaw to go with our supper. Although the coleslaw was gone in a couple of days, a mostly full pint of buttermilk remained in the refrigerator.  I didn't want to throw it out so I used it to make my grandmother's loaf cake.  Calling this delectable dessert a loaf cake is a misnomer because my grandmother didn't bake it in a loaf pan.  My mother didn't use a loaf pan either and neither do I. What my family fondly refers to as a loaf cake is actually a pound cake.  The name isn't the only thing that's different about this recipe.

Pound cakes got their name because they were originally made with one pound each of flour, butter, sugar and eggs.  Now days, pound cakes can include leavening agents such as baking soda or baking powder; flavoring or even multiple flavorings; add ins such as fruit, nuts and chocolate to name a few.

Pound cakes are still made with butter -- or margarine -- although not necessarily a pound.  Some recipes also call for shortening, in addition to the butter or margarine.  My grandmother's recipe is made with shortening. I can tell you from personal experience the cake isn't as good when it's made with anything other than shortening, so no substitutes!

A lot of pound cake recipes call for the fat (butter, margarine, shortening) to be creamed first and then the sugar gradually added.  Not this recipe.  The shortening and sugar are creamed together from the beginning

Margaret's Morsels | Loaf Cake


 until light and fluffy, about five to seven minutes.

Margaret's Morsels | Loaf Cake

Don't rush the creaming process.  It's an important component in baking for two reasons.  One, it incorporates air into the batter which results in a lighter cake.  Two, the sugar gets evenly dispersed throughout the fat.  The sugar doesn't dissolve so don't expect the creamed mixture to be perfectly smooth.  If you feel the creamed mixture with your fingertips, it will have a slightly gritty texture.

My grandmother's recipe is also different when it comes to adding the eggs. Every pound cake I've ever made, except this one, calls for the eggs to be added one at a time and beaten until combined.  My grandmother's recipe calls for beating the eggs together, adding them all at once 

Margaret's Morsels | Loaf Cake

and then mixing them into the creamed mixture until combined.

Margaret's Morsels | Loaf Cake

Cake recipes typically call for combining the dry ingredients and adding them alternately with the wet ingredients, beginning and ending with the dry ingredients.  This sequence is very important.  The creamed mixture can't absorb much liquid so it's imperative to add the dry ingredients first. If you don't, you'll end up with a tough cake.  Unless otherwise directed, a good rule of thumb is to add 1/3 dry, 1/2 wet, 1/3 dry, 1/2 wet and 1/3 dry. When you add the ingredients, mix them only until combined.  Overmixing will cause the cake to be tough.  My grandmother's recipe alternates wet and dry ingredients, but there is a slight difference.

Instead of combining the dry ingredients, only the flour is added alternately with the wet ingredient I alluded to in the first paragraph, buttermilk.  Not only does buttermilk produce a cake that is tender, it also adds a slight tangy flavor to the finished product.  More importantly, though, it's a crucial ingredient for this cake to be successful.  For that reason, no substitutes allowed!  However, if you don't have buttermilk, you can make sour milk which will take the place of buttermilk.  To make 1 cup sour milk, put 1 tablespoon of lemon juice or white vinegar in a measuring cup.  Add enough milk to make 1 cup.  Thoroughly stir the mixture and let it sit for 5 minutes; proceed as directed.

The only flavoring in my grandmother's recipe is vanilla.  I highly recommend using pure vanilla extract.  I know it's expensive, but it tastes so much better that imitation vanilla.  The vanilla and two leavening agents (baking powder and baking soda) are added at the same time and mixed into the batter. 

Margaret's Morsels | Loaf Cake
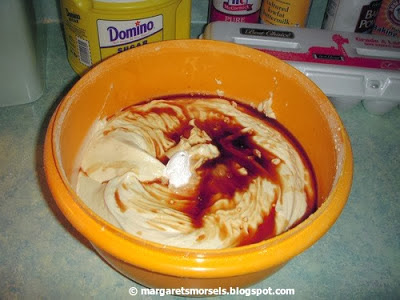
Most baking powders are double-acting which means they release gas when mixed with a liquid and again when exposed to heat.  On the other hand, baking soda must be mixed with an acid in order to work as a leavening agent.  Buttermilk or sour milk acts as the acid.  This is why you can't substitute another liquid for the buttermilk.

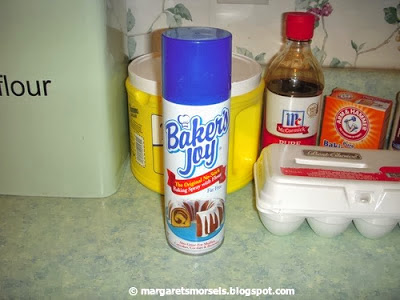
The rest of the recipe is straightforward.  Grease and flour a Bundt or tube pan.  Or, what I do, spray the pan with Baker's Joy, a nonstick baking spray that contains flour.

Margaret's Morsels | Loaf Cake

Put the batter in the pan

Margaret's Morsels | Loaf Cake


and bake 45 to 60 minutes, or until done.

Margaret's Morsels | Loaf Cake

The easiest way to tell when the cake is done is to insert a toothpick in the cake.  If the toothpick comes out clean, or with a few crumbs, the cake is done.  Other signs include a top that springs back when lightly touched and a cake that pulls away from the sides of the pan.  Let the cake cool in the pan 10 minutes and then remove it to a wire rack to cool completely.

I serve the cake plain just like my mother and grandmother did.  If you want it a little fancier, add fresh fruit or a scoop of ice cream on top of each slice when it's served.  If you want to garnish the whole cake, an easy way to do that is to sprinkle powdered sugar on top after the cake is completely cool.


Margaret's Morsels | Loaf Cake

I don't know why the directions for my grandmother's recipe are different from other pound cake recipes.  I don't even know why or how the cake came to be know as a loaf cake!  What I do know, though, is that the cake is delicious and the method, although not conventional, works each and every time.  It's also a tasty way to use leftover buttermilk.  Even better, though, is to buy buttermilk specifically for this cake and find some other way to use the rest of the buttermilk!


Loaf Cake
12 to 16 Servings

1 cup shortening (no substitutes)
2 cups sugar
4 eggs, beaten
3 cups all-purpose flour
1 cup buttermilk or sour milk (no substitutes)*
2 Tbsp. pure vanilla extract
1/4 tsp. baking soda
1 tsp. baking powder

Cream shortening and sugar until light and fluffy, about five to seven minutes.  Beat eggs and add all at once to creamed mixture; mix well.  Add flour and buttermilk alternately, beginning and ending with flour; mix after each addition until just combined.  Add vanilla, baking soda and baking powder; mix until combined.  Pour batter in a greased and floured Bundt or tube pan.  Bake at 325° for 45 to 60 minutes, or until done.  Put the pan on a wire rack for 10 minutes; remove the cake and cool completely on the wire rack.

*To make 1 cup sour milk, put 1 tablespoon of lemon juice or white vinegar in a measuring cup.  Add enough milk to make 1 cup.  Thoroughly stir the mixture and let it sit for 5 minutes; proceed as directed.


© Margaret's Morsels


October 8, 2013

Stuff It!

Pin It
Margaret's Morsels | Stuffed Manicotti

We were on the road seven weeks this summer.  One trip was personal; the rest were business.  Normally when we're out of town, we like to eat at restaurants that are local to the area.  An exception to this is when we see a restaurant we've eaten at before that doesn't have a location in the city where we live.  On one trip, we saw an Italian restaurant that my husband and I used to frequent when we lived in another city.  We decided to take a walk down memory lane and eat there one night.  Our son said he wasn't in the mood for Italian, so my husband and I went without him.

The restaurant was just as we remembered.  Romantic lighting; Italian music playing softly in the background; linen tablecloths and napkins; a house salad with chickpeas and pepperoncini tossed with a tangy Italian vinaigrette; a menu selection that hadn't changed much -- if any -- in 20 years.  It was hard to decide what to order, but I finally decided to get something I hadn't eaten in years:  stuffed manicotti.  It was as good as I remembered.  In fact, it was so good, I decided to take half of it back to the hotel to reheat in the microwave for lunch the next day.

I remember the first time I ever made stuffed manicotti.  My husband and I were newlyweds, living downtown in a third floor walk up apartment with a small kitchen.  The manicotti stuck to the pot; a lot of the manicotti tore while it was cooking; I used a soup spoon to stuff the filling into the manicotti which made it a tedious task; I didn't have a baking pan big enough for all the manicotti and had to use two pans which meant I didn't have enough sauce.  Supper was served late that night and, although the finished product didn't look pretty, it was delicious and earned a spot in my tried and true recipe collection.  

Manicotti -- large pasta tubes -- can be stuffed with a variety of fillings such as meat and cheese, spinach and cheese or, like the recipe I'm sharing today, a combination of cheeses.

Margaret's Morsels | Stuffed Manicotti
Uncooked manicotti

I'm not a fan of nonstick cookware, but I absolutely love a nonstick pot when I cook pasta.  Too bad I didn't have one when I first got married! When you cook pasta, be sure to add enough salt to the water so it tastes like saltwater.  If the water isn't salty enough, the cooked pasta won't be either.  Maybe my first experience cooking manicotti scarred me, because ever since then I use a wooden spoon to stir the manicotti instead of a pasta fork.

While the manicotti is cooking, spread a thin layer of pasta sauce in the bottom of a greased 13 x 9 x 2-inch baking pan.

Margaret's Morsels | Stuffed Manicotti

Make the filling by combining eggs, seasonings and a combination of Mozzarella, Parmesan and Ricotta cheeses.  Ricotta is a slightly grainy white cheese that can be used in savory dishes as well as sweet dishes such as cheesecake and cannoli.  It's sold in a carton like sour cream and cottage cheese and is usually found near them or the cream cheese at the grocery store.

Margaret's Morsels | Stuffed Manicotti
The filling

When the manicotti is done, rather than dumping them into a colander, I use a slotted spoon and scoop them out one at a time.  When they've all been removed, pat them dry with a paper towel.  This step may seem unnecessary, but it's actually quite important.  It keeps the sauce from being diluted with the residual water.  Lay the manicotti in a single layer on a cutting board or other work surface.  Don't fret if some of the manicotti tore; they can still be used.

Margaret's Morsels | Stuffed Manicotti
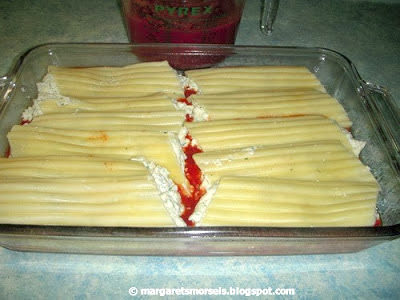
Depending on your perspective, now comes the fun or not so fun part of the recipe:  stuffing the manicotti.  I no longer use a soup spoon, but a disposable pastry bag.  If you don't have one, you can put the filling in a plastic food storage bag, snip off the corner and squeeze the filling into the manicotti.  An iced teaspoon also works good.  The long handle reaches deeper into the manicotti than a soup spoon.  I find it easier to pipe the filling halfway in one end of the manicotti, turn it around and finish filling it on the other end.  Put the stuffed manicotti in the prepared baking pan.  If the manicotti tore, place it in the pan with the torn side down.  If there's any leftover filling, you can spread it on top of the manicotti.  I rarely have any filling left.  I don't like to skimp on the filling so I'm only able to fill 10 out of the 14 manicotti.  If you fill more of the manicotti than I do, just pack them tightly in the baking dish in a single layer.

Margaret's Morsels | Stuffed Manicotti

Cover the manicotti with more pasta sauce and cook until it's heated through.  This can take anywhere from 35 to 55 minutes depending on your oven.  You'll know when it's ready because the sauce will be bubbling. If you take a peek at the filling, you'll see that it's smooth and creamy.

Margaret's Morsels | Stuffed Manicotti
Ready to eat

Heat the remaining sauce to serve with the manicotti.  If you like a lot of sauce, you might want to buy a second can of pasta sauce to ensure you've got enough.  The leftover sauce will come in handy when you reheat any leftovers.

Remember the manicotti I took back to the hotel?  Our son, who wasn't in the mood for Italian food, thought it looked good and ended up eating it before I even had a chance to put it in the refrigerator!  He liked it so much, he wanted to know if I could make it at home sometime.  Before I had a chance, we were on another trip and ate at a different Italian restaurant. Our son ordered stuffed manicotti, but he didn't think it was as good as the first restaurant.  A few weeks later, I finally had a chance to make stuffed manicotti.  I was touched when our son told me it was better than the stuffed manicotti served at either restaurant!

Stuffed Manicotti
4 to 6 Servings

1 (8 oz.) box manicotti
3 cups Ricotta cheese
1 (12 oz.) pkg. shredded Mozzarella cheese
3/4 cup grated Parmesan cheese
3 eggs, slightly beaten
1 1/2 tsp. salt
3 tsp. parsley flakes
3/4 tsp. oregano
1/4 tsp. pepper
1 (24 oz.) can pasta sauce

Cook manicotti according to package directions; drain.  Dry manicotti with paper towels and place in a single layer on a cutting board or other work surface.  In a large bowl, combine cheeses, eggs, salt, parsley flakes, oregano and pepper.  Fill manicotti with the cheese mixture.  Spread a thin layer of pasta sauce in a greased 13 x 9 x 2-inch baking pan.  Place manicotti in pan in a single layer; cover with 2 to 3 cups pasta sauce. Bake at 350° for 35 to 55 minutes, or until heated through and cheese is melted. Heat the remaining sauce and serve with the manicotti.

© Margaret's Morsels


September 10, 2013

Cooking Q & A: Summer Edition

Pin It
I've never gone this long without posting a new blog.  Even when I was in the hospital in 2010, I still managed to post something!  I was planning to post several new blogs this summer, but that didn't happen.  We were on the road all but three weeks of our son's summer vacation.  One trip was personal; the rest were business.  We ended up driving over 5,000 miles through nine states in the Midwest, Northeast and South before we were done.  Fortunately, we were able to come home a few days between trips. This gave me just enough time to get the laundry and mail caught up before heading out again.  Although I had every intention of writing while on the road -- I took my notes and a USB full of food pictures -- at the end of a long day, I was just too tired to write.  No sooner had we gotten home than it was time to get back into the routine of work, carpools and chauffeuring my son to and from sports practice several times a week. Things are finally back to normal and I'm putting the finishing touches on a new blog.  In the meantime, I want to answer the questions readers emailed me over the summer.

"I want to make your Strawberry Delight Cake.  Where can I find strawberry glaze at the grocery?"  Oscar

Margaret's Morsels | Strawberry Delight Cake

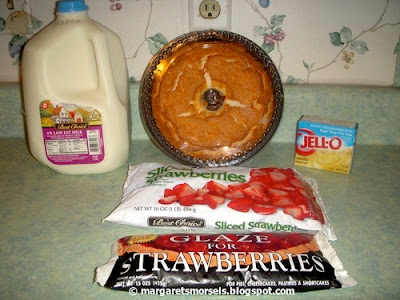
Strawberry glaze is sold in the produce department in either a pouch like the one pictured above or a plastic bowl.  It's available in regular and sugar-free versions.


"I see a lot of recipes that call for coating food with panko.  What's so special about it?"  Stefanie

Japanese bread crumbs -- also called panko -- are often used to coat foods that are fried.  These bread crumbs don't absorb as much oil when fried so the food has a crispier crust.  

"Is it better to buy pecans that have already been chopped or should I chop them myself?"  Deidre

Margaret's Morsels | Chicken Salad

I think pecans taste better when you chop them as you need them. Around the holidays, many organizations sell one pound bags of pecan halves -- like the one pictured above -- as a fundraiser.  I buy several bags, store them in the refrigerator so they'll stay fresh and use them whenever a recipe calls for pecans.

"What's the best way to dry salad greens?"  Alissa

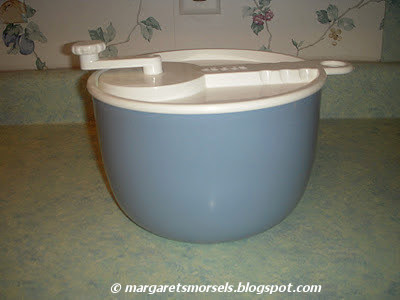
Margaret's Morsels | Prep School

Nothing dries greens faster or better than a salad spinner.  I always thought this was a useless kitchen gadget until I actually used one.  My salad spinner is over 20 years old.  It has a crank on top you turn which spins the inner basket.  Some newer models have a cord you pull to make the basket spin.

"How do I know whether to sift ingredients before or after they're measured?  Also, how do I sift ingredients if I don't have a flour sifter?"  Caitlin

If a recipe calls for 2 cups sifted flour, you sift the flour before it's measured. If a recipe calls for 2 cups flour, sifted, you measure the flour before it's sifted.

Margaret's Morsels | Prep School

My mom had a flour sifter with a crank.  I never liked it so I bought one that had a spring action handle.  Unfortunately, the handle always got stuck so it was too much trouble to use.  Anymore, I use a mesh strainer to sift dry ingredients.  I put the ingredients in the strainer and use my hand to tap the side of the strainer so the ingredients fall through the mesh into a bowl. I have three strainers -- small, medium and large -- so I can use the one that's the right size for the job.

"How do you keep food like hot dogs from sticking when frozen?"  Greg

When you want to freeze food like hot dogs, hamburger patties, cookies or rolls, put the food on a baking sheet in a single layer, making sure the items aren't touching.  If you're freezing something sticky, line the baking sheet with parchment paper first.  Put the baking sheet in the freezer until the food is frozen.  Transfer the food to a plastic freezer bag or storage container.  It won't stick together when stored because each piece was individually frozen beforehand.

"If a recipe calls for fresh herbs, can I substitute dried herbs instead?"  Valerie


You can substitute fresh herbs for dried and vice versa, but use a 3:1 ratio and not equal amounts.  Dried herbs have a stronger flavor than fresh herbs so you'd need less dried herbs than fresh.  For example, if a recipe calls for three tablespoons fresh herbs, you'd substitute one teaspoon dried herbs.  When cooking with dried herbs, add them at the beginning of the recipe so they have time to release their flavors.  If you're using fresh herbs, add them toward the end of cooking so they won't lose their flavor.

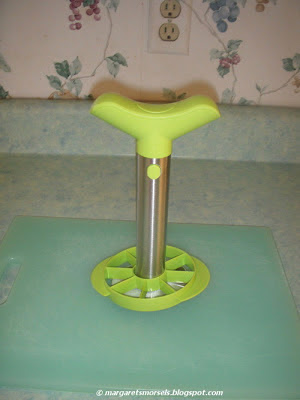
"Do you have a favorite kitchen gadget that's not considered a necessity?"  Whitney


Margaret's Morsels | Pineapple Pointers

I absolutely love the pineapple slicer I bought a couple of years ago!!!! After eating fresh pineapple, it's hard to eat the stuff in the can.  If this slicer ever broke, I'd definitely buy a new one ASAP!  Click here if you want to see how this device works.


"I've seen in your pictures that you use a lot of store brand or generic products.  Are there any you won't use?"  Judy


I don't like off brand gelatin or canned soup.  I also don't like off brand refrigerated baked goods, such as crescent rolls, biscuits, pie crusts or off brand frozen biscuits and garlic bread.  However, I do like and use off brand frozen deep-dish pie crusts and pancakes.  

"What's the difference between pure and imitation vanilla extract?  Which one do you use?"  Brooke

Pure vanilla extract is made with vanilla beans and a solution of alcohol and water.  Imitation vanilla is made from artificial flavorings and leaves a bitter aftertaste.  Pure vanilla extract is more expensive, but I think it's worth every penny!

"Do you scoop or spoon dry ingredients into a measuring cup?"  Sam

My mom taught me to spoon ingredients into a measuring cup and level them off with the back of a table knife.  By spooning ingredients into the cup, you don't run the risk of packing them down which could cause an inaccurate measurement.


The most accurate way to measure ingredients, though, is the way we did it when I worked in a bakery.  We'd measure the ingredients on a kitchen scale, adding or subtracting ingredients until we had the right amount.  Not only was it accurate, it was much quicker than measuring cup after cup of flour or sugar.


"I remember reading a list of marinating tips in one of your blogs, but I can't remember which blog it was.  Could you please post the link to those tips again?  Thanks."  Cara

Margaret's Morsels | Marinated Pork Tenderloin

The marinating dos and don'ts were from a blog I posted in 2010 with the recipe for Marinated Pork Tenderloin pictured above.  The tips can be viewed here.


"Can I use cooking wine instead of regular wine in recipes?"  Grace

You can, but I don't advise it.  Cooking wine tends to be saltier than regular wine.  The caterer I worked for in the early 1990's used to say, "If the wine's not good enough to drink, don't use it for cooking either!"

"Oh-Em-Gee!!!!!!  I love the cake plate your Easter Carrot Cake was on.  Any chance you could tell me where you bought it?"  Ashleigh

Margaret's Morsels | Carrot Cake

I'm glad you liked it!  It's actually a lazy Susan and not a cake plate!  I ordered it from Amazon.com.  Here's what it looks like without anything on top.


"What is gravy flour and where can I get it?"  Jill

Gravy flour, also known as Wondra, is a finely ground all-purpose flour that dissolves instantly and is unlikely to form lumps.  It's sold in the baking aisle with all-purpose, self-rising and bread machine flour.


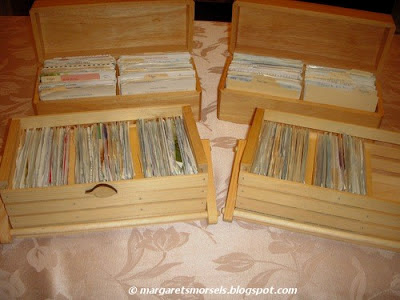
"You must have a lot of recipes.  How do you store them?"  Shannon


Yes, I do have a lot of recipes.  Sometimes I think I have too many recipes! I'm old fashioned and write my recipes on recipe cards and insert them into clear plastic recipe sleeves to keep them clean.  When I first started cooking, I could store all my recipes -- even the ones I hadn't tried yet -- in the strawberry recipe box pictured above.  As my recipe collection grew, I kept my tried and true recipes in one box and moved all the untried recipes to another recipe box.  Nowadays, I keep all my untried recipes in the four boxes pictured below and my tried and true recipes in the picture albums shown above.  The picture albums take up less space than recipe boxes! 


Thanks for emailing all the great questions!  If you've got a question and didn't see it here, email it to me at margaretsmorsels@yahoo.com and I'll do my best to answer it in the next Q & A installment.  Check back soon for the recipe for one of my favorite Italian dishes!


© Margaret's Morsels