May 24, 2013

Brunch for a Bunch

Pin It
  
Margaret's Morsels | Eggs Benedict Casserole


I've always thought eggs Benedict was the perfect brunch dish.  Not only is it delicious, it also looks elegant:  a toasted English muffin topped with Canadian bacon, poached egg and a dollop of Hollandaise sauce.  As much as I like eggs Benedict, it wasn't something I wanted to fix at home, especially for a lot of people.  Poaching all those eggs wasn't something I wanted to do!  A couple of years ago, I found a recipe in the newspaper that lets me serve eggs Benedict without poaching a single egg!

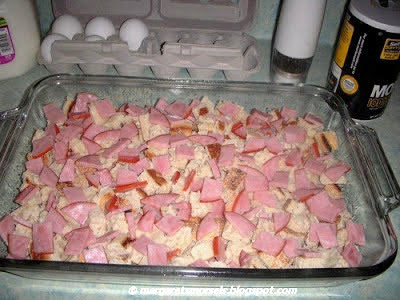
Eggs Benedict Casserole uses the same basic ingredients as eggs Benedict, but they're not used in the same way.  The casserole starts by cutting the Canadian bacon into pieces and placing half of them in the bottom of a 13 x 9 x 2-inch baking dish.

Margaret's Morsels | Eggs Benedict Casserole

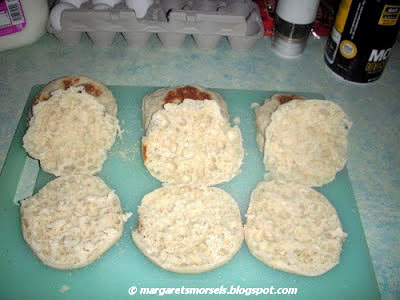
Instead of toasting the English muffins, they're split in half,

Margaret's Morsels | Eggs Benedict Casserole

cut into 1-inch pieces and placed on top of the Canadian bacon.

Margaret's Morsels | Eggs Benedict Casserole

The remaining Canadian bacon is sprinkled on top of the English muffins.

Margaret's Morsels | Eggs Benedict Casserole

Eggs are whisked with milk -- it helps bind the casserole -- salt and pepper and poured over the ingredients in the baking dish.

Margaret's Morsels | Eggs Benedict Casserole

Although salt and pepper aren't used in traditional eggs Benedict, they enhance the flavor of the casserole.

Cover the baking dish and refrigerate overnight.  My experience has been the longer the casserole is refrigerated, the softer the finished product. Since my family prefers a firmer texture, I refrigerate it a minimum of four hours and no more than six.

Remove the baking dish from the refrigerator 30 minutes before baking and let it sit at room temperature.  Cover the baking dish with foil and bake for 35 minutes.  Remove the foil and continue baking until a knife inserted in the center comes out clean, about 10 to 15 minutes.

Margaret's Morsels | Eggs Benedict Casserole

Traditionally, Hollandaise -- a rich sauce made with butter, egg yolks and lemon juice -- is spooned over each serving.  You can make Hollandaise from scratch or, what I do, use two packages of Hollandaise sauce mix.  If I'm making the casserole for a bunch, I fix both packages of sauce.  If I'm only cooking for the three of us, I fix one package the day I make the casserole and the other when I reheat the leftovers.  Instead of pouring the Hollandaise over the casserole, I serve it separately so people can take as much or as little as they want.

Margaret's Morsels | Eggs Benedict Casserole

The next time you need brunch for a a bunch, whip up a batch of Eggs Benedict Casserole.  Add some grits or Potatoes O'Brien, a fruit salad and some muffins and you've got a meal that won't break the bank!


Eggs Benedict Casserole
8 Servings

2 (5 oz.) pkg. Canadian bacon, cut into pieces
6 English muffins, split and cut into 1-inch pieces
8 eggs, beaten
2 cups milk
1 tsp. salt
dash of pepper
2 (1.25 oz.) pkg. Hollandaise sauce mix, prepared according to pkg. directions

Place half the Canadian bacon in a greased 13 x 9 x 2-inch baking dish. Sprinkle the English muffin pieces into the baking dish and top with the remaining Canadian bacon.  Whisk the eggs, milk, salt and pepper together and pour over the ingredients in the baking dish.  Cover and refrigerate overnight or a minimum of four hours.

Remove the baking dish from the refrigerator 30 minutes before baking and let it sit at room temperature.  Cover the dish with foil and bake at 375° for 35 minutes.  Uncover and continue baking until a knife inserted in the center comes out clean, about 10 to 15 minutes.  

Prepare the Hollandaise sauce according to the package directions.  Serve with the casserole.

© Margaret's Morsels


May 20, 2013

Graduation Time

Pin It
Margaret's Morsels | Mortarboard Cupcakes

Pomp and Circumstance will be played in venues around the country as students go through the rite of passage known as graduation.  A tasty way to say "conGRADulations" is with the mortarboard hats pictured above. These tasty, edible creations are easy to make and can be decorated with school colors.  If you missed this post last year, you can click here for step by step directions.


© Margaret's Morsels

May 17, 2013

Microwave Magic

Pin It
Margaret's Morsels | Microwave Brownies

Microwave ovens are wonderful for reheating food.  They're also an excellent way to cook bacon, popcorn, fresh corn-on-the-cob and baked potatoes. You can also use a microwave to cook a made from scratch dessert.  You can go from this

Margaret's Morsels | Microwave Brownies

to this

Margaret's Morsels | Microwave Brownies

in just four minutes!

Homemade microwave brownies are easy to make.  They use the usual ingredients for brownies so chances are you've already got everything on hand.  Nuts are optional so, if you don't have any or don't like them, you can omit them.

To save even more time, let the butter or margarine soften at room temperature while you measure the remaining ingredients.  By the time you're done measuring, the butter will be soft.

Cream the butter and sugar together.

Margaret's Morsels | Microwave Brownies

Mix in the eggs and vanilla.

Margaret's Morsels | Microwave Brownies

Combine the dry ingredients and add to the creamed mixture.

Margaret's Morsels | Microwave Brownies

Beat with a mixer until the ingredients are thoroughly combined.

Margaret's Morsels | Microwave Brownies

Stir in nuts.  I prefer walnuts, but pecans are good too.  Unfortunately, I didn't have either one so I made this batch without nuts.

Pour the batter into a greased glass or microwave-safe baking dish.  I use an 8-inch square Pyrex dish.

Margaret's Morsels | Microwave Brownies

To keep the brownies from overcooking, microwave them in one minute intervals.  Check the batter with a toothpick after each minute, repeating the process until the toothpick comes out clean.  There may be some crumbs on the toothpick, but that's ok.  It takes a total of four minutes for the brownies to cook in my 1100 watt microwave.  Depending on the wattage of your microwave, it may take more or less time.

Let the baking dish cool on a wire rack and then cut the brownies into squares.

Microwave brownies are great for those times when you want something sweet, but you don't want to spend a lot of time in the kitchen.  The recipe also comes in handy when you find out at the last minute you need to make something homemade for a bake sale the next day.  The brownies can be cooked and cooled in less time than it would take to make something from a mix!

Microwave Brownies
16 Servings

1 cup sugar
2/3 cup butter or margarine, softened
2 eggs
1/2 tsp. vanilla
1/2 cup cocoa
1 cup all-purpose flour
1/2 tsp. baking powder
dash of salt
1 cup chopped nuts (optional)

Cream the sugar and butter together in a large mixing bowl using an electric mixer.  Add eggs and vanilla; mix well.  Combine the cocoa, flour, baking powder and salt.  Add to the creamed mixture, beating until combined.  Stir in nuts.  Spread in a greased 8-inch glass or microwave-safe baking dish.  Microwave on High in one minute intervals, testing with a toothpick after each minute.  Repeat the process until a toothpick comes out clean.  Cool the baking dish on a wire rack and then cut the brownies into squares.

© Margaret's Morsels

May 8, 2013

Celebrate Mom

Pin It

Mother's Day is big business in the restaurant world.  According to the National Restaurant Association, Mother's Day is the most popular day to eat out.  This is precisely why I don't want my family to take me out to eat on Mother's Day!  While I appreciate the sentiment, I'd rather go out to eat when it's not as crowded, prices aren't inflated and restaurants aren't in a hurry to turn the table and seat the next patron.  If, for one reason or another, your mom feels the same way, fix her a home cooked meal instead.  If that thought scares you because you're not a cook, check out the recipes below.  This baker's dozen includes recipes for the novice as well as the experienced cook and those in between.  Click on the words in bold to see the recipe.  If none of these are mom's cup of tea, check my blog for lots more recipes.  

Bright and Early:

Margaret's Morsels | Baked Omelet Roll

Baked Omelet Roll:  Six ingredients, a blender, 13 x 9 x 2-inch pan and spatula are all you need to make this impressive looking dish.  You can add meat, vegetables or cheese as a filling, but make sure whatever you use is fully cooked.

Margaret's Morsels | French Toast Souffle

French Toast Souffle:  Although the word "souffle" may sound intimidating, this recipe is really easy to prepare.  You don't even need a souffle dish! It's baked in a 13 x 9 x 2-inch baking dish.  When baked, it makes a delicious sauce that can be spooned on top instead of using syrup.  It has to be assembled and refrigerated the night before it's baked.

Salads:

Margaret's Morsels | Chicken Tender Salad

Chicken Tender Salad:  A bed of salad greens topped with chicken tenders, bacon, hard-boiled eggs, tomatoes, shredded cheese, croutons or potato sticks and some dressing would cost upwards of $8.00 in a restaurant.  This homemade version -- which can be made with a package of salad mix and a box of frozen chicken tenders -- tastes just as good and is a fraction of the cost.

Margaret's Morsels | Chicken Salad

Chicken Salad:  This is the best chicken salad I've ever eaten!  It takes time to make, but it's worth the effort.  It's best when made a day ahead of time so the flavors have time to blend.  Add some celery sticks, croissants and a congealed salad to round out the meal.  To impress mom, place scoops of chicken salad on a lettuce lined platter and top each scoop with a sprig of parsley.

Margaret's Morsels | Cherry Gelatin Fruit Salad

Cherry Gelatin Fruit Salad:  This recipe only uses four ingredients and all of them are sugar-free!  It can be made using a decorative mold, individual molds or a 2-quart serving bowl.  It's a nice accompaniment to chicken salad.

The Main Event:

Margaret's Morsels | Easy Pork Chops and Apples

Easy Pork Chops and Apples:  There's no need to peel apples or brown pork chops with this recipe.  Spread canned apple pie filling in a baking dish, add the pork chops and top everything with packaged stuffing mix. Serve a vegetable or two on the side and you've got a meal that was easy to prepare.

Margaret's Morsels | Broccoli Quiche

Broccoli Quiche:  You don't have to make the pie crust, cook the broccoli or, if you don't mind spending a little extra, grate the cheese to make this quiche.  Add a green salad and some fresh fruit and you've got a meal mom will love.

Margaret's Morsels | Baked Ziti

Baked Ziti:  If you can boil water, you can make this pasta dish.  It's so tasty, mom will never guess it only costs .67 cents a serving!  Add a green salad and some garlic bread and you've got a filling meal.

On the Side:

Margaret's Morsels | Potatoes O'Brien

Potatoes O'Brien:  This recipe uses frozen steak fries instead of fresh potatoes.  This makes the dish quick to prepare because you don't have to peel potatoes.  It also makes cooking time minimal.  This is delicious served with a baked omelet roll.

Margaret's Morsels | Macaroni and Cheese

Macaroni and Cheese:  This side dish is tastier than anything you get from a box!  The hardest part of the recipe is boiling water.  You don't even have to cook the sauce on the stove; the ingredients are mixed up in a bowl.

Bread Basket:

Margaret's Morsels | Cinnamon Muffins

Cinnamon Muffins:  This was the first Mother's Day recipe I ever posted on my blog.  These muffins start with a package of yellow or white cake mix and require more mixing than measuring!  The muffins can be made in a regular size muffin tin or miniature ones.

Sweet Endings:

Margaret's Morsels | Lemonade Pie

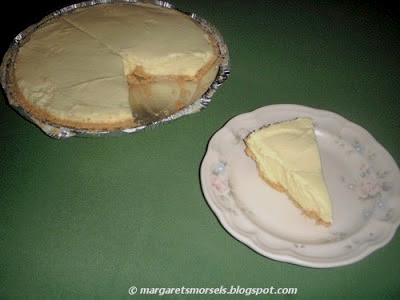
Lemonade Pie:  You won't need any measuring cups or spoons to make this no bake pie.  You will, however, need a can opener and an electric mixer.  Unlike a lot of no bake pies, this pie gets it creaminess not from Cool Whip, but from cream cheese.  You need to allow four hours for it to firm up in the freezer before it's served.

Margaret's Morsels | Sour Cream Cherry Cheesecake

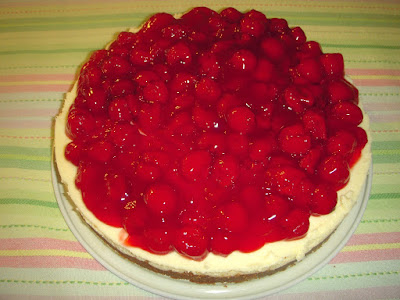
Sour Cream Cherry Cheesecake:  Mom will never guess this cheesecake isn't made from scratch.  A package of no bake cheesecake mix is doctored up and the result is a cheesecake that tastes homemade.  If you don't like cherries, substitute your favorite flavor of pie filling instead.

© Margaret's Morsels

May 2, 2013

Refried Beans with a Twist

Pin It

Margaret's Morsels | Unfried Refried Beans

Last fall, while cooking a pot of dried pinto beans for supper, I started thinking about how I could turn pinto beans into refried beans.  Surely, it couldn't be that hard.  I started by looking at refried bean recipes in cookbooks and on the Internet.  Sure enough, it wasn't hard to transform pinto beans into refried beans.  Finding the right blend of spices, however, wasn't as easy.  I ended up creating my own recipe using my mother's method of cooking pinto beans, a combination of spices culled from several recipes and topping it off with some shredded cheese.

The first thing to remember about dried pinto beans is that they double in size when cooked.  I found this out in my late teens when my mother asked if I would pick up a package of pinto beans for her at the grocery. This was the first time I ever bought dried pinto beans and I bought a 32 ounce package because the 16 ounce package didn't look big enough.  As it turns out, a 16 ounce package will yield approximately 6 cups of beans when cooked.

Working in batches, spread some beans out on a work surface.

Margaret's Morsels | Unfried Refried Beans

Sort through the beans, discarding any that don't look good and removing any debris such as small rocks.  Put the beans in a colander and rinse them under cold running water.

Dried pinto beans need to be rehydrated before they're cooked.  This is usually done in one of two ways.  Either cover the beans with cold water and let them sit at room temperature for several hours or bring the beans to a boil, remove them from the heat and let them soak for 1 1/2 hours.  My mother used a different method.  I don't know who taught her to cook pinto beans this way, but the method is faster and the beans turn out tender and delicious every single time.

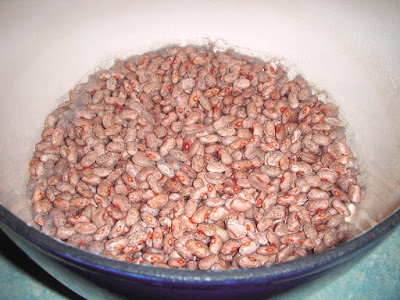
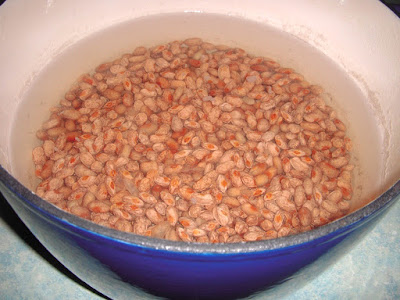
This is how my mother taught me to cook dried pinto beans.  Once the beans have been rinsed, put them in a large pot -- remember they'll double in size -- and barely cover them with cold water.

Margaret's Morsels | Unfried Refried Beans

Bring the water to a boil and let boil for two minutes.

Margaret's Morsels | Unfried Refried Beans

Drain the beans in a colander, put them back in the pot and generously cover the beans with cold water.

Margaret's Morsels | Unfried Refried Beans

Bring the beans to a boil and add sugar, Crisco -- I assume my mother added this to help tenderize the beans -- and the spices for refried beans: chili powder, cumin, garlic powder and onion powder.  Do not add salt. Salt added at the beginning of the cooking time will make the beans tough. Reduce the heat to medium-low, cover the pot with a lid and cook for two hours or until tender.  The water will cook down so check the pot periodically and add additional water if needed.  When the beans are done, stir in the salt.

Margaret's Morsels | Unfried Refried Beans


Remove the beans from the pot with a slotted spoon, reserving the cooking liquid.  If you want the beans to have a smooth consistency, mash them with an electric mixer, adding 1/2 cup cooking liquid for a creamy consistency.

Margaret's Morsels | Unfried Refried Beans

If you want the beans to have more texture, mash them with a fork, adding 1/4 cup cooking liquid at a time, until the beans reach the desired consistency.

Margaret's Morsels | Unfried Refried Beans

Normally, this is where you'd put the beans in a skillet with lard and turn them into refried beans.  Not with this recipe.  I omit this step which is what makes them "unfried" refried beans.

Put the beans in a microwave-safe serving dish and heat for three minutes. Stir and heat another three minutes.  Sprinkle shredded Colby Monterey Jack cheese on top and heat in the microwave until the cheese melts.

Margaret's Morsels | Unfried Refried Beans
If you don't want refried beans, leave the beans whole and serve them as a side dish or even as an entree for a meatless meal.  The addition of chili powder, cumin, garlic powder and onion powder turns everyday pinto beans from ho hum to olé!

Margaret's Morsels | Unfried Refried Beans
Unfried Refried Beans
8 Servings

1 (16 oz.) pkg. dried pinto beans
1 tsp. sugar
2 Tbsp. Crisco
1 tsp. chili powder 
1 tsp. cumin 
1 tsp. garlic powder
1 tsp. onion powder
1 tsp. salt
shredded Colby Monterey Jack cheese to taste

Sort beans, removing any that don't look good as well as any other debris such as rocks.  Put beans in a colander and rinse them with cold running water.  Put the beans in a large pot and barely cover them with water. Bring the water to a boil.  Boil 2 minutes; drain.  Generously cover beans with water and bring to a boil.  Add sugar, Crisco, chili powder, cumin, garlic powder and onion powder.  Reduce heat to medium-low; cover and cook 2 hours or until tender.  Check periodically during the cooking time and add additional water if necessary.  When the beans are done, stir in the salt.

Remove the beans from the pot with a slotted spoon, reserving the cooking liquid.  If you want the beans to have a smooth consistency, mash them with an electric mixer, adding 1/2 cup cooking liquid for a creamy consistency.  For chunkier beans, mash the beans with a fork, adding 1/4 cup cooking liquid at a time, until the beans reach the desired consistency.

Put the beans in a microwave-safe serving dish and heat for three minutes. Stir and heat another three minutes.  Sprinkle the desired amount of shredded Colby Monterey Jack cheese on top and heat in the microwave until the cheese melts.

© Margaret's Morsels