February 8, 2013

Fabulous Fudge

Pin It
Margaret's Morsels | Peanut Butter Fudge

Valentine's Day is less than a week away.  If you want to do something different this year, leave the box of chocolates at the store and make your Valentine some homemade candy instead.  Making candy doesn't have to be hard.  It doesn't have to be chocolate either!

My mother made the best peanut butter fudge.  Her recipe called for cooking part of the ingredients until they reached the soft-ball stage.  The remaining ingredients were stirred in and the mixture was spread in a square 9-inch pan.  The result was perfect fudge every time.  She made it look so easy!  I've never had success with her recipe, even though I've used a candy thermometer and a digital thermometer to know when the mixture was at the soft-ball stage.  Fortunately, I found a recipe that rivals my mother's fudge, but is much easier to make.

Before you begin, measure all the ingredients and line a 13 x 9 x 2-inch pan with foil.  A quick and easy way to line the pan is to turn it upside down and shape the foil around the pan.

Margaret's Morsels | Peanut Butter Fudge

Remove the foil, turn the pan right side up and put the foil in the pan.

Margaret's Morsels | Peanut Butter Fudge

The fudge gets its smooth texture from cream cheese.  My family is used to eating Neufchatel 1/3 less fat cream cheese so that's what I use.  The fudge will be firmer, though, if you use regular cream cheese.  You can use whichever one you prefer, but don't use fat-free cream cheese.  The fat in the cream cheese helps make the fudge firm.

Put cream cheese, peanut butter and peanut butter chips in a microwave-safe bowl. 

Margaret's Morsels | Peanut Butter Fudge

Microwave on High 45 seconds.  Remove from the microwave and stir. Continue to microwave in 15 second intervals, stirring each time, until the ingredients are melted.

Margaret's Morsels | Peanut Butter Fudge

The original recipe didn't call for any flavoring, but I think the fudge tastes better with the addition of pure vanilla extract.  Pure vanilla extract is expensive, but it's so much better than imitation vanilla.  Imitation vanilla is made from artificial flavorings and leaves a bitter aftertaste.  If you don't have the real thing, leave the vanilla out; the fudge will still be good.

Add powdered sugar, one cup at a time, using your hands to knead it into the peanut butter mixture.  Once all the powdered sugar has been incorporated, press the mixture evenly into the foil-lined pan.

Margaret's Morsels | Peanut Butter Fudge

You may think the pan is too big, but it's not.  The fudge is rich so you want the pieces to be thin rather than thick.  Let set at room temperature until firm, about 2 hours.  Cover the pan with foil and refrigerate overnight.

The next day, use the foil to lift the fudge out of the pan.

Margaret's Morsels | Peanut Butter Fudge

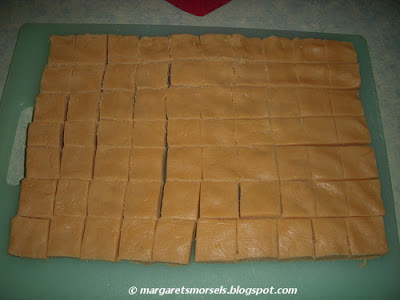
Peel the foil off and put the fudge on a cutting board.  To make the pieces look nicer, I trim the edges off before cutting the fudge into 1 1/4-inch pieces.

Margaret's Morsels | Peanut Butter Fudge

If it's just not Valentine's Day without chocolate, check back next week for the chocolate dessert I'm making for my family.


Peanut Butter Fudge
70 (1 1/4-inch) Pieces

1 (8 oz.) pkg. cream cheese (regular or Neufchatel)
1/2 cup creamy peanut butter
1 cup peanut butter chips
1 Tbsp. vanilla
4 cups powdered sugar

Line a 13 x 9 x 2-inch pan with foil so that foil extends over the sides of the pan.  Put the cream cheese, peanut butter and peanut butter chips in a microwave-safe bowl.  Microwave on High for 45 seconds.  Remove from the microwave and stir.  Microwave in 15 second intervals, stirring each time, until the mixture is melted.  Stir in the vanilla; blend well.  Add powdered sugar, 1 cup at a time, using your hands to knead it into the peanut butter mixture.  After the powdered sugar has been incorporated, press the mixture evenly into the foil-lined pan.  Let stand at room temperature until set, about 2 hours.  Cover the pan with foil and refrigerate.  The next day, use the foil to lift the fudge out of the pan. Remove the foil, place the fudge on a cutting board and cut into squares. Store in the refrigerator.

© Margaret's Morsels


February 1, 2013

Macaroni and Cheese with a Twist

Pin It
Margaret's Morsels | Queso Macaroni

Last year, on a trip out of town, my husband, son and I stopped to eat dinner at a family owned restaurant.  Being a creature of habit, I ordered a vegetable plate.  I don't remember what two of the vegetables were, but I vividly remember the third one:  macaroni and cheese.  It definitely had a twist to it and it wasn't the pasta!  Two differences were clearly visible. One, the sauce was made with white -- not yellow -- cheese.  Two, the ingredients weren't baked in the oven.

My son also had macaroni and cheese and agreed it was delicious.  We started talking about how to duplicate the dish at home when Bill, the cook and owner of the restaurant, came to our table to see if we needed anything.  When I complimented him on the macaroni and cheese, he confirmed that my two observations about the dish were correct. 

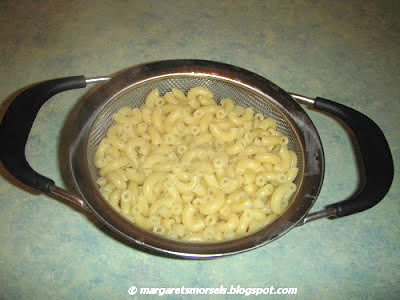
He used queso blanco -- a creamy, soft, unaged white cheese -- instead of Cheddar.  Rather than baking the ingredients, he stirred the cheese sauce into the cooked macaroni.  He proceeded to give me the recipe which made an enormous amount of macaroni and cheese.  It took some experimenting, but I was able to reduce the ingredients and make the dish using an eight ounce package of macaroni.

The sauce starts with a roux -- a mixture of equal parts fat and flour -- that is cooked until the mixture makes a smooth paste.

Margaret's Morsels | Queso Macaroni

Milk is gradually added to the roux.  Through trial and error, I discovered that 1 1/4 cups milk makes a sauce that's the perfect consistency, not only when it's served, but when leftovers are reheated in the microwave.  The mixture is cooked until it's thickened, but not too thick.  The cheese will also act as a thickener.

Margaret's Morsels | Queso Macaroni
Before the cheese is added

The pan is removed from the heat and the queso blanco is stirred into the mixture.

Margaret's Morsels | Queso Macaroni
 After the cheese is added

The sauce is poured over the macaroni and then stirred.

Margaret's Morsels | Queso Macaroni

Queso macaroni is a nice alternative to baked macaroni and cheese. The cheese may be different, but the finished product goes well with any entree that you'd normally serve with macaroni and cheese.  My son thinks it's especially good with corn dog casserole.  As far as he's concerned, those two foods are a match made in culinary heaven.

Margaret's Morsels | Queso Macaroni


Queso Macaroni
8 Servings

1 (8 oz.) pkg. elbow macaroni
3 Tbsp. butter or margarine
3 Tbsp. all-purpose flour
1/2 tsp. salt
dash of pepper
1 1/4 cups milk
2 cups shredded queso blanco cheese

Cook macaroni according to package directions; drain and set aside.  In a saucepan over medium-low heat, melt the butter.  Add flour, salt and pepper, stirring to make a smooth paste.  Gradually add milk, stirring constantly until heated and thickened.  Remove pan from heat; stir in the cheese until smooth.  Pour sauce over macaroni; stir to combine.

© Margaret's Morsels

January 18, 2013

Low and Slow Cooking

Pin It
Margaret's Morsels | Crock-Pot Good and Easy Stew

Until I started writing this blog, I had no idea there were days that celebrated various foods.   Some, like National Peanut Butter Cookie Day and National Pigs in a Blanket Day, are observed once a year (June 12 and April 24 respectively).  Others have a whole month devoted to them. For instance, January is National Slow Cooking Month.  I love cooking with a slow cooker, also known as a crock-pot, and post a recipe every January in honor of this time saving appliance.

Over the last 2 1/2 years, I've shared a number of slow cooker recipes: Chicken a la King; Chili; Queso Dip; Barbecue Chicken; French Dip Sandwiches; Pot Roast with Vegetables.  Today, I want to share my favorite stew recipe.  It's different from a lot of stew recipes in that the only vegetable it uses is mushrooms.  This is ideal for me since I don't like meat in vegetable soup and I don't like vegetables in my stew!

Stew meat -- boneless precut cubes usually from tougher cuts of meat -- is combined with dry onion soup mix, beef broth, mushroom stems and pieces and a can of undiluted cream of mushroom soup.  Put the mixture in the slow cooker, cover with the lid and turn to low.  I cook the stew eight hours, but it can be cooked as long as 12 hours.   

Margaret's Morsels | Crock-Pot Good and Easy Stew
Ready to be cooked.


Margaret's Morsels | Crock-Pot Good and Easy Stew
Cooked eight hours.

The broth is thin so I thicken it with a slurry at the end of the cooking time. Slurry is a fancy name for a thin paste made from equal parts water and starch -- cornstarch or flour -- used as a thickener.  I prefer cornstarch for several reasons.  One, it has twice the thickening power of flour.  One tablespoon of cornstarch is equal to two tablespoons of flour.  Two, cornstarch keeps the broth clear; flour turns it opaque.  Three, cornstarch only needs to be mixed with cold water, unlike flour which has to be cooked to lose the raw taste.

You can whisk the cornstarch into the water or, what I do, combine the ingredients in a small bowl with a lid and shake until the cornstarch is dissolved.

Margaret's Morsels | Crock-Pot Good and Easy Stew
 Slurry made from cornstarch and water.

If I have time, I stir the mixture into the slow cooker and let the stew cook another hour.  If not, I put the slow cooker liner on the stove top, stir in the slurry and cook until the broth is thickened.  Not all slow cooker liners cans be used on the stove top so read the directions that came with your slow cooker before you attempt this.

Margaret's Morsels | Crock-Pot Good and Easy Stew
 The thickened stew.

I serve the stew with noodles and a vegetable.  I serve English peas in the winter and coleslaw in the summer.  The stew is also good with mashed potatoes in place of the noodles.

Margaret's Morsels | Crock-Pot Good and Easy Stew

There's nothing better than coming home to the aroma of a fully cooked meal.  With a slow cooker, that can be a reality all year long!

Good and Easy Stew
8 Servings

2 1/2 lb. stew meat
1 (1.15 oz.) envelope dry onion soup mix
1/2 cup beef broth
1 (10 3/4 oz.) can cream of mushroom soup (undiluted)
1 (8 oz.) can mushroom stems and pieces, drained

Combine the ingredients.  Place in a slow cooker, cover and cook on low for 8 to 12 hours.  If desired, thicken gravy.  Serve over noodles or mashed potatoes.


© Margaret's Morsels

January 11, 2013

No Spoon Needed

Pin It
Margaret's Morsels | Oatmeal Muffins

For many people, the start of the New Year is about making resolutions or implementing changes.  With that in mind, the last two Januaries, I've posted recipes that use healthier cooking methods than their traditional counterparts:  baked -- not fried -- salmon patties; steamed broccoli with -- not cheese sauce -- lemon; sauteed -- not fried -- pork chops; baked -- not fried -- Mozzarella cheese sticks.  This year, I thought I'd do something different and share a recipe that's a tasty way to add fiber to your diet.

According to newspaper and magazine articles, most people don't eat enough fiber.  Fiber can be found in a variety of foods including beans, whole grains, nuts, berries, bran and oatmeal to name a few.  If you like to get your fiber from oatmeal, break the monotony by putting down the spoon and picking up an oatmeal muffin instead!  The recipe I'm sharing uses oats in both the batter and the topping.  With some prep work the night before, the muffins can easily be mixed up in just a few minutes the next morning.

Combine the dry ingredients -- flour, oats, brown sugar, baking powder, cinnamon, salt -- in a mixing bowl.  You can use either old fashioned or quick cooking oats, but not instant.  Instant oatmeal has been precooked and, as such, won't work in baked goods.

Margaret's Morsels | Oatmeal Muffins

Combine the topping ingredients -- oats, sugar, cinnamon -- in a small bowl or resealable plastic bag. 

Margaret's Morsels | Oatmeal Muffins

The next morning, combine the wet ingredients -- egg, milk, oil -- in a small bowl.

Margaret's Morsels | Oatmeal Muffins

Add the wet ingredients to the dry ingredients, stirring only until combined; it's ok if the batter looks lumpy.  You don't want to overmix the batter or the muffins will be tough.

Margaret's Morsels | Oatmeal Muffins

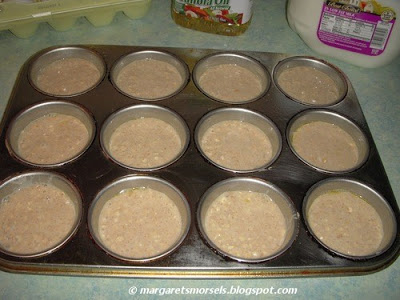
Put the batter into greased muffin cups, filling each cup 3/4 full.

Margaret's Morsels | Oatmeal Muffins

Sprinkle the topping evenly over the batter.


Bake the muffins for 15 to 20 minutes.  Remove the pan from the oven and let the muffins cool five minutes.  Run a knife around the edge of the muffins to loosen them from the pan.  Lift the muffins out and place them on a cooling rack.  Don't turn the muffin pan over or the topping will fall off!

Margaret's Morsels | Oatmeal Muffins

The muffins are a nice change of pace for breakfast and they can easily be packed in a bookbag, purse or briefcase for a snack later in the day.  Not only does fiber make you feel full, it also helps lower cholesterol.  The muffins are so tasty, your kids won't even realize they're also good for them!

Oatmeal Muffins
12 Servings

Batter:
1 1/2 cups all-purpose flour
1 cup oats
1/2 cup brown sugar, packed
1 Tbsp. baking powder
1 tsp. cinnamon
1/4 tsp. salt
1 egg
1 cup milk
1/4 cup oil (I use canola)

Topping:

2 Tbsp. oats
1 Tbsp. sugar
1/4 tsp. cinnamon

Combine the flour, oats, brown sugar, baking powder, cinnamon and salt in a large mixing bowl.  In a small bowl, whisk together the egg, milk and oil.  Add the egg mixture to the dry ingredients; stir just until combined (batter will be lumpy).  Spoon batter into greased muffin cups, filling each 3/4 full.  Combine the topping ingredients in a small bowl; sprinkle evenly over batter.  Bake at 400° for 15 to 20 minutes or until done.  Let muffins cool five minutes before removing from the pan.

© Margaret's Morsels
December 24, 2012

Pressed for Time

Pin It
Margaret's Morsels  | Cinnamon Cookies

For the first time in almost 20 years, I won't be making German Christmas Cookies this year.  My mother made these delectable, melt in your mouth cookies flavored with nutmeg and frosted in icing tinted red, green and yellow every year at Christmas.  They were a holiday tradition just like her cheeseball and Kool-Aid Punch.  Although they epitomize Christmas to me, they have to be rolled, cut out and frosted, something I don't have time to do this year.  I'll still make cookies -- they'll even be shaped like trees and wreaths -- but the designs will come not from a cookie cutter but from a cookie press.

I remember the first time I ever saw a cookie press.  I was a teenager visiting my next door neighbor.  She was using a cookie press to make spritz cookies.  I remember thinking how much faster it was to use a cookie press to shape cookies rather than rolling them out and cutting them with cookie cutters.  It made an indelible impression on me and, when I was living on my own in my first apartment, I bought my very own cookie press. Although a cookie press makes things faster, you don't have to use one to make the recipe I'm sharing today.

Cookie presses come in two sizes:  regular and bite size.  I have one of each, but prefer the bite size cookie press.  I like serving miniature desserts, especially at the holidays when there's a wide variety of food -- including desserts -- available.

A cookie press consists of two parts:  a hollow tube and templates with various designs.

Margaret's Morsels  | Cinnamon Cookies


The tube is filled with cookie dough

Margaret's Morsels  | Cinnamon Cookies

and the template is screwed on the bottom of the tube.


Margaret's Morsels  | Cinnamon Cookies

The cookie dough is pressed through the template by pressing a trigger mechanism on the cookie press.  As the trigger is pressed, a plunger pushes the dough through the template.  Changing the template is as easy as unscrewing the template and screwing on a different one.  I don't recommend using a cookie press with nonstick cookie sheets.  Nonstick pans keep things from sticking which also includes the cookie dough from the cookie press!

The cinnamon cookie recipe is fairly straightforward.  The butter -- I use unsalted -- and sugar are creamed until light and fluffy.

Margaret's Morsels  | Cinnamon Cookies

Add the egg yolks and vanilla

Margaret's Morsels  | Cinnamon Cookies

and beat well.

Margaret's Morsels  | Cinnamon Cookies

Stir the dry ingredients together and add to the creamed mixture in three additions.

Margaret's Morsels  | Cinnamon Cookies

Fill the cookie press with dough and make the desired shapes directly on the cookie sheet.  You'll need to press the mechanism a couple of times before the dough starts coming out of the template.

Margaret's Morsels  | Cinnamon Cookies

Brush the cookies with the reserved egg whites; this helps the cinnamon sugar mixture adhere to the cookies.

Margaret's Morsels  | Cinnamon Cookies

Sprinkle the tops with the cinnamon sugar mixture.

Margaret's Morsels  | Cinnamon Cookies

Bake the cookies for 8 to 10 minutes and immediately remove them to a cooling rack.

Margaret's Morsels  | Cinnamon Cookies

You'll need to wash the cookie sheet between batches to remove the egg white residue and leftover cinnamon sugar.

If you don't have a cookie press, make the cookies as directed, but refrigerate the dough until it's firm enough to roll into balls.  Omit the egg whites and roll the cookies in the cinnamon sugar mixture like you would for Snickerdoodles.  Proceed as directed.  You may need to increase the baking time for regular size cookies.

These cookies will never replace the Christmas cookies from my childhood, but they're a nice alternative this year since I'm pressed for time.


Cinnamon Cookies
150 Bite Size

1 cup butter (no substitutes), softened
1 cup sugar
2 eggs, separated
1 tsp. vanilla
2 1/4 cups all-purpose flour
2 tsp. cinnamon
1/2 tsp. salt
2 egg whites
1/4 cup sugar
1 tsp. cinnamon

Cream butter and sugar until light and fluffy.  Add egg yolks and vanilla; beat well.  Stir the flour, 2 teaspoons cinnamon and salt together; add to creamed mixture in three additions.  Place cookie dough in cookie press; make desired shapes on ungreased cookie sheet.  Brush cookies with the reserved egg whites.  Combine 1/4 cup sugar and 1 teaspoon cinnamon; sprinkle over cookies.  Bake at 400° for 8 to 10 minutes.

© Margaret's Morsels

December 20, 2012

Beating the Holiday Hustle

Pin It
Margaret's Morsels | Goulash

Life gets busier in December.  In addition to everyday activities -- working, taking care of families, driving carpools, cooking, cleaning, doing laundry, paying bills, attending sporting events, meetings, school functions and church activities -- tis also the season for cookie swaps,

Margaret's Morsels | Goulash

decorating,


sending Christmas cards,

Margaret's Morsels | Goulash

wrapping packages, 

Margaret's Morsels | Goulash


Margaret's Morsels | Ritz Cracker Cookies

When busy days get even busier, you don't have to eat out or rely on frozen food or take out for a fast meal.  The recipe I'm sharing today is ready in less than an hour.

A few years ago, a friend gave me a recipe for goulash.  When I heard the name, I immediately thought of the traditional Hungarian dish which is a kind of soup or stew.  I was pleasantly surprised to find out that this goulash, unlike its namesake, is actually a casserole.  Although the preparation is different, both recipes share some similarities.
  • Meat:  Both versions use beef, but the casserole uses ground beef instead of stew meat. 

Margaret's Morsels | Goulash

  • Vegetables:  The soup or stew usually has potatoes, onions and tomatoes, although some versions use a larger variety of vegetables.  The casserole uses onion, canned pork and beans and, in place of tomatoes, a can of tomato soup.  Make sure you use pork and beans and not baked beans which are flavored with additional spices.

Margaret's Morsels | Goulash

  • Pasta:  Some versions call for traditional goulash to be cooked with pasta while other versions serve the dish over cooked pasta.  The casserole uses macaroni which is combined with the other ingredients before baking.

Margaret's Morsels | Goulash

  • Spices:  The soup or stew is seasoned with paprika -- a bright orange-red spice made from ground up sweet peppers -- which can range from mild to hot.  The casserole gets some heat from a couple of tablespoons of chili powder.

Margaret's Morsels | Goulash

Although there are similarities between the dishes, there's also one noticeable difference:  cheese.  The top of the casserole is covered with shredded Cheddar cheese before it's baked.

Margaret's Morsels | Goulash

The casserole is baked in the oven for 30 minutes.  I add a salad and garlic bread for an easy meal on a busy day.  Not only is this quick to prepare during the holiday hustle, it's also a warming meal on a cold winter night.

Margaret's Morsels | Goulash

Goulash
6 to 8 Servings

1 lb. ground beef
1/2 onion, chopped
2 Tbsp. chili powder, divided
1 cup elbow macaroni, cooked and drained
1 (15.75 oz.) can pork and beans
1 (10 3/4 oz.) can tomato soup (undiluted)
2 cups shredded Cheddar cheese

Brown the ground beef, onion and 1 tablespoon chili powder; drain. Combine the ground beef mixture with the macaroni, pork and beans, soup and remaining 1 tablespoon chili powder.  Put in a lightly greased 13 x 9-inch pan.  Sprinkle with cheese.  Bake at 350° for 30 minutes.

© Margaret's Morsels

December 11, 2012

Candy Cane Reminder

Pin It
Margaret's Morsels | Candy Cane Lollipops

Just a friendly reminder that if you want to make these white chocolate and peppermint lollipops in February, be sure to stock up on mini candy canes while they're available.

Margaret's Morsels | Candy Cane Lollipops


© Margaret's Morsels