June 29, 2013

Smokin' Hot

Pin It
Margaret's Morsels | Barbecue Baked Beans

Since the 4th of July is next week, I thought I'd share a recipe I first made a couple of years ago for my family's Independence Day celebration.  It's an easy way to add heat to the meal without the fire.

When I think of barbecue, I think of a pulled pork sandwich piled high on a bun and topped with coleslaw.  Or, barbecue spaghetti sauce ladled on a plate of hot cooked spaghetti.  Or, something I make at home, barbecue chicken breasts that have been cooked in the crock-pot.  Barbecue isn't just for entrees though.  It makes a great addition to baked beans.

Barbecue Baked Beans are similar to the Easy Stove Top Beans recipe I posted a couple of years ago.  They use a lot of the same ingredients, but have different cooking methods.

The most notable difference is stove top beans use pork and beans, while barbecue baked beans use baked beans.  Sometimes the terms are used interchangeably, but there is a difference between the two.  Canned pork and beans are lighter in color and are made with white beans, tomato sauce and, surprisingly, very little pork.  Canned baked beans are made with additional ingredients which not only gives them a darker color, but makes them sweeter and thicker too.

Both recipes start by cooking bacon and using the grease to saute chopped onion.  Once the onion is sauteed 


Margaret's Morsels | Barbecue Baked Beans


and drained,


Margaret's Morsels | Barbecue Baked Beans


the baked beans 


Margaret's Morsels | Barbecue Baked Beans


are combined with barbecue sauce (this takes the place of the vinegar and catsup used in the easy stove top beans)


Margaret's Morsels | Barbecue Baked Beans


brown sugar,


Margaret's Morsels | Barbecue Baked Beans


the sauteed onion 


Margaret's Morsels | Barbecue Baked Beans


and crumbled bacon.


Margaret's Morsels | Barbecue Baked Beans


Put the mixture in a greased baking dish and bake until heated through, 20 to 30 minutes.

The recipe can be doubled or even tripled, but you might not want to double or triple the barbecue sauce.  It depends on how spicy you want the finished dish.

The barbecue sauce will make the beans smokin' hot.  If that's too much heat for you, check back in a couple of days for a tasty way to cool off your taste buds.


Barbecue Baked Beans
4 Servings

3 bacon strips, cooked and crumbled
2 Tbsp. chopped onion
1 (16 oz.) can baked beans
3/4 cup barbecue sauce
2 Tbsp. packed brown sugar


Saute onion in bacon grease; drain.  Thoroughly combine all ingredients. Put mixture in a greased casserole dish.  Bake at 350° until heated through, 20 to 30 minutes.

© Margaret's Morsels

June 19, 2013

A Bowl Full of Cherries

Pin It
Margaret's Morsels | Cherry Pie Filling Salad

I've posted a lot of recipes that came from my mother.  Today, I thought I'd share one that was given to me by my mother-in-law.  Ironically, I'd seen the recipe in a cookbook years earlier, but dismissed it thinking it wouldn't be any good.  Boy, was I wrong!

Cherry pie filling salad only uses five ingredients.  One of them -- sweetened condensed milk -- is prominently featured in the recipe and the reason I dismissed the recipe in the first place.  It's not that I don't like sweetened condensed milk -- I use it in other recipes -- but I couldn't imagine a salad made with milk.  After all, sweetened condensed milk is, as the name says, milk that has been thickened by removing the water and then sweetened with sugar.

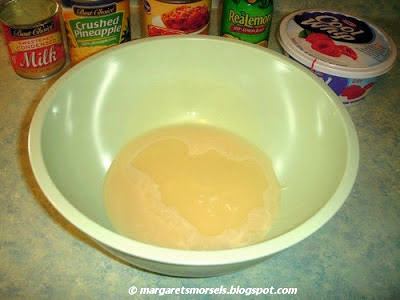
The sweetened condensed milk 

Margaret's Morsels | Cherry Pie Filling Salad


is combined with lemon juice,

Margaret's Morsels | Cherry Pie Filling Salad


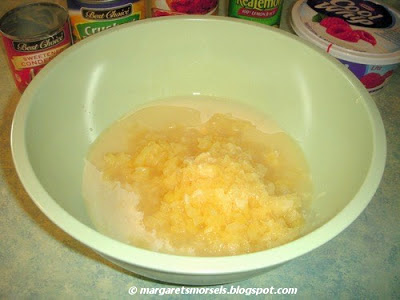
crushed pineapple

Margaret's Morsels | Cherry Pie Filling Salad


and cherry pie filling.

Margaret's Morsels | Cherry Pie Filling Salad


My mother-in-law used regular cherry pie filling, but I use lite which has fewer calories and less sodium, carbs and sugar than regular pie filling. When it's mixed with the other ingredients, you won't even be able to taste the difference.  Once these ingredients are thoroughly combined,

Margaret's Morsels | Cherry Pie Filling Salad


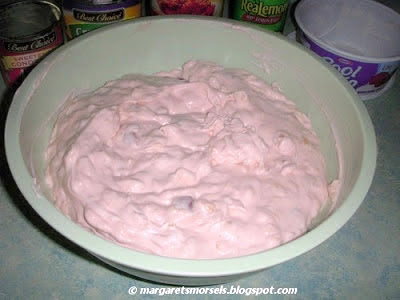
a carton of Cool Whip is folded into the mixture.

Margaret's Morsels | Cherry Pie Filling Salad


To make this salad a little healthier, I use Cool Whip Lite which has less fat than regular Cool Whip.  Refrigerate the salad several hours or overnight until it's thoroughly cold.

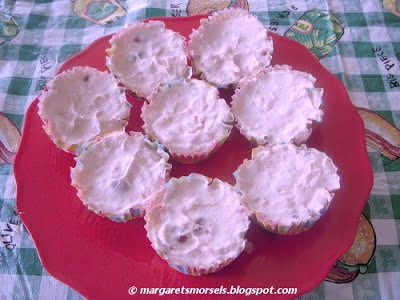
Although it's called salad and could be served as such, my mother-in-law served it as a dessert.  I serve it that way too, but with a twist.  I like to freeze it in individual paper baking cups.  If you want to freeze it, make sure to use regular or low-fat Cool Whip.  The fat in the Cool Whip helps make the salad firm when frozen.  You don't need to refrigerate the salad first if you're going to put it in the freezer.

Line a muffin tin with paper baking cups.  You'll need 30 if you want to freeze the entire salad.  Spoon the mixture into the cups, filling almost all the way to the top.

Margaret's Morsels | Cherry Pie Filling Salad


Use a spoon to smooth the top and put the pan in the freezer overnight.

Margaret's Morsels | Cherry Pie Filling Salad

The next day, remove the baking cups from the pan and store them in a covered container in the freezer.

One advantage of using low-fat Cool Whip is that, when frozen, it's not rock hard.  You can take it out of the freezer and serve it immediately without having to wait for it to soften.  If you use regular Cool Whip, remove the desired number from the freezer and let them soften a few minutes at room temperature before serving.

You can skip freezing the salad and serve it straight from the refrigerator.  I serve part of it this way and freeze the rest.  When the temperature goes from hot to scorching in the summer, these individual frozen treats are much more refreshing than a popsicle or scoop of ice cream.

Margaret's Morsels | Cherry Pie Filling Salad


Cherry Pie Filling Salad
4 to 6 Servings or 30 Servings if Frozen

1 (14 oz.) can sweetened condensed milk
1/4 cup lemon juice
1 (20 oz.) can crushed pineapple, drained
1 (21 oz.) can cherry pie filling
1 (8 oz.) carton Cool Whip, thawed*

Mix the first four ingredients.  Fold in Cool Whip.  Mix well and refrigerate. Store leftovers in the refrigerator.

To freeze, put paper baking cups in a muffin pan.  Spoon the mixture into the  cups, filling almost all the way to the top.  Use a spoon to smooth the top and put the pan in the freezer overnight.  The next day, remove the baking cups from the pan and store them in a covered container in the freezer.

*If freezing the salad, use regular or low-fat Cool Whip, not fat-free.


© Margaret's Morsels
June 13, 2013

Kitchen Essentials

Pin It
According to theknot.com, June, August, September and October are the most popular months for weddings.  I believe it, especially when I think back to the number of weddings I've attended during those months!  Since wedding season is upon us, I thought I'd share two blogs I posted in early 2012.  These blogs came about after a friend that was getting married asked me to compile a list of my "must have" kitchen tools.  I hope these suggestions will come in handy, whether you're registering for wedding gifts, moving out on your own for the first time or looking for tools to make cooking easier.

Margaret's Morsels | Prep School

Prep School:  This lists the tools a cook needs to prep food for cooking.  It isn't all inclusive, but these are the tools I rely on when I'm cooking for three or twenty three.    

Margaret's Morsels | Cooking School

Cooking School:  This lists the items I rely on once the measuring, chopping, peeling, juicing, pounding, grating, straining, mixing, whisking, rolling and cutting have been done.


© Margaret's Morsels
June 6, 2013

Say Cheese: Vegetable Edition

Pin It
Margaret's Morsels | Broccoli Au Gratin

A couple of years ago, I shared a recipe for fresh steamed broccoli with lemon -- not cheese -- sauce.  When I don't have fresh broccoli on hand or I want to serve something a little fancier, I pull out a recipe my mom used to make called Broccoli Au Gratin.  The name may sound intimidating, but the recipe is really easy to make.  Au gratin is just a French word that means to sprinkle food with bread crumbs, grated cheese, or both and then brown it in the oven.

Instead of fresh broccoli, this casserole uses a 16 ounce package of frozen chopped broccoli that's cooked according to package directions.  While the broccoli is cooking, crumble enough Ritz crackers to equal 1/2 cup crumbs -- about 13 crackers.  The easiest and neatest way to do this is to put the crackers in a plastic bag

Margaret's Morsels | Broccoli Au Gratin

and crush them with your hands.

Margaret's Morsels | Broccoli Au Gratin

When the broccoli is almost done, bring a can of undiluted cream of chicken soup to a boil over low heat.

Margaret's Morsels | Broccoli Au Gratin

Remove the soup from the heat and stir in the grated cheese until it's melted.


Margaret's Morsels | Broccoli Au Gratin
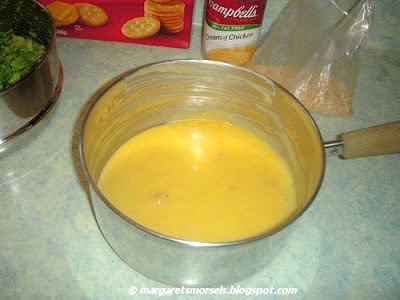
I use 98% fat-free soup which has less sodium than regular soup.  For that reason, I stir in 1/2 teaspoon of salt when I add the cheese.

Thoroughly drain the broccoli, stir it in the soup mixture and spread it in a greased casserole dish.

Margaret's Morsels | Broccoli Au Gratin

Most recipes call for cracker crumbs to be combined with melted butter or dotted with butter, but not this one.  It doesn't use any butter.  I actually prefer it this way because the crumbs won't be soggy when you reheat the leftovers.  Sprinkle the cracker crumbs on top 

Margaret's Morsels | Broccoli Au Gratin

and bake the casserole at 350° for 30 minutes.

My mom served Broccoli Au Gratin with a variety of entrees, but I especially like to serve it with Microwave Tuna and Noodle Parmesan.

Margaret's Morsels | Broccoli Au Gratin
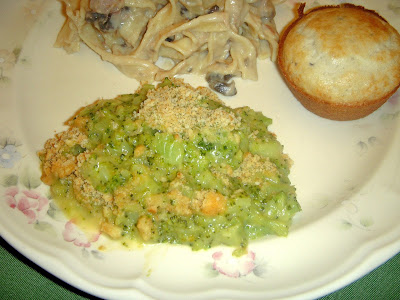
No matter what you choose to serve it with, the recipe is a nice alternative to steamed broccoli.  It's also an easy, tasty and inexpensive way to dress up an ordinary package of frozen chopped broccoli.

Broccoli Au Gratin
6 Servings

1 (16 oz.) pkg. frozen chopped broccoli, cooked and drained
1 (10 3/4 oz.) can cream of chicken soup (undiluted)*
1/2 cup shredded Cheddar cheese
1/2 cup crushed Ritz cracker crumbs (approximately 13 crackers)

Cook broccoli according to package directions; drain.  Bring undiluted soup to a boil over low heat; remove from heat and stir in cheese until it's melted.  Stir in broccoli.  Place mixture in a greased casserole dish; sprinkle with cracker crumbs.  Bake at 350° for 30 minutes.

*If using 98% fat-free soup, add 1/2 teaspoon salt when you add the cheese.

© Margaret's Morsels