August 30, 2010

A Summertime Staple

Pin It
Margaret's Morsels | Chicken Salad


Before summer is over, I want to share my favorite summertime recipe.  I make the first batch as soon as the mercury starts rising.  I obtained the recipe from a restaurant in Chattanooga 20 years ago.  It is the best Chicken Salad I've ever eaten!


All chicken salad recipes start out the same.  They use chicken, seasonings and something to bind it together.  Usually the binding ingredient is mayonnaise, but I've seen recipes that use sour cream, whipped cream, cream cheese and even Cool Whip.  Some recipes keep it simple, but other recipes add a lot of ingredients.  The additional ingredients fall into four categories:

  • Fruit:  This is probably the most popular addition to chicken salad.  A lot of recipes use grapes, mandarin oranges or pineapple.  I've also seen recipes that use peaches, apricots, strawberries or cranberries.
  • Vegetables:  Although not as popular as fruit, most recipes usually include celery, onion, pimentos or a combination of the three.  I've also found recipes that use garlic, green peas, green onions or broccoli.
  • Texture:  Chicken salad doesn't have much texture which is why a lot of recipes include something crunchy.  Usually the crunch comes from celery or nuts, such as almonds, cashews, pecans or walnuts.  Some recipes add texture by adding bacon, poppy seeds or French fried onions.
  • Seasonings:  This is where personal preference comes into play more than any other category.  I stick with salt and pepper, but there are recipes that call for lemon juice, sugar, mustard, vinegar, honey, mint or Worcestershire sauce.

Chicken salad is a versatile recipe.  If you don't like an ingredient, you can leave it out or substitute something else in its place.  If you think it needs additional ingredients, you can add things you like.  When you add or subtract ingredients, you need to adjust the amount of the binding ingredient and seasonings as well.

My recipe uses what I consider to be traditional ingredients for chicken salad, but it does contain one ingredient that is slightly exotic:  water chestnuts.  Water chestnuts are bland, but they are extremely crunchy.  I highly recommend leaving them in the salad.

Margaret's Morsels | Chicken Salad

I omit the pecans if I know someone is allergic to nuts.  You could put pecans in half the batch and leave the other half plain.  However, you need to make sure you know which batch is which.  I find it easier just to leave out the pecans.


When I make chicken salad, I use chicken breasts with the skin and bone attached.  I find the meat is more flavorful than using boneless, skinless chicken breasts.  While the chicken is cooking, I prep all the other ingredients.  By the time the chicken is cooked, skinned and boned, I've got everything ready to assemble.  I make chicken salad a day ahead and refrigerate it so the flavors have time to blend.

Margaret's Morsels | Chicken Salad
I do all this while the chicken is cooking.


A nice way to serve chicken salad is on a lettuce lined platter.  You can use a cookie scoop to make individual mounds of chicken salad.  To make it fancier, top each mound with a sprig of parsley.


I like to serve chicken salad with a basket of croissants and another cold dish, such as Cherry Gelatin Fruit Salad.  Summer is quickly winding down, but I think there's enough time for me to make one more batch of chicken salad this season.


Chicken Salad
8 Servings

4 chicken breast halves
1 onion, quartered
1 stalk celery, halved
1 (8 oz.) can water chestnuts, drained and chopped
1/4 cup sweet pickle relish, drained
1 (2 oz.) jar diced pimentos, drained
1/4 cup chopped  pecans
1/2 cup chopped celery
3 hard-boiled eggs, peeled and chopped
mayonnaise (enough to moisten)
salt to taste
pepper to taste

Cover chicken with water; add salt, onion and stalk of celery.  Bring to a boil; reduce heat.  Cover and cook until chicken is tender, about 1 hour. Discard onion and celery.  Skin and debone chicken; chop into small chunks.  Add remaining ingredients; mix well.  Keep refrigerated.


© Margaret's Morsels


August 24, 2010

Mad About Molds

Pin It
Margaret's Morsels | Cherry Gelatin Fruit Salad

I love congealed salads.  They are a cold side dish on a hot day, can be made with a variety of flavors with all kinds of additions, usually fruit and vegetables.  There is one exception.  Fresh pineapple contains an enzyme that prevents gelatin from congealing.  If you want to use pineapple, you need to use canned pineapple.


I don't know where I found the recipe for Cherry Gelatin Fruit Salad, but I've been making it for over a decade.  It is my most requested congealed salad recipe.  People are surprised when they find out it only uses four ingredients.  You can't tell when you're eating it that those four ingredients are sugar-free.


Margaret's Morsels | Cherry Gelatin Fruit Salad

I love to use decorative molds when I make congealed salads.  If you don't have a mold, you can use any food container that has a distinctive shape. I've used silicone pans, cake pans and muffin pans.  It's nice to make the congealed salad in holiday themed pans, if you have them.  It adds festivity to the holiday table.


Margaret's Morsels | Cherry Gelatin Fruit Salad
Items I've used as molds.

A nice touch is to make the salad in individual molds.  Not only does this look pretty on a serving platter, it's also good for portion control when you're feeding a lot of people.  If you know how many people are attending, you can make one mold for each person.

If you want to buy some molds, I highly recommend plastic ones that have a top and bottom lid.  After you put the mold on the serving platter and remove the second lid, the salad drops out of the mold onto the serving platter.


Margaret's Morsels | Cherry Gelatin Fruit Salad
This mold has a lid on the top and bottom.

No matter which container you use, be sure to spray it generously with nonstick cooking spray.  If you don't, you might have trouble getting the salad out of the mold or it might tear up in the process.

Right before you remove the salad from the mold, wet a paper towel and rub it on your serving platter.  The damp platter makes it easy to move the salad if it's not in the right spot.

To remove the salad from the mold, fill the kitchen sink with enough hot water to come halfway up the sides of the mold.  Put the mold in the water for 10 seconds.  Invert the serving platter over the mold and turn both upside down.  If the salad doesn't come out of the mold, run a thin blade knife around the sides to loosen the salad.  It should easily release from the pan.

Whether you mold it or serve it from a bowl, I hope you'll try this recipe.  It is quite tasty and you won't even miss the sugar!

 Cherry Gelatin Fruit Salad
8 Servings

1 cup unsweetened applesauce
1 (6 oz.) pkg. sugar-free cherry gelatin
1 (12 oz.) can diet 7-Up
1 (8 oz.) can unsweetened crushed pineapple (undrained)

In a saucepan, bring the applesauce to a boil; remove from heat.  Stir in gelatin until dissolved.  Slowly add 7-Up and pineapple.  Pour into a mold or 2-quart serving bowl.  Chill overnight.


© Margaret's Morsels

August 18, 2010

Sensational Strawberries

Pin It
Kids in the South usually get out of school the end of May and go back in August.  This coincides with, and makes it easy to remember, peak strawberry season:  June to August.  Thanks to imports, strawberries are also available other times during the year.  The best ones, though, are grown locally and that season, like summer break, goes by quickly.

When choosing strawberries, look for plump red berries that have the green caps attached.  Larger berries may look prettier, but smaller berries have more flavor.  Always look at the berries on the bottom of the package. The ones on top may look picture perfect, but the ones on the bottom might be bad.

Unlike some produce, strawberries do not ripen once they are picked so make sure the berries you're buying are ripe ones.  I always smell the berries.  If the strawberry scent is faint, I don't buy them.

Strawberries need to be stored in the refrigerator and are best used within a day or two of purchase.  Before storing them, remove any berries that are damaged.  Don't wash the strawberries or cut off the green caps until you're ready to use them.  Once the caps are removed, the strawberries start deteriorating.

Since strawberries are still available, I want to share a strawberry cake recipe given to me by my husband's cousin.  The cake starts with a cake mix and is very easy to prepare.  The assembly may sound complicated, but it's actually very easy.  The following tips should make the process even easier.

Margaret's Morsels | Triple Strawberry Cake
Triple Strawberry Cake
  • When you take the cake out of the oven, let it cool in the pan on a wire rack for 10 minutes.  Remove the cake from the pan onto a wire rack, but do not flip it right side up.
  • Once the cake is completely cool, leave it on the wire rack and put it in the freezer for 30 minutes.  You don't want to freeze the cake, but want it very cold.  This makes it easier and less crumbly when you slice it into layers.
  • After you take the cake out of the freezer, flip the cake over onto another wire rack.  The bottom layer will now be right side up when you slice the cake into layers.
  • You can cut the cake into layers using a sawing motion with either a serrated knife or a piece of unflavored dental floss.  If you use the dental floss, you'll need to cut the cake at each corner on one end in order to insert the dental floss.  Hold the dental floss tightly and, starting at the opposite end, use a sawing motion as you pull the dental floss towards you.
  • Once the cake is split into two layers, slide a cake board under the layer that's on top.  This makes it easier to move and less likely to tear up.  When it's time to put this layer back in the pan, you can slide it easily off the cake board.
Margaret's Morsels | Triple Strawberry Cake
 The top layer removed from the cake.
 
  • When putting the layers back into the pan, put the wire rack or cake board at the end of the pan.  There's less chance of the cake tearing since you won't have to rearrange it in the pan.
While the cake is in the freezer, slice the strawberries and put them in a bowl with some sugar.  A good rule of thumb is to use 1 tablespoon of sugar for each cup of sliced strawberries.  You may need more or less sugar depending on the sweetness of the berries.  Stir the sugar into the berries and leave the bowl on the countertop.  By the time you slice the cake into layers, the berries and sugar will have made a syrup.


Margaret's Morsels | Triple Strawberry Cake
The strawberry and sugar mixture.

Now you're ready to assemble the cake.  Slide the bottom layer back into the cake pan.  Spoon half the strawberry mixture over the bottom layer. Put the container of strawberry icing in the microwave and heat on High for 15 seconds, or until it's soft enough to pour.  Pour the icing over the cake. The cake will look like this:

Margaret's Morsels | Triple Strawberry Cake

Slide the top layer into the cake pan and repeat the process with the remaining strawberries and the cream cheese icing.  Once the cake is assembled, keep it covered and stored in the refrigerator.  

If you have any strawberries left, you can use them as a garnish on the cake.  Put a strawberry on a cutting board.  Using a sharp knife, slice the berry from the green cap to the bottom of the berry without cutting all the way through.  Fan these cuts out and put one strawberry on each piece of cake.


Margaret's Morsels | Triple Strawberry Cake

This cake may seem like a lot of work, but it's really not hard at all.  Even if the layers are uneven or the cake doesn't look the way you want, nobody will notice.  They'll be too busy eating the cake and asking for the recipe!

Triple Strawberry Cake
12 to 16 Servings

1 (18.25 oz.) pkg. strawberry cake mix
4 cups sliced strawberries or to taste
1/4 cup sugar (more or less to taste)
1 (16 oz.) can strawberry icing
1 (16 oz.) can cream cheese icing

Prepare cake mix according to package directions.  Spray a  9 x 13 pan with nonstick cooking spray with flour.  Pour batter into pan and  bake according to package directions.  After cake cools, slice into two layers.

Put strawberries and sugar in a bowl.  Let stand 5 to 10 minutes to make a syrup.  Put one cake layer back in the 9 x 13 pan.  Put half the strawberry mixture over the bottom cake layer.  Put the container of strawberry icing in the microwave and heat on High 15 seconds, or until it's soft enough to pour.  Pour the icing over the strawberries.

Put the top cake layer back in the pan.  Put the remaining strawberry mixture over the top layer.  Put the container of cream cheese icing in the microwave and heat on High 15 seconds, or until it's soft enough to pour. Pour the icing over the strawberries.  Keep cake covered and stored in the refrigerator.

Margaret's Morsels | Triple Strawberry Cake


© Margaret's Morsels
August 13, 2010

Morselette

Pin It The idea and pictures for today's morselette are courtesy of my son.  He recently opened some candy he received last Christmas (what can I say, the kid doesn't have a sweet tooth).  The candy looked substantial in the box:


When he opened the box, this is what he found:


The box had a cardboard insert that held the candy up, making it look much larger.   Have you found any food items that had misleading packaging?


© Margaret's Morsels

August 10, 2010

The Staff of Life

Pin It
Margaret's Morsels | Garlic Cheese Biscuits

Bread is called the staff of life, but it's not a staple on my dinner table. Occasionally I make cornbread or corn muffins.  When I serve pasta, I heat frozen garlic bread.  For holidays and special occasions, I always make homemade rolls.  The rest of the year my bread basket is empty, except for the few occasions when I need something that's a step up from cornbread, but not as time consuming as homemade rolls.


Recipes for Garlic Cheese Biscuits have been around for decades.  Most of these recipes try to replicate the biscuits served at Red Lobster.  The recipes I've tried over the years made that claim too, but I never thought the biscuits tasted as good as the ones served in the restaurant.  After several unsuccessful endeavors, I finally gave up and decided if I wanted Garlic Cheese Biscuits, I'd have to go to Red Lobster to get them.


Last year, a friend gave me a different version of a recipe for Garlic Cheese Biscuits.  I was skeptical about trying it since I had been disappointed with other versions I'd made in the past.  I compared the ingredients in her recipe to the ones used in other recipes and -- although similar -- there were enough differences that I decided to whip up a batch. I'm glad I did because these Garlic Cheese Biscuits are, as my family calls a good recipe, a "keeper."

Margaret's Morsels | Garlic Cheese Biscuits
I use HeartSmart Bisquick and sharp Cheddar cheese.
You can use regular Bisquick and mild Cheddar cheese instead.

My son never liked my previous attempts at Garlic Cheese Biscuits because they didn't have enough cheese.  He loves the new recipe because it uses a lot more cheese.  My husband thought my previous attempts didn't have enough garlic.  The new version uses garlic powder and garlic salt for a double dose of garlic flavor.  

These minor changes made all the difference and I now have a Garlic Cheese Biscuit recipe my whole family loves.  I'm glad because I don't care for fish and don't want to go to Red Lobster!

Garlic Cheese Biscuits
12 to 15 Servings

2 cups Bisquick
1/2 tsp. garlic powder
1 1/2 cups shredded Cheddar cheese
2/3 cup milk
2 Tbsp. butter, melted
1/2 tsp. garlic salt

Preheat oven to 400°.  Stir together the first three ingredients.  Add milk and stir until combined.  Place dough in greased muffin cups.  Bake 10 minutes or until lightly browned.  Melt butter and mix with garlic salt.  Brush biscuits generously with butter mixture as soon as they come out of the oven.

© Margaret's Morsels


August 5, 2010

Barbecue Without the Grill

Pin It


Margaret's Morsels | Crock-Pot Barbecue Chicken

It's summertime and the livin' is easy.  It's also hot and humid outside. With some advance planning, you can make mealtime easy and keep the kitchen cool.  All it takes to serve a hot meal without feeling the heat is a slow cooker.


Slow cookers were introduced in the early 1970's, but have evolved over the years.  When they first hit store shelves, the liner --  the insert that goes inside the slow cooker -- wasn't removable.  This made clean up difficult and many slow cookers were pushed to the back of the cabinet.  A few years later, slow cookers became available with a removable liner.  A removable liner makes clean up a breeze since it can be washed in the dishwasher.


Slow cookers come in a variety of shapes and sizes ranging from one quart to six quart.  The most common shapes are round and oval.  The oval shape is wonderful for cooking something big like a roast.  My 21 year old slow cooker has two settings:  low and high.  Newer models have more settings and some are even programmable.


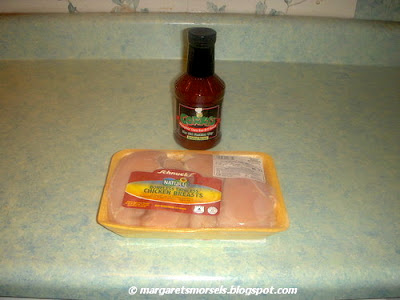
My husband loves barbecue chicken.  Although we live in a city where barbecue is king, rather than go out to eat, I fix barbecue chicken in my slow cooker.  The first time I fixed it, my husband deemed the recipe a keeper.  It's not so much a recipe, but a method.  It's quick and easy and only uses two ingredients:  barbecue sauce and chicken.

Margaret's Morsels | Crock-Pot Barbecue Chicken

Put the desired number of boneless, skinless chicken breasts in the slow cooker.  Pour your favorite barbecue sauce over the chicken, covering the top of the chicken with the sauce.  If you're cooking several pieces of chicken, it's a good idea to put some barbecue sauce between the layers of chicken.  Put the lid on and turn the temperature setting to low.  Five hours later, your dinner will be ready.  One advantage of using a slow cooker is it cooks with slow and steady heat, so it's ok if the chicken cooks longer than five hours.


Margaret's Morsels | Crock-Pot Barbecue Chicken
The cooked barbecue chicken.


With just a little bit of prep time, your entree will be cooked and the kitchen cool when you're ready to eat.  If you want to keep your kitchen completely cool, round out the meal with a green salad and some fresh microwave corn-on-the-cob.


© Margaret's Morsels


August 2, 2010

Company's Coming

Pin It
Margaret's Morsels | Overnight Coffee Cake


My mother was a great cook who taught me a lot about cooking and entertaining.  One of the best pieces of advice she gave me is one I take to heart:  do as much work as possible ahead of time.  This is especially good advice when having overnight guests.


I love having friends and family come for a visit.  It's a chance to catch up, renew friendships, strengthen family ties and, for those that have never been to our city, show them around.  I find it easy to prep food ahead of time for the evening meal, but breakfast is another story.


Mornings are always hectic at our house.  Depending on the day, my husband and I might have to go to work and our son might have school. Most guests don't mind a bowl of cereal, toast or fruit.  I like to have something special at least one day so this is when I pull out a recipe my mother gave me for Overnight Coffee Cake.


The best part of this recipe, other than the taste, is the cake is assembled ahead of time and refrigerated overnight.  This makes preparing breakfast less stressful the next day.  Unlike egg dishes and casseroles that need to be served hot and may not reheat well, I don't have to worry about the temperature of the cake.  It can be served hot, warm or at room temperature, depending on when our guests wake up.


When I make this cake, I measure all the ingredients before I do anything else.  In culinary practice, this is known as mise en place --  everything is measured and ready to be used.  While the butter is softening, I prepare the topping ingredients.  Once the topping is made, I'm ready to make the cake.


Margaret's Morsels | Overnight Coffee Cake
The combined topping ingredients.


Since the ingredients have already been measured, it only takes a few minutes to mix up the cake.  After I put the cake batter in the pan, I use an offset spatula to smooth the top.  An offset spatula has a bend in the blade which makes it ideal for smoothing cake batter or icing.  I sprinkle the topping evenly over the cake, cover the pan with foil and put the cake in the refrigerator.


Margaret's Morsels | Overnight Coffee Cake
The offset spatula is the one on the bottom.


The next morning, I put the cake in a preheated oven for 30 to 40 minutes. I have bacon or fruit salad available if our guests want something with the cake.  Most of the time, though, they eat the cake by itself.  My nephew, Andy, was visiting and liked the cake so much, he wanted to make sure I gave  his mother the recipe before they went home.  Don't be surprised if your guests request a copy of the recipe too!


Margaret's Morsels | Overnight Coffee Cake


Overnight Coffee Cake
15 Servings

Cake:

3/4 cup butter or margarine, softened
1/2 tsp. vanilla
1 cup sugar
2 eggs
1 (8 oz.) carton sour cream
2 cups all-purpose flour
1 tsp. baking powder
1 tsp. baking soda
1/2 tsp. salt 

Topping:
3/4 cup sugar
1/4 cup all-purpose flour
1/4 cup shortening
3 tsp. cinnamon

Combine butter, vanilla and sugar; cream until light and fluffy.  Add eggs and sour cream, mixing well.  Combine next 4 ingredients; add to batter and mix well.  Pour batter into a greased 13 x 9 x 2-inch baking pan. Combine topping ingredients; mix well and sprinkle evenly over batter. Cover and chill overnight.  Uncover and bake at 350° for 30 to 40 minutes or until cake tests done.


 © Margaret's Morsels