July 31, 2011

Brunch: Part 2

Pin It
Margaret's Morsels | Brunch

In part 1 of the series, I shared a recipe for Baked Omelet Roll.  Today, I want to share a recipe for a side dish that's equally good with breakfast as it is with lunch items on a brunch menu.

Most restaurants serve potatoes with breakfast and brunch, usually home fries or hash browns.  I also serve potatoes, but in the form of Potatoes O'Brien.

Potatoes O'Brien are potatoes cooked with chopped bell pepper -- either red or green -- and onion.  I use equal parts of bell pepper and onion which keeps either ingredient from overpowering the potatoes.  Since I use green pepper, I add diced pimentos -- sweet red pepper -- for color.  Pimentos add a burst of color without adding much flavor.


Margaret's Morsels | Potatoes O'Brien
Potatoes O'Brien without pimentos.


Margaret's Morsels | Potatoes O'Brien
Potatoes O'Brien with pimentos.

Unlike most recipes for Potatoes O'Brien, this one starts with steak fries -- large flat shaped French fries -- instead of fresh potatoes.  This makes the dish quicker to prepare because you don't have to peel potatoes.  Because frozen French fries have already been partially cooked, the cooking time is minimal.

The steak fries need to be diced into cubes approximately the same size.

Margaret's Morsels | Potatoes O'Brien

The fries are too hard to cut when frozen.  Remove however many fries you think you'll need from the bag and let them sit at room temperature for 10 minutes before dicing.  If you need more potatoes, repeat the process.

The pepper, onion and pimentos are cooked in butter until the onion is tender.  Add the potatoes and seasonings and cook until the potatoes are browned and heated, 15 to 25 minutes.  If you're serving the potatoes with Baked Omelet Roll, start cooking the potatoes before you start the omelet.  This way, the omelet won't get cold while the potatoes finish cooking.

Margaret's Morsels | Potatoes O'Brien

Next week, I'll share a recipe that will make a sweet ending to this brunch trilogy.

Potatoes O'Brien 
4 Servings

1/3 cup chopped bell pepper
1/3 cup chopped onion
2 Tbsp. diced pimentos, drained
1/4 cup butter or margarine
3 1/2 cups diced frozen steak fries
1 tsp. salt
1/8 tsp. pepper

Melt butter in a large skillet.  Add bell pepper, onion and pimentos; cook until the onion is tender.  Reduce heat to medium.  Stir in potatoes, salt and pepper.  Cook, stirring occasionally, until potatoes are browned and heated, 15 to 25 minutes.


© Margaret's Morsels


July 26, 2011

Brunch: Part 1

Pin It This is the first of a three part brunch series.


Margaret's Morsels | Brunch

When my husband and I first started dating, we enjoyed going out to brunch on occasion.  One of our favorite restaurants served brunch on Saturday so it was a relaxing way to start the weekend.  After we got married, life became busier and going out to brunch became a thing of the past.  Every now and then, I recreate the brunch experience, but in the comfort of our home.

Brunch, the combination of breakfast and lunch, is a great way to enjoy a meal with your family or entertain a group of people.   Although my menu leans more towards breakfast, a combination of breakfast and lunch items is perfectly acceptable.  To make brunch even easier, serve the food as a buffet and let each guest fix their own plate.

I like to serve eggs, but I want something fancier than scrambled eggs and not as time consuming as poached or fried eggs.  Omelets are a good choice, but not if you're cooking for a crowd.  This is when I rely on a recipe that makes one omelet, but with six servings.


Margaret's Morsels | Baked Omelet Roll

Baked Omelet Roll is an omelet that's baked in the oven, rolled into a jelly roll and then cut into six pieces.  Because you're not making and folding six omelets, it's easier to prepare than omelets made in the traditional manner.

The ingredients -- eggs, milk, flour, salt and pepper -- are typical of most omelet recipes, except for the flour.  The flour gives the omelet form, making it possible to roll it up without tearing.

The ingredients are combined and poured into a 13 x 9-inch pan that has been thoroughly coated with nonstick cooking spray.  Don't skimp on the cooking spray; the omelet will be much easier to roll if it's not sticking to the pan.  Depending on your oven, the omelet bakes in 10 to 15 minutes. Keep an eye on it so it doesn't get too brown.


Margaret's Morsels | Baked Omelet Roll
The baked omelet.

Like any omelet, you can add fillings after it's baked, right before it's rolled. Because the omelet is fully cooked, make sure the filling ingredients are cooked or safe to eat as added.  My family enjoys the omelet with bacon. However, when I serve this to company, I only put cheese on the omelet and serve bacon, sausage or ham on the side.

Margaret's Morsels | Baked Omelet Roll
The omelet with cheese.


Margaret's Morsels | Baked Omelet Roll
The omelet with cheese and bacon.

Once the omelet is baked and the fillings are added, it's time to roll the omelet.  The rolling needs to be done while the omelet is warm or else it won't roll easily.  Slide a spatula under one of the short sides to release the omelet from the pan.


Margaret's Morsels | Baked Omelet Roll

Using your hands, roll the omelet to the other end of the pan creating a jelly roll.  Place the omelet on a platter and slice it into six pieces or let people cut their own piece. When cut, the omelet will have a pinwheel design.


Margaret's Morsels | Baked Omelet Roll

Don't double the recipe if you need more than six servings; the omelet will be too thick to roll.  If you have two 13 x 9-inch pans that will fit in the oven without touching -- air needs to circulate to ensure even baking -- bake two omelets at once.  If not, or you don't have two pans, bake the omelets one at a time.

Check my blog later this week for an accompaniment that goes great with both breakfast or lunch items on the brunch menu.

Baked Omelet Roll
6 Servings

6 eggs
1 cup milk
1/2 cup all-purpose flour
1/2 tsp. salt
1/4 tsp. pepper
1 cup shredded Cheddar cheese

Put the eggs and milk in a blender.  Add flour, salt and pepper.  Cover and process until smooth.  Pour into a 13 x 9-inch baking pan that has been coated with nonstick cooking spray.  Bake at 400° for 10 to 15 minutes or until the eggs are set.  Sprinkle the omelet with cheese.  Roll the omelet up in the pan, starting with a short side.  Place seam side down on a serving platter.  Cut into 1-inch slices.


© Margaret's Morsels

July 16, 2011

Here's the Scoop

Pin It
Margaret's Morsels | Peach Ice Cream

July is National Ice Cream Month and this Sunday, July 17, is National Peach Ice Cream Day.

Until I started making homemade ice cream, the only peach ice cream I'd eaten was nothing more than vanilla ice cream with some diced peaches added.  The ice cream tasted more like vanilla than peach.

Several years ago, I found a recipe for peach ice cream that delivers a double dose of peach flavor.  The recipe uses fresh peaches and canned peach nectar.

Peaches peak in July and August.  You can read tips about choosing fresh peaches here.  Nectar, the drink of the gods in mythology, is a sweet juice extracted from fruit.  It is thicker than other types of fruit juice.  Canned nectar is sometimes found with other fruit juices or in the fruit aisle.  The last time I bought a can, it was in the ethnic food aisle at the grocery store.

Margaret's Morsels | Peach Ice Cream
The peach nectar on top of the milk mixture

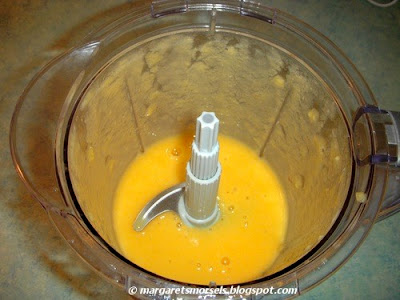
Unlike peach ice cream I've had in the past, this peach ice cream doesn't use diced peaches.  The peaches are completely pureed until smooth, resulting in an ice cream that truly melts in your mouth.  If you prefer ice cream with more texture, dice some of the peaches and stir them in before putting the mixture in the ice cream maker.

Margaret's Morsels | Peach Ice Cream
It may look like vanilla, but it tastes like peach!

Take advantage of nature's bounty and make some peach ice cream while peaches are in season.  If you're not a fan of peaches, celebrate National Ice Cream Month with this homemade vanilla ice cream instead.

Peach Ice Cream
1 1/2 Quarts

4 medium size fresh peaches, peeled and sliced
2 Tbsp. sugar
1/4 cup lemon juice
1/4 tsp. salt
1 (14 oz.) can sweetened condensed milk
1 (5 oz.) can evaporated milk
1 1/4 cups whole milk
3/4 cup peach nectar

Puree peaches, sugar, lemon juice and salt in a blender until smooth.  Combine sweetened condensed milk, evaporated milk and whole milk.  Add the peach mixture and peach nectar to the milk mixture.  Cover and chill 30 minutes.

Pour mixture into the freezer container of an electric ice cream maker and freeze according to the manufacturers' instructions.  Transfer ice cream to an airtight container and freeze until firm, about 2 hours.


© Margaret's Morsels

July 13, 2011

Summer Soup

Pin It
Margaret's Morsels | Orange Peach Soup

Years ago, I used to purchase an orange peach fruit juice.  The orange peach combination was delicious and I was disappointed when the juice was discontinued.  When I came across the recipe for Orange Peach Soup, I remembered the fruit juice from long ago and knew I had to try the recipe.  Unfortunately, it was the middle of winter so I had to wait a few months.  You don't have to wait, though, because peaches peak in July and August making it the perfect time to make a batch of this soup.

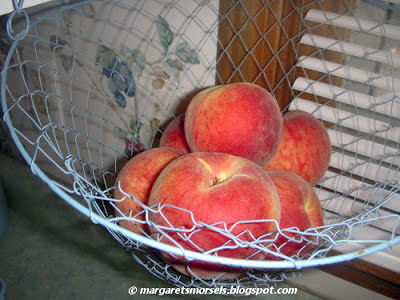
The best way to buy peaches is with your eyes, nose and hands.  Look for unblemished peaches without any traces of green.  Peaches have a rosy blush on the surface, but that's indicative of the variety and has nothing to do with ripeness.  Smell the peaches.  A ripe peach smells like a peach.  If there's little or no fragrance, keep smelling until you find peaches with a peach aroma.  Feel the peaches and apply a little pressure with your hand. You don't want the peaches to be too soft, but you don't want them to be too hard either.  Buy peaches that yield slightly to pressure.

Margaret's Morsels | Orange Peach Soup

Peaches come in white and yellow varieties and can be used interchangeably.  I prefer yellow peaches because they tend to be juicier and more flavorful.  Peaches are sold as either clingstone or freestone. The terms describe how easy it is to remove the pit from the fruit.  A clingstone tends to cling whereas a freestone is easy to remove.

Peel, slice and puree the peaches with lemon juice in a blender.  The lemon juice keeps the peaches from turning brown while the rest of the ingredients are being prepared.


Margaret's Morsels | Orange Peach Soup
The pureed peaches and lemon juice

Combine water, instant tapioca, sugar and salt in a saucepan and bring to a boil.  Remove the pan from the heat and add the remaining ingredients, including the peach puree.   Let the soup cool to room temperature -- to speed up the process, I transfer the soup from the warm saucepan to a bowl -- and then refrigerate.  

If the only tapioca you're familiar with is pudding, you may be wondering why it's used in this recipe.  Tapioca is a starch used to thicken food. Instant tapioca looks like little pellets.


Margaret's Morsels | Orange Peach Soup
Instant tapioca

Although tapioca does a great job thickening the soup, the pellets don't completely dissolve.  If you don't mind the texture, you can serve the soup as it is.  If you're like me and prefer a smoother soup, there's an easy solution.

After the soup is completely chilled -- I make it a day ahead and refrigerate it overnight -- taste it to see if it's sweet enough.  Some peaches are sweeter than others so you may need to add additional sugar.

Pour the soup into a blender container and add sugar, if necessary, one teaspoon at a time, blending until the sugar is dissolved.  Taste the soup after each addition to make sure you don't add too much sugar.  Using a blender pulverizes the sugar and the tapioca at the same time.  If the soup doesn't need any additional sugar, you can still process it in a blender to achieve a smoother consistency.

The soup makes a great first course, especially when the meal that follows is light.  It can also be served as an entree with a salad -- green, tuna or chicken -- and croissants.  My husband likes to pour the soup over ice and drink it as a beverage.  It makes a thick beverage, but my husband finds it extremely refreshing after working in the yard on a hot summer day.

No matter how you serve it, this soup is definitely flavorful and refreshing. Peach season is short so enjoy this soup while peaches are at the peak of flavor.


Orange Peach Soup
6 to 8 Servings

2 lb. fresh peaches, peeled and sliced
1 Tbsp. lemon juice
2 1/2 cups water, divided
3 Tbsp. instant tapioca
3 Tbsp. sugar (plus more for sweetening, if needed)
dash of salt
1 (6 oz.) can frozen orange juice concentrate, thawed (undiluted)
fresh mint sprigs (for garnish)

Combine peaches and lemon juice in a blender container; process until smooth.  Set aside.

Combine 1 cup water, tapioca, sugar and salt in a large saucepan.  Bring to a boil, stirring frequently.  Remove from heat and stir in remaining ingredients, including the peach puree.  Cool to room temperature.  Cover and chill completely.  

Taste the chilled soup to see if more sugar is needed.  Add 1 teaspoon of sugar at a time, if necessary, and process in a blender until smooth.  Serve garnished with fresh mint sprigs, if desired.


© Margaret's Morsels

July 11, 2011

Technical Update Morselette

Pin It For some reason, a blog I posted in June (Company's Coming Dinner Edition) is showing up as being posted today.  I don't know why this happened or how to correct the problem.  The blog isn't new, but if you missed it here's a chance to read it and get a really good recipe.  I'll be posting new blogs later this week using a fruit that's in season right now.


© Margaret's Morsels

Company's Coming: Dinner Edition

Pin It
Margaret's Morsels | Pork Chops with Mushroom Gravy

When we have company -- either overnight or dinner guests -- I like to serve Pork Chops with Mushroom Gravy.  It isn't difficult to prepare, is always well received and is one of my family's favorite recipes.

Normally when I cook something for the first time, I take out the offending ingredients -- the things my family won't eat -- and, in the case of most entree recipes, add a can of mushrooms.  The recipe for Pork Chops with Mushroom Gravy has the distinction of being one of only a few in my recipe box that I didn't have to change to suit my family's taste.

The pork chops take an hour to cook, but the time it takes to put dinner on the table can be shortened by doing prep work ahead of time.

Chop the onion and green pepper and store them with the mushrooms in a covered container or resealable plastic bag in the refrigerator.

Margaret's Morsels | Pork Chops with Mushroom Gravy

Combine the dry ingredients -- flour, salt and pepper -- in a resealable plastic bag and set aside.  The pork chops will be coated with this mixture, but it will also be used to thicken the gravy.  For this reason, I use Wondra instead of all-purpose flour.  Wondra, also known as gravy flour, is a finely ground all-purpose flour that dissolves instantly and is unlikely to form lumps.  If you don't have Wondra, use all-purpose, but not self-rising flour.

When you're ready to cook, coat the pork chops with the dry ingredients. The easiest way to do this is to put the pork chops in the plastic bag two at a time.  Seal the bag and shake it until both sides of the pork chops are thoroughly coated with the mixture.  Set the coated pork chops aside and continue the process until all the pork chops are coated.  Don't discard the remaining flour mixture.

Margaret's Morsels | Pork Chops with Mushroom Gravy

Melt the margarine over high heat in a large 12-inch skillet.  Put four pork chops in the skillet; don't put more than four in at once because overcrowding will keep the meat from browning properly.  Cook the pork chops for one minute; turn the pork chops over and cook the other side for one minute.  The pork chops will be light brown and there won't be any pink on the top.  Transfer the pork chops to a greased 13 x 9 x 2-inch baking pan.  Repeat the process with the remaining pork chops.

Margaret's Morsels | Pork Chops with Mushroom Gravy
Notice the color of the pork chops 
after being cooked for one minute.

The rest of the recipe is pretty straight forward.  Saute the onion, green pepper and mushrooms in the same skillet until the onion and green pepper are soft.  Sprinkle the reserved flour mixture over the vegetables, stirring to combine.  Slowly stir in the milk and bring the mixture to a boil. Boil for two minutes or until the gravy is thickened, stirring constantly.

Margaret's Morsels | Pork Chops with Mushroom Gravy
The thickened gravy.

Remove the skillet from the heat and stir in lemon juice.  Lemon juice may sound out of place in this recipe, but it serves an important purpose. Lemon juice enhances the flavor of food without adding many calories. Pour the gravy over the pork chops, spreading to cover all the pork chops. Cover the pan with foil and bake in a 350° oven for one hour.

Margaret's Morsels | Pork Chops with Mushroom Gravy
Ready to be covered with foil and baked.

The pork chops cook in the gravy which keeps them moist and tender. The gravy is delicious over the pork chops, but it's even better served with a starch, such as rice or mashed potatoes.  Add a green vegetable and you've got a delicious dinner.

I've always had good luck with this recipe which is one reason I like serving it to company.  When our company leaves, I know they leave content, well fed and, more often than not, with a copy of the recipe.

Pork Chops with Mushroom Gravy
6 to 8 Servings

1/2 cup Wondra or all-purpose flour
1 1/2 tsp. salt
1/4 tsp. pepper
6 to 8 boneless pork chops (1-inch thick)
1/4 cup margarine
1/2 cup chopped onion
1/2 cup chopped green pepper (I use frozen)
1 (4 oz.) can mushroom stems and pieces, drained
2 cups milk
2 Tbsp. lemon juice

Combine the flour, salt and pepper in a large resealable plastic bag.  Add pork chops, two at a time, tossing to coat.  Set remaining flour mixture aside.

Melt margarine in a large 12-inch skillet.  Cook pork chops in margarine one minute; turn pork chops over and cook the other side one minute. When done, transfer to a greased 13 x 9 x 2-inch baking dish.

In the same skillet, saute the onion, green pepper and mushrooms until the onion and green pepper are soft.  Stir in the reserved flour mixture. Gradually add milk, stirring to combine.  Bring the mixture to a boil; cook and stir for 2 minutes or until thickened.  Remove from heat; stir in lemon juice.  Pour gravy over pork chops.  Cover the pan with foil and bake at 350° for 60 minutes.

© Margaret's Morsels

July 7, 2011

Some Assembly Required

Pin It

Margaret's Morsels | Crock-Pot French Dip Sandwiches


We're not big sandwich eaters.  Most of the sandwiches we eat are made with things we have on hand -- peanut butter, bologna, egg salad -- that can easily be put between two slices of bread.  Occasionally we'll fix a grilled cheese sandwich, but that's the extent of our sandwich making, except for one other sandwich.  We love French Dip Sandwiches so I make them every couple of months.

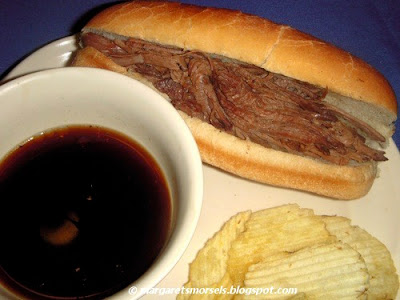
French Dip, as it's usually called, is a hot roast beef sandwich served on French or hoagie rolls with the au jus -- the unthickened natural juices from the cooked meat -- served in a bowl on the side.  The recipe I'm sharing takes time to prepare, but there's very little work involved since it's cooked in a crock-pot.

I always cook roast in a crock-pot so I opt for an English roast which is a tough, but very flavorful, cut of meat.  Inexpensive tougher cuts of meat are wonderful cooked in a crock-pot because the long cooking time makes them tender.  An English roast needs to be cooked in liquid so it's ideal for this recipe.

Although the recipe calls for all visible fat to be removed from the roast, I leave a little bit for flavor.  The roast -- it doesn't have to be browned or coated with flour -- goes in the crock-pot.  The remaining ingredients are combined and poured over the roast.  One ingredient, rosemary, needs to be crushed before being added to allow the flavor to be released. Rosemary is too hard for me to crush with my hands.  I don't have a mortar and pestle so I put the rosemary on a cutting board and crush it with the bottom of a measuring cup.  Add water to the crock-pot, put on the lid and turn the crock-pot to low.

Margaret's Morsels | Crock-Pot French Dip Sandwiches
The crushed rosemary is on the right.

After cooking 10 to 12 hours, the meat is very tender, but it needs to be shredded into smaller pieces for sandwiches.  The easiest way to do this is with two forks.  If you want to use cheese -- most restaurants use Provolone or Mozzarella -- put it on the bread first and then add the meat. Heat the sandwiches in a 350° oven for about 5 minutes, just until the cheese starts to melt.  If you want the sandwiches plain, put the meat on the bread and skip heating them in the oven.  Strain the au jus and put in small bowls for dipping.

Although the recipe is for sandwiches, we love the flavor of the meat so much I often serve this as an entree.  I don't thicken the au jus for gravy.  I strain the au jus and put it in a gravy boat.  That way, we can use the leftover meat and au jus for sandwiches.


Margaret's Morsels | Crock-Pot French Dip Sandwiches
Dinner is served.

If you have any leftovers, the easiest way to reheat them is the same way you cooked them:  in a crock-pot.  I use a smaller 1 1/2-quart crock-pot for reheating because there's usually not a lot leftover.  Since it's already cooked, it only takes 1 1/2 to 2 hours to reheat.

This is a great dish to cook when you're going to be gone all day.  You can cook it when you're home, but the smell will have you salivating all day. Don't say I didn't warn you!


French Dip Sandwiches
8 Servings

1 (3 to 4 lb.) top chuck roast
1/2 cup soy sauce
1 beef bouillon cube
1 bay leaf
4 whole peppercorns
1 tsp. dried rosemary leaves, crushed
1 tsp. dried thyme
1 tsp. garlic powder
2 cups water
French or hoagie rolls

Remove and discard all visible fat from roast.  Place roast in a crock-pot. Combine soy sauce, bouillon cube and spices; pour over roast.  Add water. Cover and cook on low heat 10 to 12 hours or until meat is very tender. Remove meat from broth; shred with forks and keep warm.  Discard bay leaf.  Strain broth; skim off fat.  Pour broth into small cups for dipping. Serve warm on desired bread.

Variation:  If desired, put cheese on the bread before adding the meat.  Put sandwiches on a baking pan and heat in a 350° oven for about 5 minutes, just until the cheese starts to melt.


© Margaret's Morsels
July 1, 2011

Easy as Pie

Pin It
Margaret's Morsels | Cookie Apple Cobbler

One year ago tomorrow, I posted my first blog with a recipe for a cool and creamy pie for the 4th of July.  In May, I posted an idea for an easy red, white and blue dessert.  If you want something more traditional and less colorful, nothing is more American than apple pie.  Or, in the case of the recipe I'm sharing today, apple cobbler.

A cobbler is a baked deep-dish fruit dessert topped with a batter which makes a crust when baked.  Cobblers are easy to make since they only have a filling and top crust.  Unlike a pie with fluted edges or a lattice top, a cobbler doesn't have to look perfect.

When you bake apples, choose all purpose or baking apples such as Empire, Golden Delicious, Granny Smith, McIntosh or Rome to name a few.  All purpose apples retain their shape and don't turn mushy during baking.

You can use one kind of apple, but it's better to use a variety for a contrast of taste and texture.  The last time I made this cobbler, I combined sweet Golden Delicious with tart Granny Smith apples.  You don't have to limit the apples to two varieties; combine three, four or more for a one of a kind culinary creation.

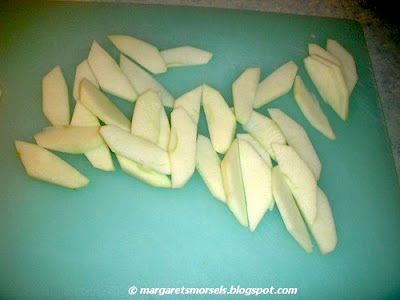
When you cut the apples, try to keep the slices the same thickness so they bake evenly.  I use an apple wedger which cores the apple and slices it into eight equal pieces.  If the apple won't sit flat, slice a thin piece off the bottom to make it level.


Margaret's Morsels | Cookie Apple Cobbler

Once the apples have been wedged, I turn the pieces upside down on a cutting board and cut them into thinner slices.


Margaret's Morsels | Cookie Apple Cobbler

Margaret's Morsels | Cookie Apple Cobbler

The apples are combined with the remaining filling ingredients:  brown sugar to sweeten; flour to thicken; cinnamon to flavor; and lemon juice to keep the apples from turning brown.

Cobblers are a deep-dish dessert so they require a deep-dish baking pan. I use a deep-dish stoneware baking pan which is bigger than my other pie pans.  If you don't have a pan deep enough, use smaller pans and make two cobblers.


Margaret's Morsels | Cookie Apple Cobbler
Left to Right:  Regular pie pan, deep-dish pie pan
deep-dish stoneware pan.

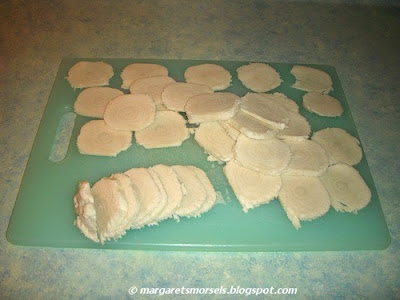
Once the apples are in the pan, it's time to add the topping ingredients. Cobbler batter is typically made of butter or margarine, sugar, flour, salt, baking powder, vanilla and milk.  You don't have to make the topping for the recipe I'm sharing today.  It uses a roll of refrigerated sugar cookie dough instead.  Slice the cookie dough into thin pieces approximately the same thickness.

Margaret's Morsels | Cookie Apple Cobbler

Place the cookie dough over the filling, overlapping the dough, if necessary.  Sprinkle the dough with a combination of cinnamon and sugar before it goes in the oven.


Margaret's Morsels | Cookie Apple Cobbler
   
The cobbler bakes in 35 to 45 minutes, depending on the thickness of the apples and cookie dough.  It's easy to tell when the cookie dough is done, but not so easy to tell about the apples. Carefully stick the tip of a sharp knife into the cobbler to test the apples for doneness.  When the apples are tender and the cookie dough baked, the cobbler is ready.

Remove the cobbler from the oven and let cool on a wire rack.  The cobbler can be served warm or at room temperature.  It's delicious served warm with a scoop of vanilla ice cream on top.  Leftover servings can be reheated in the microwave, if desired.

If you think the cobbler is good in July, wait until you make one in the fall with apples that are in season.  It's even better!

Cookie Apple Cobbler
6 to 8 Servings

6 cups apples, peeled, cored and sliced
1 cup brown sugar
2 Tbsp. flour
1 tsp. cinnamon
2 Tbsp. lemon juice
1 (16.5 oz.) pkg. refrigerated sugar cookie dough
2 Tbsp. sugar
1/2 tsp. cinnamon

Peel, core and slice apples.  Combine apples with the brown sugar, flour, 1 teaspoon cinnamon and lemon juice; toss to coat apples well.  Spoon apples into an ungreased deep-dish pie pan.  Slice cookie dough and arrange on top of apples, overlapping if necessary.  Combine sugar and 1/2 teaspoon cinnamon; sprinkle evenly over cookie dough.  Bake at 350° for 35 to 45 minutes or until top is golden brown and apples are tender.


© Margaret's Morsels