
According to Foodimentary -- a website that keeps track of food holidays -- today is World Nutella Day. Nutella, a creamy combination of cocoa and hazelnuts, is best known as a dip or spread, but it actually has many other uses. You can add Nutella to cakes, cookies, pies, candies, ice creams and frostings too! It's also an ingredient in beverages, both alcoholic and nonalcoholic.
This time last year, a friend gave me the recipe for Nutter Butter Nutella Icebox Cake. When I read the recipe, I immediately thought of tiramisu. Instead of ladyfingers and coffee, though, this recipe uses Nutter Butters -- the peanut shaped cookies I transform into ghosts at Halloween -- and milk.
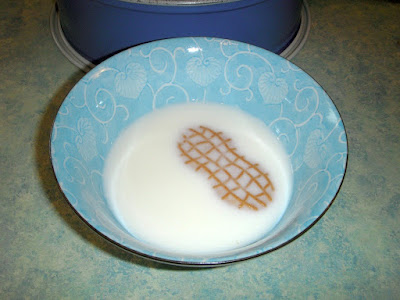
The Nutter Butters are softened by briefly dipping them in milk before placing them in the pan.

I use a spring-form pan, but you can use a 9-inch square pan or layer the ingredients in a pretty glass bowl. Depending on the size and shape of the pan you use, you may need more or less cookies.


I use a spring-form pan, but you can use a 9-inch square pan or layer the ingredients in a pretty glass bowl. Depending on the size and shape of the pan you use, you may need more or less cookies.
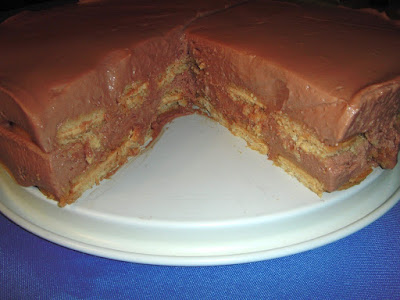
Half the filling -- cream cheese, sugar, vanilla, Nutella and heavy cream -- is spread over the first layer of cookies. If the dessert is scooped out of the pan, you can get away with using low-fat cream cheese. If the cake is cut into slices, the pieces will be firmer and retain their shape better if you use regular cream cheese.
Repeat the process with a second layer of cookies and the remaining filling.

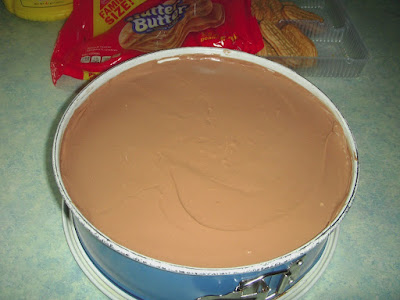
You don't have to measure the filling, but make sure you leave enough to completely cover the top of the cake. The cake needs to be refrigerated overnight to firm up.


You don't have to measure the filling, but make sure you leave enough to completely cover the top of the cake. The cake needs to be refrigerated overnight to firm up.
The cake is plain so I drizzle some chocolate syrup on the serving plate to add a little color before adding the piece of cake.

If you want to dress it up even more, add a dollop of whipped cream,

a sprinkling of chopped leftover Nutter Butters

and top with additional chocolate syrup.


If you want to dress it up even more, add a dollop of whipped cream,

a sprinkling of chopped leftover Nutter Butters

and top with additional chocolate syrup.

The next time you see Nutella in the grocery and wonder what you can do with it, remember it's more than a spread!

Nutter Butter Nutella Icebox Cake
6 to 8 servings
2 (8 oz.) pkg. cream cheese, softened
3/4 cup sugar
2 tsp. vanilla
1 (13 oz.) jar Nutella
1 1/2 cups heavy cream
30 Nutter Butters (plus more for garnish, if desired)
1/2 cup milk
whipped cream (optional)
chocolate syrup (optional)
In a large bowl, mix cream cheese, sugar and vanilla until smooth. Mix in Nutella until combined. Add heavy cream; beat 2 minutes, or until very thick. Dip Nutter Butters one at a time in milk. Line the bottom of a spring-form pan with the cookies. Top with half the cream cheese mixture. Make a second layer with remaining cookies and cream cheese mixture. Cover and refrigerate overnight. Cut into slices and serve. Top with whipped cream, chopped Nutter Butters and chocolate syrup, if desired. Refrigerate leftovers.
© Margaret's Morsels


