© Margaret's Morsels
Welcome to Margaret's Morsels!!! I hope you'll enjoy these cooking tips, techniques and recipes. If you like the site, please share it with a friend! I love to interact with readers so feel free to leave comments, questions or feedback or email me directly at margaretsmorsels@yahoo.com. Thanks for stopping by! Check back soon for the latest morsel. Bon Appetit!
January 28, 2011
Morselette
January 26, 2011
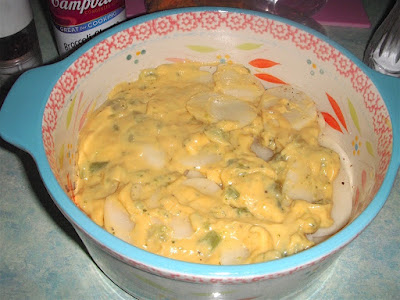
Broccoli Cheese Potatoes
In the 1980's, baked potatoes with a variety of toppings were the rage and available everywhere, even in fast food restaurants. Unfortunately, baked potatoes aren't "hot" anymore. Most restaurants don't have them on the menu, except with butter and sour cream and, in a few instances, cheese and bacon.
My favorite baked potato has always been a broccoli baked potato. There's a deli in my city that serves it and, as my family and friends can attest, I order it every single time I eat there. Occasionally, I'll fix a broccoli baked potato at home, but it only makes one meal. When I found the recipe for Broccoli and Cheese Potatoes, I knew it would be a good side dish, but it also makes a nice substitute for a broccoli baked potato.
The original recipe called for the potatoes to be peeled, cut in half and boiled. The potatoes were then sliced, the casserole assembled and baked for an additional amount of time. I knew there had to be an easier way and looked at the recipe for Scalloped Potatoes for inspiration.
The version I came up with eliminates boiling the potatoes ahead of time. This means they have to cook longer in the oven, but the total cooking time is only a little longer than what was called for in the original recipe.
Peel the potatoes and cut them into slices about 1/8 to 1/4-inch thick. The potatoes need to be sliced the same thickness -- or as close as possible -- so they cook evenly.
Layer the slices from one potato on the bottom of a greased casserole dish. Salt and, if desired, pepper the potatoes.
Spread 1/2 or 1/3 of the soup over the potatoes.
Sprinkle the desired amount of cheese over the soup. Repeat with the remaining ingredients.
I use a can of broccoli cheese soup, but you can use cream of broccoli instead. I like sharp Cheddar cheese, but you could substitute Velveeta, Cheez Whiz or your favorite cheese for the Cheddar. The amount of cheese is a personal preference. I use between 1 and 1 1/2 cups for two potatoes.
Although I enjoy the dish the day it's made, I like the leftovers better. I heat a serving of the potatoes in the microwave before adding some fresh broccoli and a sprinkling of Cheddar cheese. I heat everything in the microwave a few seconds, just long enough to melt the cheese. If I want the leftovers to taste more like the broccoli baked potato at the deli, I add some bacon pieces on top.
Broccoli and Cheese Potatoes aren't the same as the potato served at the deli, but it's a lot less expensive, plus there's enough leftover so I can have a "broccoli baked potato" for lunch more than one day!
Broccoli and Cheese Potatoes
4 to 6 Servings
2 or 3 potatoes, peeled and sliced 1/8 to 1/4-inch thick
salt to taste
pepper to taste (optional)
1 can broccoli cheese soup (undiluted)
shredded cheese to taste
Peel and slice the potatoes. Place one layer of potatoes in the bottom of a greased baking dish with sides 2-inches deep. Salt and pepper to taste. Cover with a layer of soup and a layer of cheese. Repeat layers with the remaining ingredients. Bake at 350° for 1 hour 15 minutes.
© Margaret's Morsels
Labels:
broccoli,
broccoli cheese potatoes,
cheese,
potatoes,
side dish,
vegetables
January 21, 2011
Breakfast Pizza
When my husband and I met 25 years ago, he told me he liked Italian cheese toast for breakfast. I soon discovered that his idea of cheese toast and my idea of cheese toast were different. To me, cheese toast was a piece of bread covered with cheese and toasted until the cheese melted. To him, cheese toast was reheated leftover pizza! I've never had Italian cheese toast for breakfast, but I have enjoyed Breakfast Pizza.
Breakfast Pizza starts with a precooked packaged pizza crust and is topped with traditional breakfast ingredients such as bacon, scrambled eggs and American cheese. A wonderful aspect of the recipe is, like any other pizza, you can add whatever toppings you like. Don't like bacon; substitute cooked sausage or ham. Don't eat meat; try scrambled eggs with sauteed onions, green peppers and mushrooms. You could even substitute another cheese -- Cheddar or Mozzarella -- for the American cheese. Make sure whatever toppings you choose are fully cooked because the pizza is only in the oven long enough to crisp the crust and melt the cheese.
I love how a microwave cooks certain foods, such as corn-on-the-cob, popcorn and bacon. When I microwave bacon, I use a specially designed tray called "Bacon Wave." A nice feature of this tray is the bacon stays out of the grease. This makes it healthier plus you can drain the grease and save it in a jar for other uses. I know this defeats the purpose of healthier bacon, but Southerners love to season food with bacon grease.
The bacon in the Bacon Wave before being cooked.
The bacon after it's cooked.
While the bacon's cooking, scramble the eggs. If you want fluffy scrambled eggs, add 1 tablespoon of milk or water for each egg you're using. Once the eggs are cooked, spread them on the pizza crust. Sprinkle the cooked bacon on the eggs and add the cheese.
I bake the pizza on a pizza pan. However, if you like a crisper crust, bake it directly on the oven rack. If you choose to use a pizza pan, it's a good idea to remove the pizza from the pan before you slice it. If you use a pizza wheel on a nonstick pan, you can ruin the nonstick finish. I transfer the pizza to a cutting board and cut it into slices with a pizza wheel. If you don't have a pizza wheel, an easy way to cut it is with a pair of kitchen scissors.
My son thought the pizza needed more cheese so he added some and melted it in the microwave.
The piece with extra cheese.
My husband likes the pizza, but he still enjoys Italian cheese toast for breakfast on occasion. Of course, now that he's married, pizza isn't a staple in the refrigerator like it was when he was single!
Breakfast Pizza
6 to 8 Servings
6 eggs, beaten
1 (14 oz.) pizza crust (I used Boboli)
1/3 cup crumbled bacon
3 slices American cheese, cut into strips
Preheat the oven to 450°. Spray skillet with nonstick cooking spray. Heat the skillet on the stove top on medium-low. Add the eggs and scramble until they reach the desired consistency. Place the pizza crust on a pizza pan, if desired. Spoon the scrambled eggs over the pizza crust; sprinkle the bacon over the eggs and add the strips of cheese. Bake for 7 to 8 minutes, or until the crust is crisp and the cheese is melted. Slice into pieces and serve hot.
© Margaret's Morsels
Labels:
breakfast,
breakfast pizza,
pizza
January 18, 2011
Slow and Easy Cooking
There's nothing better than coming home to a meal that's already cooked and ready to be eaten. This is especially true on a cold wintry day. Maybe that's why January is National Slow Cooking Month.
I've extolled the values of slow cooking in a previous blog. I love spending a minimal amount of time prepping food, putting it in a slow cooker and letting the slow cooker do the work. It makes mealtime less stressful at the end of a long day.
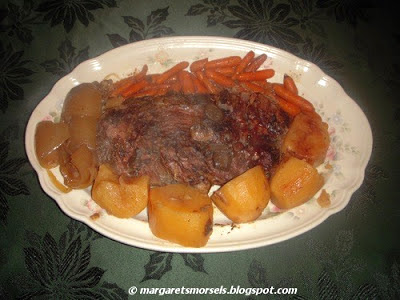
Most of the time a 3 1/2-quart slow cooker is big enough for what I'm cooking. However, there is an occasion when I need to pull out my 5-quart slow cooker. It's the perfect size for a pot roast with potatoes, carrots, onion and gravy.
Whenever I cook a roast I use an English roast, but you could use a top chuck roast instead. An English roast is a tough cut of meat from the shoulder, but it has a lot of flavor. One advantage of slow cooking is you can use inexpensive, tougher cuts of meat because the long cooking time makes the meat tender.
The roast needs to be coated with flour, salt and pepper. The easiest way to do this is to blend the dry ingredients in a resealable plastic bag. Add the roast, seal the bag and shake the bag until the roast is thoroughly coated.
The potatoes are all approximately the same size
and so is the onion.
Once the vegetables are in the slow cooker, place the roast on top of the vegetables. A can of mushroom gravy goes over the top of the roast and a cup of water is poured around the sides of the roast. The water is necessary to help soften and cook the vegetables. The flour, mushroom gravy and water combine to make a wonderful gravy that can be served with the roast, if desired.
Once everything is in the slow cooker, put on the lid, turn the temperature setting to low and your supper is on its way to being cooked. The only other thing needed to complete the meal is a pan of cornbread!
This is what you'll find after 10 hours of cooking.
January may be National Slow Cooking Month, but slow cooking occurs year round at my house. It's nice to come home to a hot cooked meal in the winter. In the spring, we can be outside enjoying the newly greened world while supper is cooking. A slow cooker is great in the summer because it doesn't heat up the kitchen like a stove. In the fall, we can enjoy the crisp autumn air without worrying about going inside and cooking supper. Maybe 2011 should be the year of the slow cooker!
Slow Cooker Pot Roast
4 to 6 Servings
1 (3 lb.) roast
1/2 cup flour
1 Tbsp. salt
1/2 tsp. pepper
2 to 3 medium potatoes, peeled and quartered
2 to 3 carrots, peeled and sliced
1 medium onion, peeled and quartered
1 (10 1/2 oz.) can mushroom gravy
1 cup water
Combine flour, salt and pepper; coat meat with flour mixture. Put vegetables on the bottom of a 5-quart slow cooker. Put roast on top of vegetables. Pour mushroom gravy on top of roast; add water around sides of roast. Cover and cook on low 10 to 12 hours.
© Margaret's Morsels
January 13, 2011
Appetizer, Entree or Both?
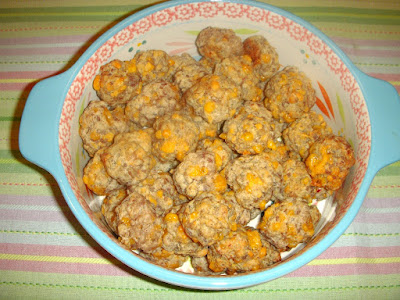
There's something about sausage balls and winter that go together. Maybe it's the spiciness of the sausage along with a hot food that warms the body. Whatever it is, sausage balls sure are good on a cold day.
The recipe for sausage balls is, as it is said, a "no brainer." You only need three ingredients: sausage, cheese and a baking mix such as Bisquick. I use regular sausage, sharp Cheddar cheese and Heart Smart Bisquick. You could use hot or sage sausage, mild Cheddar cheese and regular Bisquick. To make a sausage ball that's out of the ordinary, use ground Italian sausage and Mozzarella cheese.
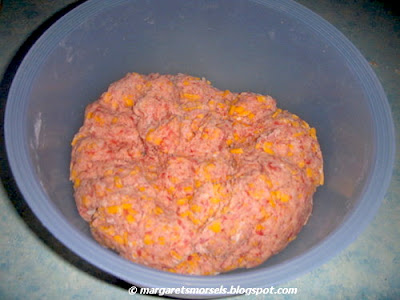
Although sausage balls aren't difficult to make, it does take time to mix all the ingredients together. Don't even try to mix everything with a spoon or mixer. The only way to mix the ingredients is with your hands. It requires some effort, but there are a couple of ways to make the job easier.
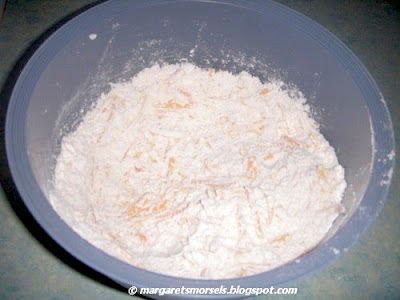
First, let the ingredients warm up at room temperature 15 to 20 minutes before you combine them. Second, mix the Bisquick and cheese together before you add the sausage.
The Bisquick and cheese mixed together.
Once everything is thoroughly combined, shape the mixture into 1-inch balls. A 1 tablespoon cookie scoop is the perfect size for sausage balls and is faster than shaping the balls by hand.
Put the sausage balls on a rimmed baking sheet such as a cookie sheet. You don't need to spray the baking sheet with nonstick cooking spray. There's enough grease in the sausage to keep the sausage balls from sticking. If one should stick, run a fork under it and it should release easily from the baking sheet. Once the sausage balls are cooked, place them on a wire rack to cool.
Sausage balls can be frozen either cooked or uncooked. Place the cooked and completely cooled or the uncooked sausage balls in a single layer on a baking sheet. Put the baking sheet in the freezer until the balls are completely frozen. This will prevent the sausage balls from sticking together. Once the sausage balls are frozen, store them in the freezer in a resealable plastic freezer bag.
When you're ready to heat frozen sausage balls that have already been cooked, you can heat them one of two ways. Remove the desired amount from the freezer, put them on a baking sheet and reheat them at 350° for 10 to 15 minutes or until heated through. If they get too brown, cover the pan with foil while they finish reheating. Or, put the frozen sausage balls on a microwave-safe container and heat them on High in the microwave for 10 seconds per sausage ball. If your microwave is less than 1100 watts, you might need to add a few seconds for each sausage ball.
Uncooked sausage balls take longer to heat because they haven't been cooked yet. Put the frozen sausage balls on a baking sheet and heat them at 350° for 25 to 30 minutes or until thoroughly cooked.
If you don't want to freeze them, cooked sausage balls can be stored in the refrigerator up to 5 days. You can reheat them in the oven or microwave as directed above.
Sausage balls are usually served as an appetizer, but they also make a great entree too. They are especially good with scrambled eggs and baked Tater Tots. Not only is this good for breakfast, it also makes a great supper. My husband isn't a big fan of eating breakfast for supper, but he makes an exception for this meal. This from the man who eats leftover supper -- salmon, pork chops, roast beef -- for breakfast!
Sausage Balls
Yields 53
1 lb. uncooked sausage
1 cup shredded Cheddar cheese
2 cups Bisquick
Combine ingredients. Roll into 1-inch balls and place on an ungreased baking sheet. Bake at 350° for 15 minutes.
© Margaret's Morsels
Labels:
appetizer,
breakfast,
hors d'oeuvre,
sausage,
sausage balls,
sausage cheese balls
January 10, 2011
Morselette
There's 4-inches of snow on the ground this morning. That may not seem like much, but my Southern city only averages 5-inches of snow during the entire winter! I'm fixing a pot of chili for supper on this cold and snowy day. What food warms you up in cold weather?
© Margaret's Morsels
January 7, 2011
Hold the Cheese
In 1990, President George H.W. Bush proclaimed he did not like broccoli, had never liked broccoli and would not eat broccoli again.
Unlike President Bush, my husband and I love broccoli. My husband likes broccoli with cheese sauce, but I like mine plain. We found the perfect compromise when I found the recipe for Broccoli with Lemon. Not only is it tasty, it's good for you and a lot healthier than broccoli with cheese sauce.
The recipe uses fresh broccoli which is loaded with nutrients. Fresh broccoli is available year round, but the peak season is April through October. When buying fresh broccoli, look for a deep green color, tightly closed buds and firm stalks. I use a 16 ounce package of broccoli florets, but you could cut a head of broccoli into florets. You'll need approximately 8 cups of florets for the recipe.
The broccoli is prepared by steaming rather than cooking it in boiling water. To steam food means to cook it on a rack over boiling liquid in a tightly covered container. Steaming food is a healthy way to cook because the food retains the nutrients. Not only that, the flavor, shape and texture remains intact too.
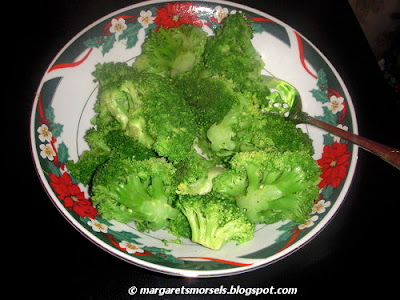
The broccoli is still bright green after it's been steamed.
The easiest way to steam broccoli is to use a collapsible metal steamer basket. The basket is inexpensive, easy to use and opens to fit almost any size pan.
There are four crucial points to remember when steaming food:
- The pan must be large enough to allow the steam to circulate. If it's too small, the food won't cook properly.
- The basket should never come in contact with the boiling liquid. Before I steam food, I put water in the pan and add the empty steamer basket to make sure the water is at the right level.
- You must use a tight fitting lid or the steam will escape. If your lid doesn't fit tightly, cover the top of the pan with foil and then add the lid.
- If you're steaming a large quantity of food, you'll need to stir the contents once or twice to ensure even cooking.
I prepare the lemon mixture right before I steam the broccoli. However, it is so quick and easy to prepare, you can assemble it while the broccoli is steaming. The recipe calls for butter or margarine; I use margarine. The only other ingredients are lemon juice, salt and pepper. The acid in the lemon juice can affect the color of the broccoli, so don't add the mixture until you're ready to eat.
If eating healthier was your resolution for 2011, Broccoli with Lemon and Baked Salmon Patties make a healthy meal. The broccoli is also delicious with Microwave Tuna and Noodle Parmesan. If you're looking for a new way to prepare broccoli, hold the cheese and add lemon instead.
Broccoli with Lemon
4 to 6 Servings
1 (16 oz.) pkg. fresh broccoli florets
3 Tbsp. butter, melted
1 Tbsp. lemon juice
1/4 tsp. salt
1/4 tsp. pepper
Place approximately 1-inch water in a large saucepan. Bring water to a boil. Put broccoli florets in a steamer basket. Put the basket over the boiling water. Cover and steam 4 to 5 minutes or until crisp-tender. In a small bowl, combine the remaining ingredients. Drizzle mixture over broccoli; toss to coat.
© Margaret's Morsels
Labels:
broccoli,
broccoli with lemon,
side dish,
vegetables
January 4, 2011
Baked not Fried
It's the beginning of a new year which means a fresh start; a clean slate; a "do over" so to speak. It's also a time to reflect and make resolutions. For many people, the resolution is to eat healthier. If that's your resolution, or you're just looking for a new recipe to try, I've got a great recipe to share.
My mother fixed fried salmon patties, also known as salmon croquettes, at least once a month. They were good, but not something I was interested in cooking when I moved away from home. I liked the salmon patties, but I didn't like to fry food then and I don't like to fry food now either. As far as I was concerned, salmon patties were a thing of the past, something to be enjoyed only when visiting my mother.
About 15 years ago, I found a recipe for Baked Salmon Patties. The recipe doesn't use the same ingredients that my mother did, but they taste just as good and are healthier since they are baked not fried. My husband loves them so I always double the recipe. If I don't, there's not enough left over for another night!
The recipe calls for one 14 3/4 ounce can of salmon, but I substitute two 5 ounce cans of skinless, boneless salmon. If you use the larger can, you'll need to remove the skin and bones. That's not something I enjoy doing so I'm willing to pay extra for the task to be done for me.
In addition to salmon, the recipe uses an egg, milk, seasonings and, to bind everything together, fresh bread crumbs. Fresh bread crumbs and dried bread crumbs are two different things and cannot be used interchangeably. Fresh bread crumbs are made with slices of bread straight from the package. Dried bread crumbs, on the other hand, are made from slices of bread that have been baked in the oven until dried and lightly browned.
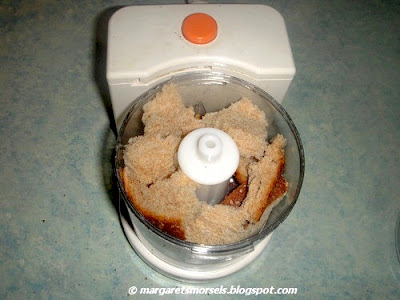
You can make fresh bread crumbs with a blender or food processor, but I like to make them in a mini food chopper. Since the mini food chopper is smaller, I can only process one piece of bread at a time. I tear up the piece of bread, place it in the bowl of the food chopper and process it until it's fine crumbs. Two slices of bread make approximately one cup of bread crumbs. If I'm doubling the recipe, I use four slices of bread.
One slice of bread before being processed.
To save time, I mix up the ingredients early in the day and store the covered container in the refrigerator until I'm ready to cook supper.
Unlike my mother's salmon patties that had to be shaped by hand, these salmon patties are baked in a muffin pan. To ensure that each patty is the same size, I use a cookie scoop to measure the mixture, but you can use a 1/4 cup measuring cup instead. This recipe makes eight salmon patties which means a 12-cup pan has four empty cups. To prevent the pan from warping, put an ice cube in each empty cup before putting the pan in the oven.
A double batch of salmon patties. Notice the ice
cubes in the empty cups.
The pan didn't warp.
I always serve the salmon patties with a package of long grain and wild rice and a vegetable. Check my blog Friday to find a vegetable recipe that goes great with the salmon patties and is good for you too!
Baked Salmon Patties
4 Servings
1 (14 3/4 oz.) can pink salmon, drained, skin and bones removed or 2 (5 oz.) cans skinless, boneless salmon, drained
3/4 cup milk
1 cup fresh bread crumbs
1 egg, beaten
1 tsp. dried minced onion
1/4 tsp. salt
1/8 tsp. pepper
Combine all ingredients; mix well. Spoon into 8 greased muffin cups, using 1/4 cup in each. Bake at 350° for 45 minutes or until browned.
© Margaret's Morsels
Labels:
baked salmon patties,
fish,
meat,
salmon,
salmon croquettes,
salmon patties
Subscribe to:
Comments (Atom)


