March 31, 2011

Good Gravy!

Pin It
Margaret's Morsels | Dried Beef Gravy

Unless something happens and I jump on the gravy bandwagon, this will be the only blog I ever post about gravy.  The only gravy I serve comes from a jar at Thanksgiving, a packaged mix when I fix chicken fried steak or is created by an entree as it cooks.


My mom was a typical Southern cook and made gravy every available opportunity.  There was turkey gravy at Thanksgiving, giblet gravy with boiled eggs at Easter, redeye gravy, sausage gravy and brown gravy, to name a few.  She also made dried beef gravy which has the distinction of being the only gravy I would eat as a child and the only gravy I actually cook as an adult.


If you've never had dried beef, you've probably seen it at the grocery store. It's usually sold in glass jars and is typically found in the canned meat aisle.

Margaret's Morsels | Dried Beef Gravy

Dried beef, also known as chipped beef, is very thin slices of smoked, salted and dried beef.  I don't care for dried beef in other dishes, but I absolutely love it in gravy.  Technically, though, dried beef gravy isn't a gravy, but a sauce.


Gravy is made from the fat and juices -- drippings -- that remain after cooking meat and is always served hot.  The sauce for dried beef gravy starts with a roux.  Roux is the French term for cooking a mixture of fat and flour over low heat.  A liquid is added and the mixture is cooked until it reaches the desired thickness.  Unlike gravy, sauces can be served hot or cold.  There are many different kinds of sauces, but dried beef gravy is actually a white sauce which is known as Bechamel.


There are two things to remember when you make gravy.  One, make sure you have all the ingredients ready to use.  Gravy has to be stirred constantly so you won't have time to measure things after you start cooking.  Two, cook gravy over medium-low to low heat to keep the mixture from scorching.


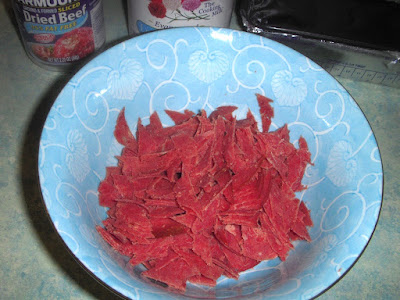
Dried beef gravy only uses five ingredients so there's very little prep work required.  The pieces of dried beef are rolled together and need to be cut into small pieces.  The easiest -- and quickest -- way to do this is unroll the beef and cut them all at once with a pair of kitchen shears.

Margaret's Morsels | Dried Beef Gravy
Unrolled and uncut.

Margaret's Morsels | Dried Beef Gravy
Cut into pieces.

Put the shortening in a large skillet and heat it over medium-low heat. Once it's melted, add the dried beef and cook it a minute or two, just long enough for it to get a little brown.  Add the flour and cook it five minutes to remove the starchy taste.

Margaret's Morsels | Dried Beef Gravy
The flour after it's been cooked five minutes.

You can use all-purpose or gravy flour, but not self-rising flour.  Gravy flour, better known as Wondra, is a finely ground all-purpose flour that dissolves instantly and is unlikely to form lumps.  Wondra makes a smooth gravy, but I stick with all-purpose flour which is what my mother always used.

Margaret's Morsels | Dried Beef Gravy

Once the flour has cooked, add the liquid in this case evaporated milk and water.  Evaporated milk is a canned milk that has 60% of the water removed.  It's wonderful for gravy because it adds a creamy texture.  It's available in regular, low-fat and nonfat varieties.  I use nonfat which is akin to skim milk.  Skim milk is an acquired taste so use regular or low-fat evaporated milk if you want a richer flavor.

Once the ingredients are combined, let them come to a boil, stirring the whole time.  Continue to cook and stir the gravy until it's the right consistency.  Most gravy recipes tell you to bring the gravy to a boil and stir it one or two minutes.  My experience with dried beef gravy is it takes longer -- about five minutes -- to thicken.  If the gravy isn't thickening enough, you can increase the heat to medium, but make sure to stir the gravy constantly.

The gravy can be served over toast, but I prefer biscuits.  My mother always made homemade biscuits, but I purchase frozen biscuits and cook however many I need.  I'm not a fan of canned biscuits, but if that's what you like or have on hand, you could substitute them instead.  Or, you could make a batch of homemade biscuits.

Margaret's Morsels | Dried Beef Gravy

Whether you call it gravy or sauce, serve it with toast or biscuits, dried beef gravy is a great addition to your recipe box.  It's a different gravy than most people are used to eating, but it's good gravy!


Dried Beef Gravy
4 Servings

3 Tbsp. shortening
1 (2.25 oz.) jar dried beef, cut into pieces
2 Tbsp. all-purpose flour
1 (12 oz.) can evaporated milk
1/2 cup water

Melt shortening in skillet over medium-low heat.  Add dried beef; brown just a minute or two.  Add flour and cook for 5 minutes.  Combine milk and water.  Add to flour mixture and cook until it reaches the desired thickness.

© Margaret's Morsels


March 28, 2011

Easter Menu Morselette

Pin It


Whether you're serving ham, lamb, turkey, chicken or something else, it's not too early to start planning your Easter menu; Easter is only 28 days away.  I'm cooking a ham, but am still thinking about the side dishes.  I've already posted some of the side dishes, but the rest I'll post in April.  What do you serve for Easter?  


© Margaret's Morsels

March 25, 2011

Let Them Eat (Cheese) Cake

Pin It
Margaret's Morsels | Sour Cream Cherry Cheesecake

My husband isn't a fan of birthday cake.  In all the years we've been together, I only remember him asking for cake once.  He requested an ice cream cake made with white cake, vanilla ice cream and vanilla frosting.


When his birthday comes around -- like it did a few days ago -- he usually asks for cherry pie.  This year he requested a cherry dessert, but not cherry pie.  He asked for cherry cheesecake instead.


I have several cheesecake recipes, but my husband's favorite is Sour Cream Cherry Cheesecake.  Not only is it delicious, it starts with a mix so it's much faster -- and more economical -- to prepare than cheesecake made from scratch.


I'm bad about not writing down where I find a recipe.  I always think I'll remember, but my memory isn't what it used to be, especially with four boxes of untried recipes.  I'm trying to break this bad habit and indicated on the recipe it came from Sandra Lee.  Unfortunately, I don't remember if it came from her magazine, website, TV show or one of her books.  I made some changes to the method so the recipe reflects those changes.


If you've never heard of Sandra Lee, she's the author of a series of cookbooks called Semi-Homemade and hosts "Semi-Homemade Cooking" on the Food Network.  The semi-homemade philosophy is to use 70% ready made ingredients and 30% fresh ingredients to create a dish that tastes homemade.  This cheesecake recipe is a great example of semi-homemade cooking.


The recipe starts with a box of homestyle no bake cheesecake mix.  The mix includes graham cracker crumbs and a powdered cheesecake filling. Start by combining the graham cracker crumbs with melted butter -- I use margarine -- and sugar.  To keep from dirtying another bowl, I combine the ingredients in the spring-form pan and then press the mixture on the bottom of the pan.


Margaret's Morsels | Sour Cream Cherry Cheesecake

If you don't have a spring-form pan, you can use a pie plate or casserole dish, but make sure it's deep enough to hold the mixture.  I don't grease the pan because the melted butter is enough to keep the crust from sticking.


If you were following the directions on the box, the crust would be finished at this stage.  However, the recipe says to bake the crust for about 10 minutes.  Baking the crust makes the cheesecake taste homemade.

Margaret's Morsels | Sour Cream Cherry Cheesecake
The baked crust.

After the crust cools in the refrigerator for 15 minutes, it's time to mix up the filling.  The directions on the box only call for milk.  The semi-homemade recipe reduces the amount of milk and adds sour cream.  Most cheesecake recipes have sour cream either in the filling or on top so the addition gives the finished cheesecake a taste of authenticity.  I use low-fat sour cream, but you can use regular.  Don't use fat-free, though, because the cheesecake won't get firm enough to cut.

Put the filling on top of the crust.  Even though pie filling will go on top, the cheesecake is prettier if the filling is smooth.  The easiest way to do this is with an offset spatula.  An offset spatula has a bend in the blade which makes it ideal for smoothing cake batter or icing.


Margaret's Morsels | Sour Cream Cherry Cheesecake
The offset spatula is the one on the bottom.

Take the spatula and spread the filling around the cheesecake, turning the pan in a circle as you work.  The filling will end up looking something like this:

Margaret's Morsels | Sour Cream Cherry Cheesecake

The cheesecake goes in the refrigerator for several hours -- I leave it in there overnight -- to get firm.  I put the can of pie filling in the refrigerator at the same time.  That way the pie filling is cold when it's put on the cheesecake.


I use lite pie filling which isn't as flavorful as regular pie filling.  If you want to doctor up lite cherry pie filling, put it in a bowl and stir in 1/4 teaspoon almond extract and 1 tablespoon sugar.  This adds an extra burst of flavor.


Sandra Lee suggests slicing the cheesecake and spooning the pie filling over each slice.  I like to put the pie filling on top of the cheesecake a couple of hours before it's served.  If you use a spring-form pan, don't put the pie filling all the way to the edge of the pan.  If you do, the pie filling will slide off when you remove the collar.  It's best to put the filling to within 1/2-inch of the edge.


If you don't like cherries, you can substitute other flavors of pie filling or leave the cheesecake plain.  It's delicious either way.  It's good year round and is especially refreshing in the hot summer months.  It also makes a good substitute for birthday cake, but make sure you don't put candles on the top!

Margaret's Morsels | Sour Cream Cherry Cheesecake


Sour Cream Cherry Cheesecake
8 Servings

1 (11.2 oz.) pkg. homestyle no bake cheesecake mix
3/4 stick butter, melted
2 Tbsp. sugar
1 1/3 cups cold milk
1/3 cup sour cream
1 (20 oz.) can cherry pie filling

Stir the crust mix with melted butter and sugar in a 9-inch spring-form pan until crumbs are moistened.  Press crumb mixture onto bottom of the pan. Bake at 350° until crust is set and golden brown around edges, about 10 minutes.  Pat down crust.  Refrigerate crust for 15 minutes or until cooled completely.

Combine cheesecake filling mix, milk and sour cream in a large bowl.  Beat for 2 minutes or until smooth.  Pour cheesecake filling mixture over crust. Cover and refrigerate several hours or overnight to get firm.  A couple of hours before serving, spread the pie filling over the cheesecake.  Cover and refrigerate until ready to serve.  Store leftovers in the refrigerator.   

© Margaret's Morsels

March 22, 2011

Comfort Food

Pin It
Margaret's Morsels | Chicken Pot Pie

Almost everyone has a favorite comfort food; a food that provides a feeling of well being usually associated with childhood or home cooking.  Comfort food runs the gamut and can be anything from soup to nuts.  To me, the ultimate comfort food is chicken pot pie.  This is surprising because my mother never made chicken pot pie!


The recipe starts with a package of refrigerated pie crusts.  I've used name brand and generic pie crusts and this is one time I stick with the name brand.  I think it tastes better than generic.  The dough is easier to handle and less likely to tear if you take it out of the refrigerator 15 minutes before you're ready to use it.  You can prep the remaining ingredients while the dough comes to room temperature.


The recipe uses canned chicken.  I use a can of all white meat, but it's more economical -- and some would say more flavorful -- to use a can of white and dark meat.  Regardless of which one you use, make sure to drain the chicken well and separate it into pieces.  The chicken is combined with potato soup, mixed vegetables, salt, pepper and milk.


Margaret's Morsels | Chicken Pot Pie

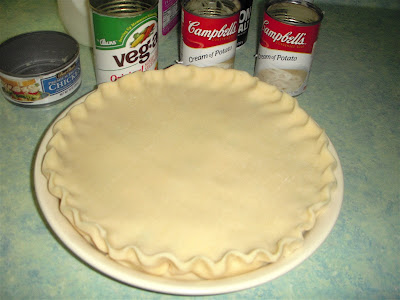
Once the ingredients are mixed together, unroll the first pie crust into a deep-dish pie plate.  Press the crust firmly onto the bottom and sides of the pie plate.  If the dough tears, use your fingers to press it back together. Pour in the filling and cover with the second crust.  Fold the excess dough under the bottom pie crust and flute the edges.


Fluting makes the pie look prettier, but it also serves a purpose.  It seals the two pie crusts together.  You can flute the edges with your fingers or the tines of a fork.  I use my fingers to make a simple design.  If you want to replicate this look, put the index finger of your right hand on the inside of the pie crust.  Put your thumb and index finger of the left hand on the outside of the pie crust.  Press your fingers towards each other to make a zig zag design.

Margaret's Morsels | Chicken Pot Pie

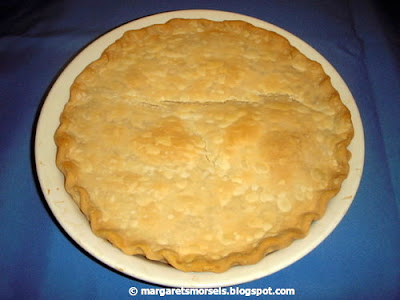
Normally you cut slits in the top of a pie crust before it's baked so steam can escape. This recipe was adamant that slits should not be cut into the dough.  I've made the pie with and without the slits and, for some reason, the pie does better without the slits.


The pie goes into a 350° oven for 1 hour.  You need to keep an eye on it while it bakes to make sure the edges aren't getting too brown.  If they do, you can cover them with foil or use a pie crust shield which is available for regular and deep-dish pie plates.  I prefer the pie crust shield because it's quick and easy to put over the pie crust plus it's reusable.


Margaret's Morsels | Chicken Pot Pie

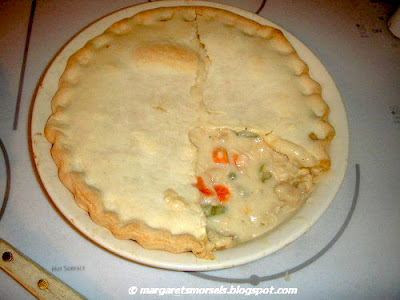
When the pie is done, remove it from the oven and let it cool for 10 minutes before cutting.  The filling won't be firm, but you can change the consistency by adjusting the amount of milk used in the recipe.  You can add between 1/2 to 1 1/4 cups of milk to get the consistency you like.   The pie on the top was made with 1 1/4 cups milk; the one on the bottom with 1/2 cup.   


Margaret's Morsels | Chicken Pot Pie


Margaret's Morsels | Chicken Pot Pie

The recipe is flexible so you can substitute fresh ingredients for the packaged ones.  If you have a good pie crust recipe, you can use that instead of the refrigerated crusts.  If you don't want to use canned chicken, substitute cooked, grilled or even rotisserie chicken cut into bite size pieces.  You can add a mixture of fresh vegetables cut into small pieces.  If you use fresh vegetables, you may need to adjust the cooking time to make sure they are fully cooked and tender.  You can also add additional spices to suit your taste.

Whether you use packaged ingredients or a combination of fresh and packaged ingredients, chicken pot pie is sure to please.  Add a green or congealed salad and you've got a well rounded meal that's nourishing to both body and soul.

Chicken Pot Pie
8 Servings

1 (14.1 oz.) pkg. refrigerated pie crusts
1 (10 oz.) can chicken in water, drained and separated into pieces
2 (10 3/4 oz.) cans cream of potato soup (undiluted)
1 (15 oz.) can mixed vegetables, drained
salt and pepper to taste
1/2 cup milk

Press one pie crust firmly onto the bottom and sides of a deep-dish pie plate.  Combine the remaining ingredients; pour the mixture into the pie plate.  Top with the remaining pie crust, fluting to seal both crusts.  Do not cut slits into the top of the crust.  Bake at 350° for 1 hour until lightly browned. Remove from oven; let cool 10 minutes before cutting. Refrigerate leftovers.


© Margaret's Morsels

March 16, 2011

Emerald Isle Fare

Pin It
Margaret's Morsels | Irish Soda Bread

Several years ago, I decided to honor my Irish heritage by cooking corned beef and cabbage on St. Patrick's Day.  My family still talks about this meal.  Unfortunately, their comments aren't positive.  My husband didn't like the cooked cabbage or carrots.  My son thought the cabbage made the house smell bad and, like his father, didn't like the cooked cabbage or carrots.  This year, I decided to make something a little sweeter for St. Patrick's Day:  a loaf of Irish Soda Bread.


Traditional Irish Soda Bread consists of four ingredients:  flour, soda, buttermilk and salt.  American versions of the recipe usually contain additional ingredients such as butter, eggs, sugar and sometimes currants, raisins or caraway seeds.  These additions make a more cake-like bread.


Irish Soda Bread is a quick bread which isn't the same thing as batter bread.  Quick breads don't require kneading or rising because they're leavened with something other than yeast.  Batter breads don't require kneading either, but they use yeast as the leavening agent.


There are two important rules to remember when you make quick bread. One, have all the ingredients at room temperature.  This makes it easier to combine the ingredients which is important for the second rule.  Two, don't overmix the dough.  Overmixing produces a tough loaf of bread.


The bread starts by mixing the dry ingredients together.  This recipe uses baking powder and baking soda as the leavening agents.  Most baking powder is double acting which means it releases gas when it's mixed with a liquid and again when exposed to heat.  On the other hand, baking soda must be mixed with an acid in order to work as a leavener.


Once the dry ingredients are mixed together, the margarine is cut into the mixture with a pastry blender.  Normally, when you cut butter or margarine into dry ingredients, the mixture turns into coarse crumbs.  Not so with this recipe because you're only adding 1/2 cup margarine to 4 cups of flour. Blend the margarine into the dry ingredients until there aren't any clumps of margarine remaining.


Margaret's Morsels | Irish Soda Bread
The dry ingredients after the margarine has been cut in.

The liquid ingredients are added next.  Remember how I said baking soda needs an acid to make it work?  In this recipe, the acid is provided by buttermilk.  Not only does the buttermilk act as the acid, it also produces a bread that is extremely tender.  If you don't have buttermilk, you can make your own sour milk.  To make 1 cup sour milk, put 1 tablespoon of lemon juice or white vinegar in a measuring cup.  Add enough milk to make 1 cup.  Thoroughly stir the mixture and let it sit for 5 minutes; proceed as directed.

Once you add the liquids, use a wooden spoon or spatula to combine the ingredients.  Remember rule number two and don't overmix the dough.  It won't be firm enough to shape into a ball yet and will look something like this:   


Margaret's Morsels | Irish Soda Bread

Normally, you don't knead quick bread.  This recipe is an exception because you need to shape the dough into a round.  Out of all the bread doughs I've worked with, this has been the easiest to knead.  Put the dough on a lightly floured surface.  Sprinkle a little flour on top of the dough and knead it three or four times. This is all it takes for the dough to stick together.   Shape the dough into a round and transfer to a greased baking sheet.

Margaret's Morsels | Irish Soda Bread
The dough after it's been kneaded and shaped.

Traditionally, Irish Soda Bread has a cross or an "X" on top of the dough. The cross signified blessing the bread whereas an "X" allowed the devil out of the bread.  There is actually a very good reason for scoring the bread.  Cutting 1/2-inch into the bread before it's baked allows heat to penetrate into the thickest part of the bread.

Margaret's Morsels | Irish Soda Bread

You can bake the bread as is or add a glaze to the top.  A glaze gives the bread a glossy look when it's baked.  Most glazes use either egg yolks or egg whites mixed with milk or water.  This recipes uses melted margarine and buttermilk.  The easiest way to apply the glaze is to brush it on with a pastry brush.  I apply the glaze before baking the bread and at 15 minute intervals while the bread is baking.  The finished loaf is prettier when it's glazed.

When the bread is done, let it sit on the baking sheet 10 minutes and then transfer the loaf to a wire rack to cool completely.  The bread can be served warm, but don't cut it while it's still hot.  If you do, the pieces will crumble.

If you're looking for something to serve for St. Patrick's Day, give Irish Soda Bread a try.  It's quick, easy to prepare and, according to my husband and son, much better than corned beef and cabbage.

Irish Soda Bread
20 Servings

4 cups all-purpose flour
1/4 cup sugar
1 tsp. baking soda
1 Tbsp. baking powder
1/2 tsp. salt
1/2 cup margarine, softened
1 cup buttermilk
1 egg
1/4 cup margarine, melted
1/4 cup buttermilk

Preheat the oven to 375°.  Whisk the first 5 ingredients together in a large mixing bowl.  Blend in the softened margarine using a pastry cutter until no clumps of margarine are visible.  Stir in the buttermilk and egg.

Turn the dough out onto a lightly floured surface.  Sprinkle a little flour on top of the dough and knead three or four times.  Form the dough into a round and place on a lightly greased cookie sheet.   Using a sharp knife, cut an "X" 1/2-inch deep into the top of the dough.

In a small bowl, combine the melted margarine and buttermilk.  Brush the bread with the mixture.  Bake at 375° for 40 to 50 minutes, or until a toothpick inserted into the center comes out clean.  Brush the loaf with the margarine mixture at 15 minute intervals while the bread is baking, if desired.

When the bread is done, let the bread sit on the cookie sheet for 10 minutes.  Transfer the loaf to a wire rack to cool completely.

© Margaret's Morsels
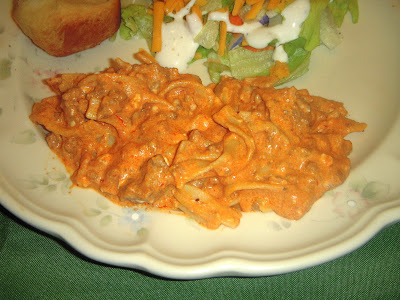
March 11, 2011

Oodles of Noodles

Pin It
Margaret's Morsels | Oodles of Noodles Lasagna

Until I started writing this blog, I had no idea there were so many designated food days.  I posted on National Grits for Breakfast Day, but missed National Peanut Butter Day.  Fortunately, I didn't miss today's designated food day, Eat Your Noodles Day, and am posting a recipe for Oodles of Noodles Lasagna in its honor.


Traditional lasagna is a layered pasta dish made with wide lasagna noodles, sauce and a blend of cottage, Ricotta, Parmesan and Mozzarella cheeses.  Other popular versions include spinach lasagna, eggplant lasagna, vegetarian lasagna and chicken lasagna which has a white sauce.


Lasagna is one of those dishes many people consider comfort food.  This is gratifying to the cook because lasagna takes a lot of time to prepare. You have to cook the noodles, make the sauce, layer the ingredients and then wait for the dish to bake.  Even if you use no cook lasagna noodles, there's still a lot of work involved.


Oodles of Noodles Lasagna is different from regular lasagna in several ways.  One, the recipe uses egg noodles instead of lasagna noodles.  Two, you don't have to make the sauce.  Three, it uses different kinds of cheese. Four, the dish can be prepared and cooked in less than 30 minutes.  Five, it's cooked in the microwave.

If you have a microwave pasta pot, you can cook the entire dish -- start to finish -- in the microwave.  I don't have one so I use a pot of boiling saltwater.  As soon as I put the pot of water on the stove, I start preparing the rest of the ingredients.

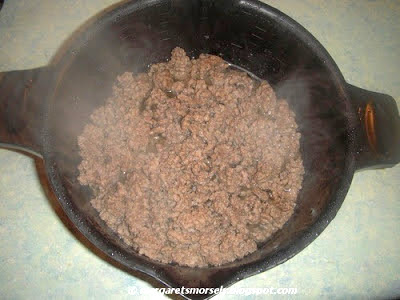
I brown ground meat in the microwave when I'm not cooking it with anything else, such as onions or peppers.  You can use any microwave-safe dish.  If you have a microwave-safe colander, you can put the meat in there and set the colander in a large microwave-safe bowl to catch the grease.  I like to use this pan from Pampered Chef.

Margaret's Morsels | Oodles of Noodles Lasagna


It's microwave-safe plus it has drain spouts -- large on one side, small on the other -- which makes draining the grease easy.  If you've never used the microwave to brown meat, you might want to give it a try.  Since you don't have to constantly stir the meat, you can do other things and let the microwave do the work.


A lot of newer microwaves have a cook option for certain foods such as ground beef.  You press the button for the food you want to cook and continue pressing to enter the quantity you want to cook.  The times that are programmed in the microwave are only an estimate so you may need to increase or reduce the cooking time.  Make sure the meat is completely browned and no pink remains.  If your microwave doesn't have this feature, you can still use your microwave to brown the ground beef.

Margaret's Morsels | Oodles of Noodles Lasagna


Crumble the meat in a microwave-safe dish and cook the meat on High, stopping to stir the meat every two minutes.  It takes about six minutes to cook one pound of ground beef in my 1100 watt microwave.  Once the meat is completely cooked, drain the grease.

Margaret's Morsels | Oodles of Noodles Lasagna

After you drain the meat, combine it with a jar of spaghetti sauce.  You can doctor the spaghetti sauce to make it taste homemade by adding garlic salt, garlic powder, oregano leaves, basil or any other seasoning your family likes.  Make sure whatever seasonings you add complement the sauce you're using.


Oodles of Noodles Lasagna uses cottage and Parmesan cheese just like regular lasagna, but it uses cream cheese and sour cream instead of Ricotta and Mozzarella.  The cheeses and sour cream melt and give the dish a wonderful creamy texture.  The cream cheese also gives the finished dish a slightly tangy flavor.  I use Neufchatel cream cheese which has 1/3 less fat and low-fat sour cream, but you can use regular instead.


Once the noodles are cooked, the meat is browned and the cheeses combined, it's time to put the lasagna together.  Like regular lasagna, the ingredients are layered, but a little differently.  The noodles go in the bottom of a greased 2-quart microwave-safe casserole dish.  The cream cheese mixture is spread over the noodles and then the meat sauce is added.  The Parmesan cheese is sprinkled on top and the dish goes in the microwave.  In 8 to 10 minutes, you have lasagna.

Margaret's Morsels | Oodles of Noodles Lasagna
Assembled and ready to go in the microwave.

I like to think of Oodles of Noodles Lasagna as lasagna with a twist.  It's not the same as regular lasagna, but it's a lot easier and just as tasty.  It's certainly a good way to get your noodles on Eat Your Noodles Day!

Margaret's Morsels | Oodles of Noodles Lasagna

Oodles of Noodles Lasagna
6 Servings

4 oz. medium egg noodles
1 (8 oz.) pkg. cream cheese
1 cup small curd cottage cheese
1/2 cup sour cream
1 lb. ground beef
1 (14 oz.) jar spaghetti sauce
1/2 cup grated Parmesan cheese

Cook noodles according to package directions; drain.  Place cream cheese in a 1-quart microwave-safe bowl; microwave on High for 30 to 50 seconds.  Add cottage cheese and sour cream; stir well.  Brown ground beef; drain grease.  Combine beef and spaghetti sauce.

Put noodles in a greased 2-quart microwave-safe casserole dish.  Spread cream cheese mixture over noodles.  Put beef mixture over the cream cheese mixture.  Sprinkle the top with Parmesan cheese.  Microwave on High 8 to 10 minutes.

© Margaret's Morsels

March 8, 2011

Potluck Pleaser

Pin It
Margaret's Morsels | Potato Salad

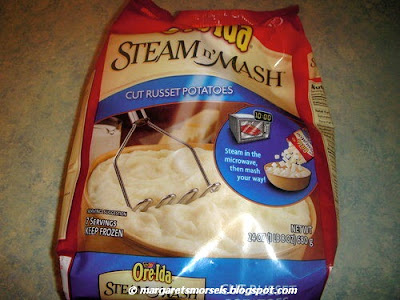
Last week, I posted a morselette about a shortcut I took the last time I made potato salad.  If you missed it, instead of cooking potatoes, I substituted a 24 ounce package of Ore-Ida Steam 'n Mash cut Russet potatoes.  Since the potatoes are already diced, all I had to do was add the rest of the ingredients after the potatoes were cooked.  Today, I thought I'd talk about potato salad and share my mother's recipe for this dish.

Margaret's Morsels | Potato Salad


There's two widely known versions of potato salad.  There's the one I consider traditional which uses mayonnaise or sour cream as a dressing and is served cold.  The other version, German Potato Salad, is served hot.  It's made with potatoes, bacon, onion, celery and green pepper. Instead of mayonnaise or sour cream, it has a dressing made from bacon drippings, vinegar and sugar.  Italian Potato Salad isn't as well known, but it includes a variety of vegetables and seasonings not usually found in the other versions.

The first thing to remember when you make potato salad is to use the right type of potato.  Potatoes that are low starch/high moisture, such as boiling, blue, purple and new, are ideal for potato salad because they retain their shape.  It's also important to make sure you add enough salt to the water when boiling the potatoes.  To me, adding salt after the potato salad is assembled is not as effective as adding enough salt at the beginning of the cooking process.

Once the potatoes are cooked and drained comes the fun part:  putting it all together.  The additions to potato salad are limitless.  It all comes down to what you like and what your family will eat.  If you use an ingredient that's in a liquid, make sure you drain it well; you don't want soupy potato salad.

My mother's recipe is plain compared to a lot of recipes, but we love it.  It only uses boiled eggs, dill relish, mayonnaise and pimentos.  The recipe can easily be doubled which is what I do when I serve it at holiday family dinners.

Margaret's Morsels | Potato Salad

Although I try to substitute healthier alternatives whenever possible, this is one time I stick with the original.  I don't like the taste of fat-free or light mayonnaise so I always use real mayonnaise.  If you like fat-free or light mayonnaise or sour cream, you can use it instead of regular.  Keep in mind that potatoes absorb more dressing when they're hot so you need to be ready to combine the ingredients as soon as the potatoes are cooked and drained.  I make the potato salad a day ahead of time so the flavors have time to blend.

Potato Salad is always popular at potluck dinners and picnics.  If you make a batch with mayonnaise or sour cream, make sure to keep the potato salad in a cooler or refrigerator until you're ready to eat.  If you want to dress up the potato salad, garnish it with chopped parsley, scallions or paprika right before serving.

The Ore-Ida Steam n' Mash potatoes are Russet potatoes which are best for mashing, baking and frying.  However, they were a good substitute in the potato salad.  In fact, my husband didn't even notice a difference until I pointed it out to him.  Would I use the shortcut again?  Absolutely. Sometimes there's more important things to do than peel, dice and cook a pot of potatoes.

Potato Salad
4 to 6 Servings

1 1/2 lb. potatoes
3 hard-boiled eggs, peeled and chopped
1/4 cup dill relish, drained
1/2 cup mayonnaise
1/4 cup diced pimentos, drained

Peel potatoes and dice into cubes roughly the same size so they cook evenly.  Place potatoes in a large saucepan; cover with water and add salt. Bring water to a boil; reduce heat to medium-low.  Cook potatoes uncovered 10 to 20 minutes or until fork-tender.  Drain potatoes.  Combine potatoes with remaining ingredients.  Refrigerate until serving.  Store leftovers in the refrigerator.

© Margaret's Morsels