October 29, 2011

Ghoulish Goodies: The Treats

Pin It
Margaret's Morsels | Halloween

I shared Halloween tricks on Wednesday.  Today, I want to share the treats.  I gave a hint about one of the treats -- bones -- in my last blog. Bones might look like a trick, but when they're made with pretzels, marshmallows and white chocolate, they're a treat!


Margaret's Morsels | Halloween Bones


To make these edible bones, start by breaking thin pretzel sticks into various sizes, but don't make them too short.  Insert the flat side of a miniature marshmallow into each end of the pretzel.


Margaret's Morsels | Halloween

Melt one 12 ounce package of white chocolate chips in a microwave, double boiler or, my preferred method, a 1 1/2-quart crock-pot.  Using a fork, dip the bones in the chocolate -- they don't have to look perfect, but make sure to cover all the ingredients -- letting the excess chocolate drip off.  Place the bones on waxed paper to dry and then store in an airtight container.

I made a congealed salad in a large brain shape mold for one of the tricks. For the treats, I use smaller molds made specifically for candy.  Candy molds are inexpensive and come in a variety of shapes and sizes for almost any occasion.  The mold I used for a Halloween treat served two purposes.  One, it was candy that looked like a bat.  Two, the bat was on top of a party pick that could be used to garnish another dessert.


Margaret's Morsels | Halloween

Candy melts -- what you use to fill the molds -- come in a rainbow of colors so you can use more than one color in a mold.  I've used multiple colors a few times but, to be honest, I don't have the time or patience so I stick with one color.

No matter which method you choose to melt the candy melts -- microwave, double boiler or crock-pot -- do not cover the container.  If you do, condensation falls into the container which hinders the melting process. The candy coating retains its shape so you need to stir it periodically to help the melting process.

Using a spoon -- I use an iced teaspoon -- fill the cavities to the top with the melted candy melts.  Once all the cavities are filled, tap the tray on the counter a couple of times to distribute the chocolate and remove any air bubbles.  Using the dull edge of a table knife, scrape any excess chocolate off the tray.  Removing the excess chocolate gives the finished candy a nicer look.  Put the tray in the freezer for 10 minutes until the candy is firm.


Margaret's Morsels | Halloween
Ready to go in the freezer.

To remove the candy from the molds, turn the tray upside down over waxed paper.  Sometimes the candy will fall out on its own.  If not, tap the bottom of the mold to help loosen the stubborn pieces.  If some of the candy breaks, put the pieces back in the crock-pot and melt them again. Store the finished candy in a food storage bag or airtight container.

Cupcakes baked in festive paper liners are always fun to serve at a party. They aren't as messy as cake and you can bake exactly as many as you need.  If you want something similar to cupcakes, but a little fancier, make mini Mason jar cakes instead.

It's fun to decorate cupcakes or Mason jar cakes with colored frosting.  I've found that store bought cream cheese frosting is just as good and a lot easier than making frosting from scratch.  I use a gel icing color to tint the frosting.  Gel icing color is much thicker than liquid food coloring and doesn't dilute the frosting.  Gel icing color also produces a deeper, richer color than liquid food coloring.  To use the gel, insert a clean toothpick into the gel.


Margaret's Morsels | Halloween

Wipe the toothpick with the gel into the frosting, stirring with a spatula to incorporate the color.


Margaret's Morsels | Halloween

Repeat the process using a clean toothpick until the frosting reaches the desired color.


Margaret's Morsels | Halloween

The cupcakes and Mason jar cakes can be left plain or decorated with sprinkles or colored sugar.  I used the bat party picks in the cupcakes and garnished the Mason jar cakes with a variety of Halloween sprinkles.


Margaret's Morsels | Halloween

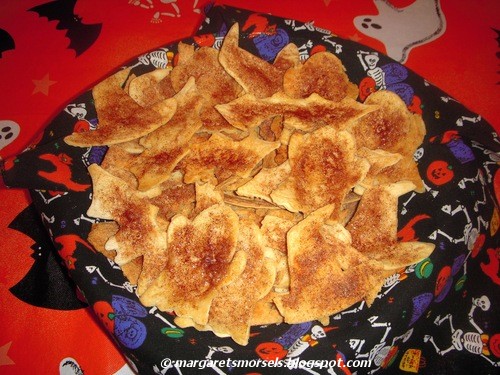
I have one more treat to share.  Instead of sprinkling Halloween shaped tortilla chips with salt, brush them with melted butter and sprinkle cinnamon sugar on top.  Bake just like you would the salted tortilla chips.


Margaret's Morsels | Halloween

May your Halloween be frightfully fun and your treats delightfully delicious!!!


© Margaret's Morsels

October 26, 2011

Ghoulish Goodies: The Tricks

Pin It
Margaret's Morsels | Halloween

Halloween was never a favorite holiday of mine until I became a mother. When our son was two, my husband came home from work to find decorations in the yard, window clings on the front door and Halloween decor inside the house.  The holiday spirit extended into the kitchen with a variety of Halloween themed foods.

Last year, I posted Halloween ideas and recipes for young kids or the young at heart.  Today, I want to share some ideas that work for the older crowd too.  This isn't a menu, but rather ideas you can mix and match for your own holiday feast.

Although I like to alter the holiday menu from year to year, I always serve Halloween shaped sandwiches as the entree.  People, young and old alike, get a kick out of them.  This year, I'm using skull, tombstone and Jack O'Lantern cookie cutters.  It's easy to add features to the skull making it go from this:


Margaret's Morsels | Halloween


to this:


Margaret's Morsels | Halloween

For best results, use bread that's a few days old; fresh bread tears too easily.  The Jack O'Lantern cookie cutter came with a small triangle that is wonderful for the nose.  If you don't have anything that small, cut a triangle shape in the bread with a knife.


Margaret's Morsels | Halloween

After you cut out the nose, make the eyes.  The easiest way to do this is to use a clean small bottle top as a cookie cutter.  If you don't have one available, cut two circles for the eyes with a knife.


Margaret's Morsels | Halloween

Finally, use a knife to draw a straight line for the mouth.  Remove some of the excess crumbs so the mouth will be visible.

Instead of regular chips and dip, serve Halloween shaped tortilla chips with Zombie Bits.  The chips are flour tortillas that have been cut with Halloween cookie cutters before being baked.  The dip may sound disgusting, but it's actually queso dip.  


Margaret's Morsels | Halloween Queso Dip


Cut the tortillas with 3-inch cookie cutters.  Place the pieces on a baking sheet and sprinkle with salt.  Bake at 400° for 6 to 10 minutes.  The time depends on the thickness of the tortillas as well as the shape of the chips. Don't underbake the chips or they'll be chewy instead of crispy.  If some chips bake faster than others, remove them to a cooling rack while the other chips finish baking.


Margaret's Morsels | Halloween

Over the last few years, Halloween molds -- especially ones that resemble body parts -- have become more commonplace.  I fill a brain mold with two packages of gelatin for a disgusting looking congealed salad.  Once the gelatin is firm and transferred to a serving platter, decorate the brain and platter with gummy words for an extra dose of disgust.


Margaret's Morsels | Halloween Gelatin Brain Mold


In addition to food, I like to include some whimsical touches.  Instead of regular ice cubes, I make ice cubes using Halloween themed silicone ice cube trays.


Margaret's Morsels | Halloween Ice Cube Tray


If I'm serving soft drinks, I make the ice cubes out of water.  If I'm serving punch, I make extra punch and freeze it as ice cubes.  This keeps the punch from getting diluted when served.

One of my favorite things to do is coat drinking glasses with fake blood. Combine corn syrup and red food coloring in a small bowl.  Dip the rims of the glasses in the mixture and stand them upright letting the "blood" ooze down the glasses.  Put the glasses on paper towels or a baking sheet to catch any drips.  This needs to be done eight hours ahead of time so the blood has time to dry.


Margaret's Morsels | Halloween

Got a bone to pick because I'm not including any dessert ideas?  Check back later this week for the treats!


© Margaret's Morsels


October 23, 2011

My 100th Blog!!!

Pin It
In elementary school, the 100th day of school is a big deal.  Students usually celebrate the day by bringing in 100 of a particular item.  Since this is my 100th blog, I thought I'd celebrate with 100 words.

Thank you so much for reading and following "Margaret's Morsels!!!!!"  I've had a lot of fun writing it and sharing my favorite recipes.  I really appreciate all the comments and emails.  I hope more people will participate for a real sense of community.

As long as people keep reading, I'll keep sharing cooking tips, techniques and recipes one dish at a time.


© Margaret's Morsels

October 21, 2011

Nuts About Coconut Variation

Pin It

Margaret's Morsels | Hoagy Cake


Last year, per a reader's request, I posted a recipe for coconut cake.  I wrote that the icing could be made as coconut or chocolate.  I recently made the cake for a church potluck dinner and wanted to show what the cake looks like with chocolate icing.  


Margaret's Morsels | Hoagy Cake
  
The chocolate icing is prepared just like the coconut icing, except the coconut is omitted.  Cocoa powder is sifted with the powdered sugar to remove any lumps.  My family loves chocolate, so I add 3 tablespoons of cocoa.  If you want an icing that's not as rich, use 2 tablespoons of cocoa instead.  If you missed the coconut cake blog, click here for the recipe.


© Margaret's Morsels

October 17, 2011

One Dish Dinner

Pin It
Margaret's Morsels | Easy Pork Chops and Apples

There's an episode of the classic TV show "The Brady Bunch," where Peter Brady does his best James Cagney imitation and announces the family is having "Pork chops and applesauce" for supper.  I couldn't tell you what the rest of the episode was about, but I remember thinking at the time, and still do, that pork chops and apples are delicious together.  When I want this wonderful combination, I rely on a recipe that blends everything in one dish.

Easy Pork Chops and Apples is quick to assemble for two reasons.  One, there's no need to peel and cut apples.  The recipe uses canned apple pie filling instead.  The apple pie filling is spread on the bottom of a greased baking dish.  Cinnamon can be sprinkled on top if you want more flavor.


Margaret's Morsels | Easy Pork Chops and Apples

Two, you don't have to precook the pork chops.  Season the boneless pork chops with salt and pepper and arrange them over the pie filling.  When I can find them, I like to use thin cut boneless pork chops.  When cooked, they're so tender you can cut them with a fork.


Margaret's Morsels | Easy Pork Chops and Apples

I changed the recipe at this point.  I can't remember the original directions, but when the stuffing was cooked it was too crumbly.  To solve the problem, I combine the stuffing mix -- cornbread or herb flavor -- with water and unmelted butter.  When combined, the stuffing holds together better and is less likely to crumble when eaten.


Margaret's Morsels | Easy Pork Chops and Apples

The recipe makes eight servings, but can easily be halved and baked in a 9-inch pan. 


Margaret's Morsels | Easy Pork Chops and Apples

Although it's a meal by itself, I always like to add a vegetable such as green beans.

If pork chops and apples aren't your thing, check back soon for a baked apple recipe that cooks in less than 30 minutes.

Easy Pork Chops and Apples
8 Servings

2 (20 oz.) cans apple pie filling
cinnamon to taste (if desired)
6 to 8 boneless pork chops (preferably thin cut )
salt and pepper to taste
6 cups stuffing mix (cornbread or herb flavor)
2 Tbsp. unmelted butter
2/3 cup hot water

Spread pie filling in the bottom of a greased 13 x 9-inch baking dish. Sprinkle with cinnamon, if desired.  Season pork chops with salt and pepper.  Arrange pork chops over the pie filling.  Combine stuffing mix, butter and water.  Spread stuffing mixture over pork chops.  Bake at 350° for 1 hour.  Recipe can be halved and baked in a 9-inch baking dish.


© Margaret's Morsels

October 12, 2011

No Bake Dessert

Pin It
Margaret's Morsels | Lemonade Pie

Earlier this year I posted a blog that included a recipe for lemon bars. This has become my most popular blog to date!  Apparently I'm not the only lemon lover so I thought I'd share another lemon recipe.  Unlike the lemon bars, this one doesn't require any cooking.

Although lemon icebox and lemon meringue pies are good, I prefer a lemon pie with a creamy consistency that doesn't skimp on flavor.  It took a few years, but I found exactly what I was looking for when I came across the recipe for Lemonade Pie.  Unlike a lot of no bake pies, this pie gets its creaminess not from Cool Whip, but from cream cheese.


Margaret's Morsels | Lemonade Pie
The mixed up pie filling.

Normally when I cook, I try to substitute healthier alternatives whenever possible.  You can do that with this recipe, but I don't recommend it.  The pie will not set up properly and the pieces won't retain their shape when you use nonfat, low-fat or a combination of these ingredients.  It's the fat in the ingredients that makes the pie firm.  If appearance doesn't bother you and you want to make a rich dessert a little healthier, substitute lighter versions of the evaporated milk, pudding and cream cheese.


Margaret's Morsels | Lemonade Pie
The pie made with low-fat ingredients.  Compare the 
texture to the pie pictured at the top of the blog.

A lot of lemon pies derive their flavor from lemon juice or lemon zest.  Not this recipe.  The lemon flavor comes from a can of frozen lemonade concentrate and a package of instant lemon pudding.  If you want a firm pie, don't use sugar-free pudding.  It doesn't have the same consistency and won't set up like regular pudding.

Once the filling is mixed up, pour it into a large graham cracker pie crust. In my opinion, there's too much filling for the crust.  I only use enough to fill the pan to the top of the crust. 


Margaret's Morsels | Lemonade Pie

You can put the leftover filling in individual graham cracker crusts or serve it as a pudding.  I put the leftover filling in dessert bowls and serve it as a prelude to the next night's dessert.


Margaret's Morsels | Lemonade Pie

It's still warm enough in my part of the country to enjoy this cool creamy pie.  If it's too cool where you live, file the recipe away for next year so you can have your lemonade and eat it too! 


Lemonade Pie
8 Servings

2 (5 oz.) cans evaporated milk
2 (3.4 oz.) pkg. lemon instant pudding mix
2 (8 oz.) pkg. cream cheese, softened
2 (3 oz.) pkg. cream cheese, softened
1 (12 oz.) can frozen lemonade concentrate, thawed
1 (9 oz.) ready made prepared graham cracker crust

Whisk together the evaporated milk and pudding mix in a bowl 2 minutes or until thickened.  Beat cream cheese at medium speed with an electric mixer until fluffy.  Add lemonade concentrate, beating until blended.  Add pudding mixture and beat until blended.  Pour into pie crust.  Freeze 4 hours or until firm; transfer to refrigerator.  Garnish, if desired.  Store leftovers covered in the refrigerator.


© Margaret's Morsels

October 4, 2011

Happy Hour at Home

Pin It
Margaret's Morsels | Frozen Lemon Lime Vodka Slush

In previous blogs, I've shared recipes for Fruit Tea and Cranberry Orange Cooler.  Today, in honor of National Vodka Day, I want to share a beverage recipe for the over 21 crowd.

Some people drink vodka straight, but I'm not one of them.  I prefer vodka mixed with other beverages.  My favorite alcoholic beverage is a Vodka Collins.  This lemon lime adult beverage is made with sweet and sour cocktail mix -- a blend of sugar, lemon and lime juices -- plus a lemon lime carbonated beverage and, of course, vodka.

A few months ago, I found a recipe for a frozen lemon lime vodka drink that is reminiscent of a Vodka Collins.  The most obvious differences are it doesn't use sweet and sour mix, contains pineapple juice and is frozen.

Margaret's Morsels | Frozen Lemon Lime Vodka Slush

The recipe uses canned frozen lemonade and limeade which takes the place of the sweet and sour mix in a Vodka Collins.  The undiluted lemonade and limeade are mixed with pineapple juice and vodka.  I use 3 cups of vodka, but you can reduce the amount if you prefer a drink that's not as strong.

Combine the ingredients in a freezer safe container and store it in the freezer.  Although vodka is a clear colorless liquid like water, it will not freeze solid.  The frozen mixture will have a slushy consistency.  I've stored the mixture in the freezer for a month without any noticeable change in taste.  If you store it longer, it might not taste as good as it did when it was first made.


The slushy frozen mixture.

When you're ready to use the mixture, scoop the desired amount into a glass.  I use a cookie scoop and put two scoops in each glass.  Finish filling the glass with the lemon lime carbonated beverage of your choice. I've tried Sprite, diet Sprite, ginger ale, 7-Up, diet 7-Up and cherry 7-Up. Out of all those beverages, I liked diet 7-Up the best.  I thought the finished product was too sweet when I used a regular soft drink.

Unless you live in a warm climate or we have an Indian summer, it might be getting too cool for this potent potable.  If you file the recipe in your recipe box, you can make it when the days start getting warmer.  It makes enough for a crowd -- the number of servings depends on how much of the mixture you put in each glass -- but it's also good one glass at a time.  Add some cheese, crackers, veggies and dip and you've got happy hour at home.

Margaret's Morsels | Frozen Lemon Lime Vodka Slush

Frozen Lemon Lime Vodka Slush

1 (12 oz.) can frozen lemonade concentrate, thawed (undiluted)
1 (12 oz.) can frozen limeade concentrate, thawed (undiluted)
1 (46 oz.) can pineapple juice
3 cups vodka
lemon lime carbonated beverage 
lime slices (for garnish; optional)

Combine the first four ingredients in a large freezer safe container.  Store in the freezer.  To serve, scoop the desired amount of mixture into a glass and finish filling with the lemon lime carbonated beverage of your choice. Garnish glasses with lime slices, if desired.


© Margaret's Morsels